Heads up! This content is relevant for Clipchamp for personal accounts. Try this link If you're looking for information about Clipchamp for work accounts.
On this page
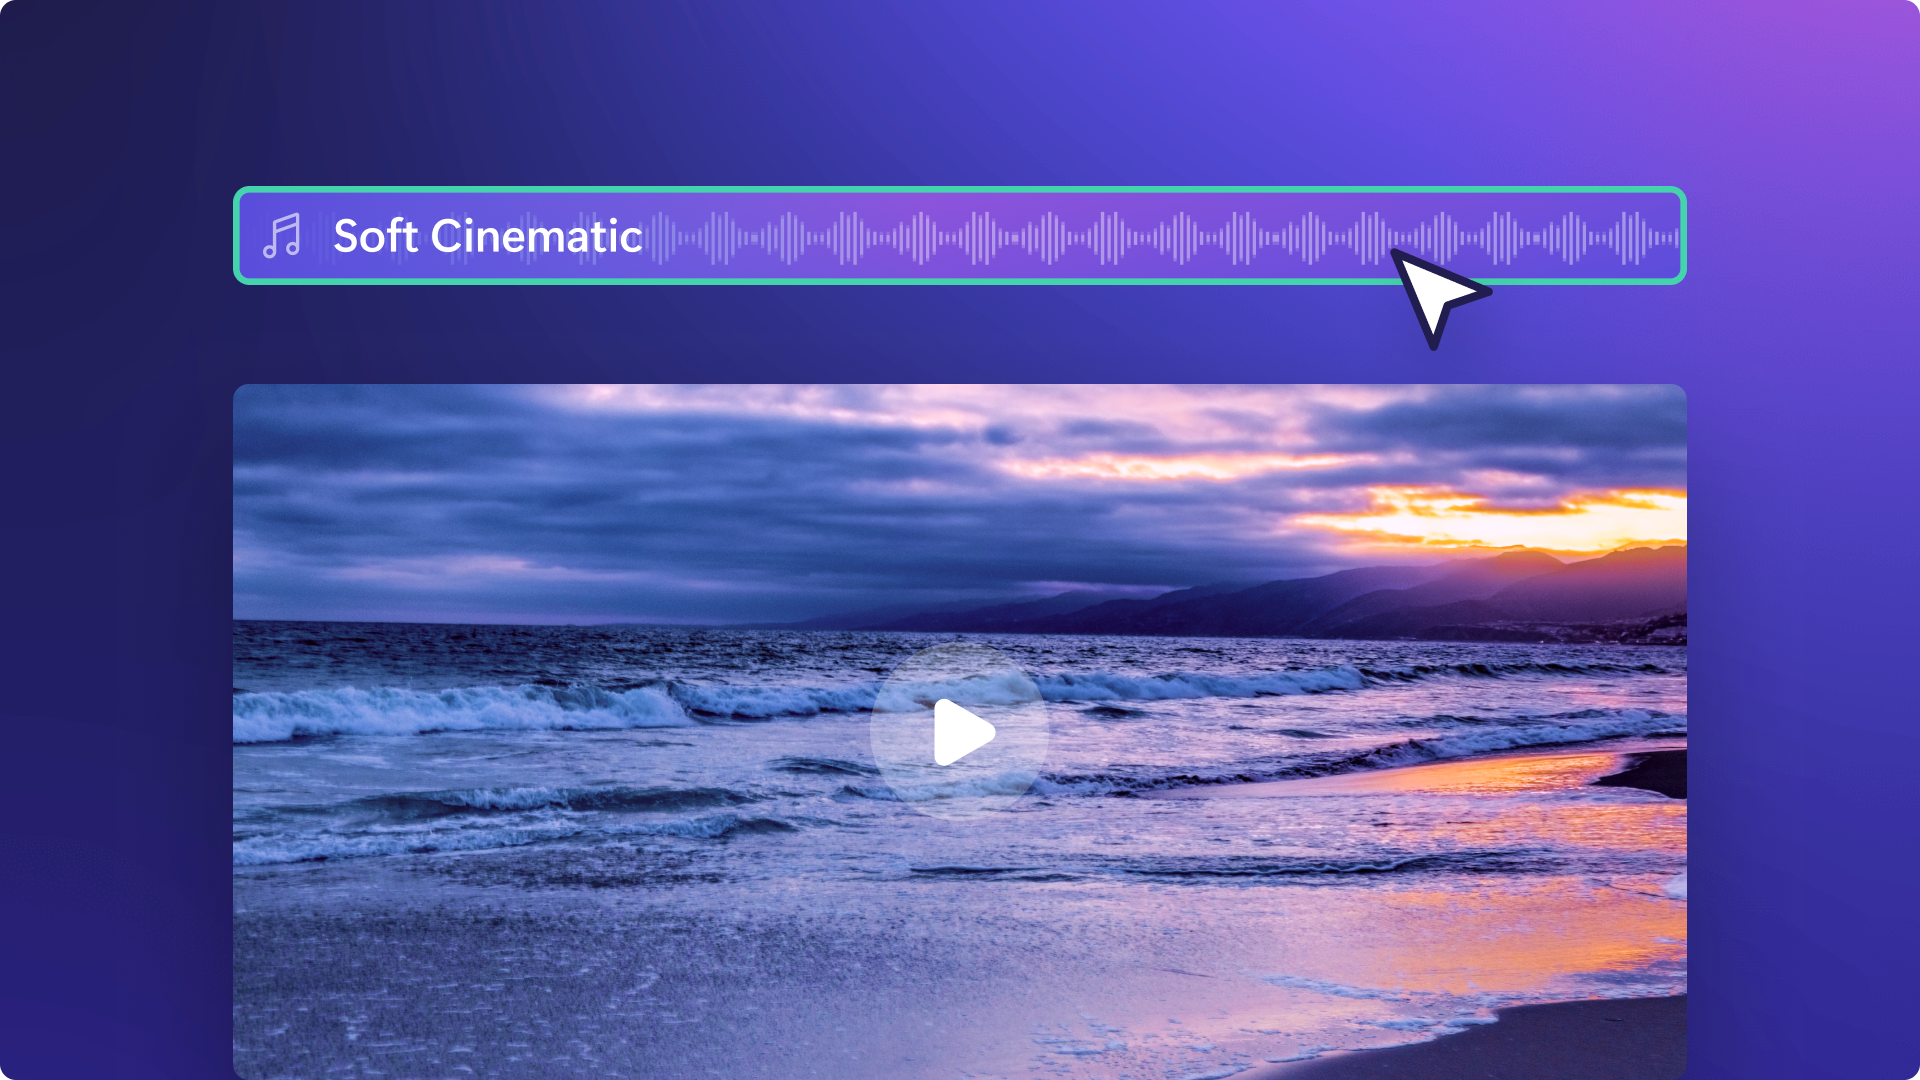
Looking to enhance your video’s impact, capture the attention of your audience and evoke emotions? From music videos on social media to training videos on YouTube, music and sound effects can create pace and rhythm for a video, change the tone and even increase engagement.
Explore how to add stock music to your video, import sound MP3 files, and add AI voiceovers with Clipchamp.
How to add stock music to your video
Step 1. Find royalty-free music and sound effects
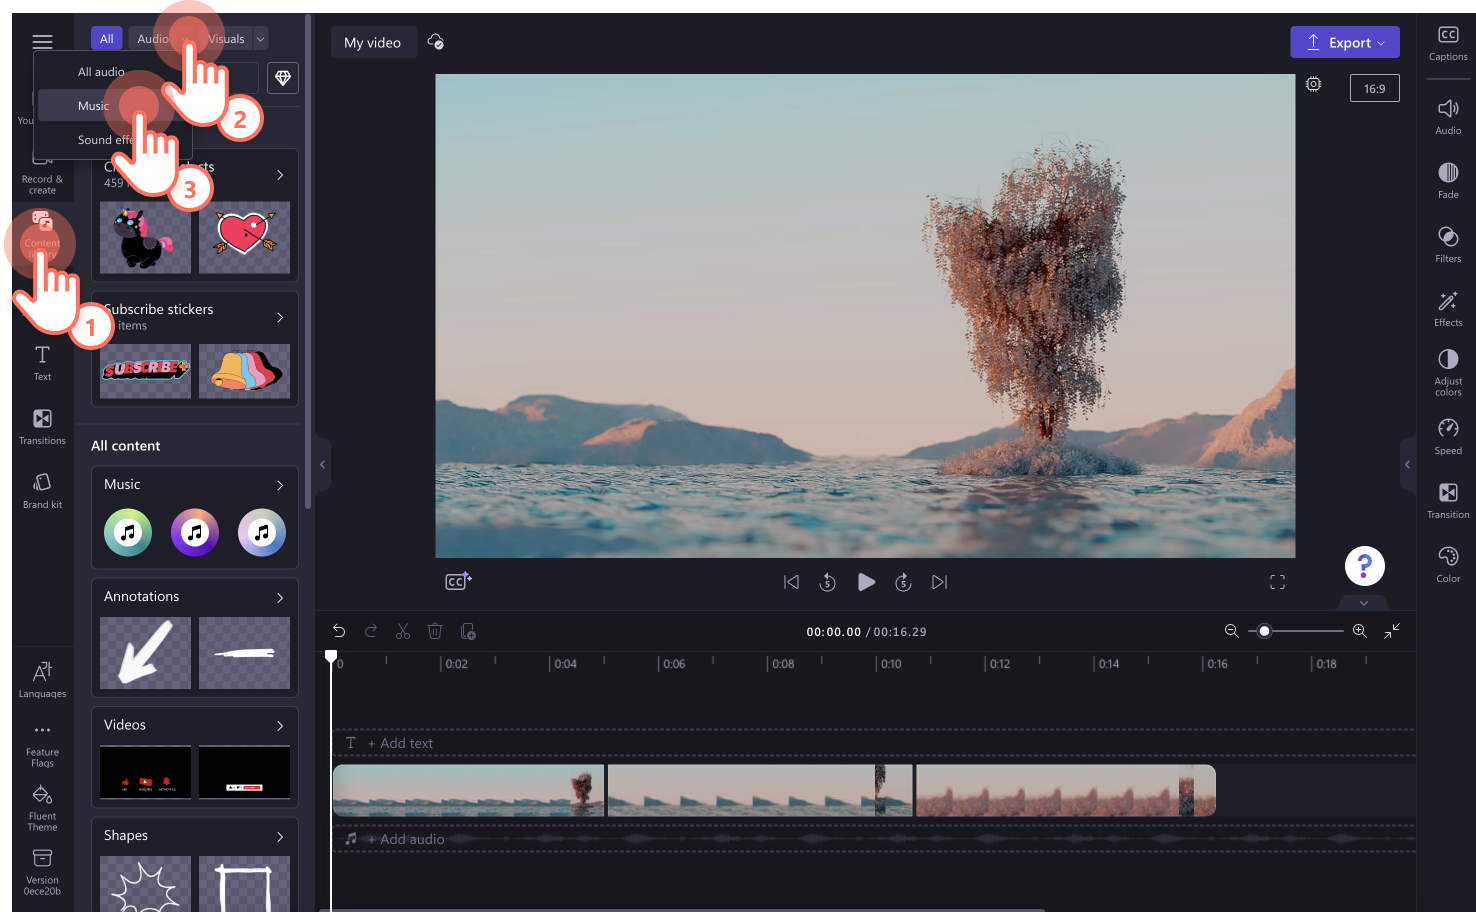
To add music to a video, click on the content library tab on the toolbar. Next, click on the audio button at the top of the tab, then click on the music option. Selecting music only will filter the content library to find only audio files.
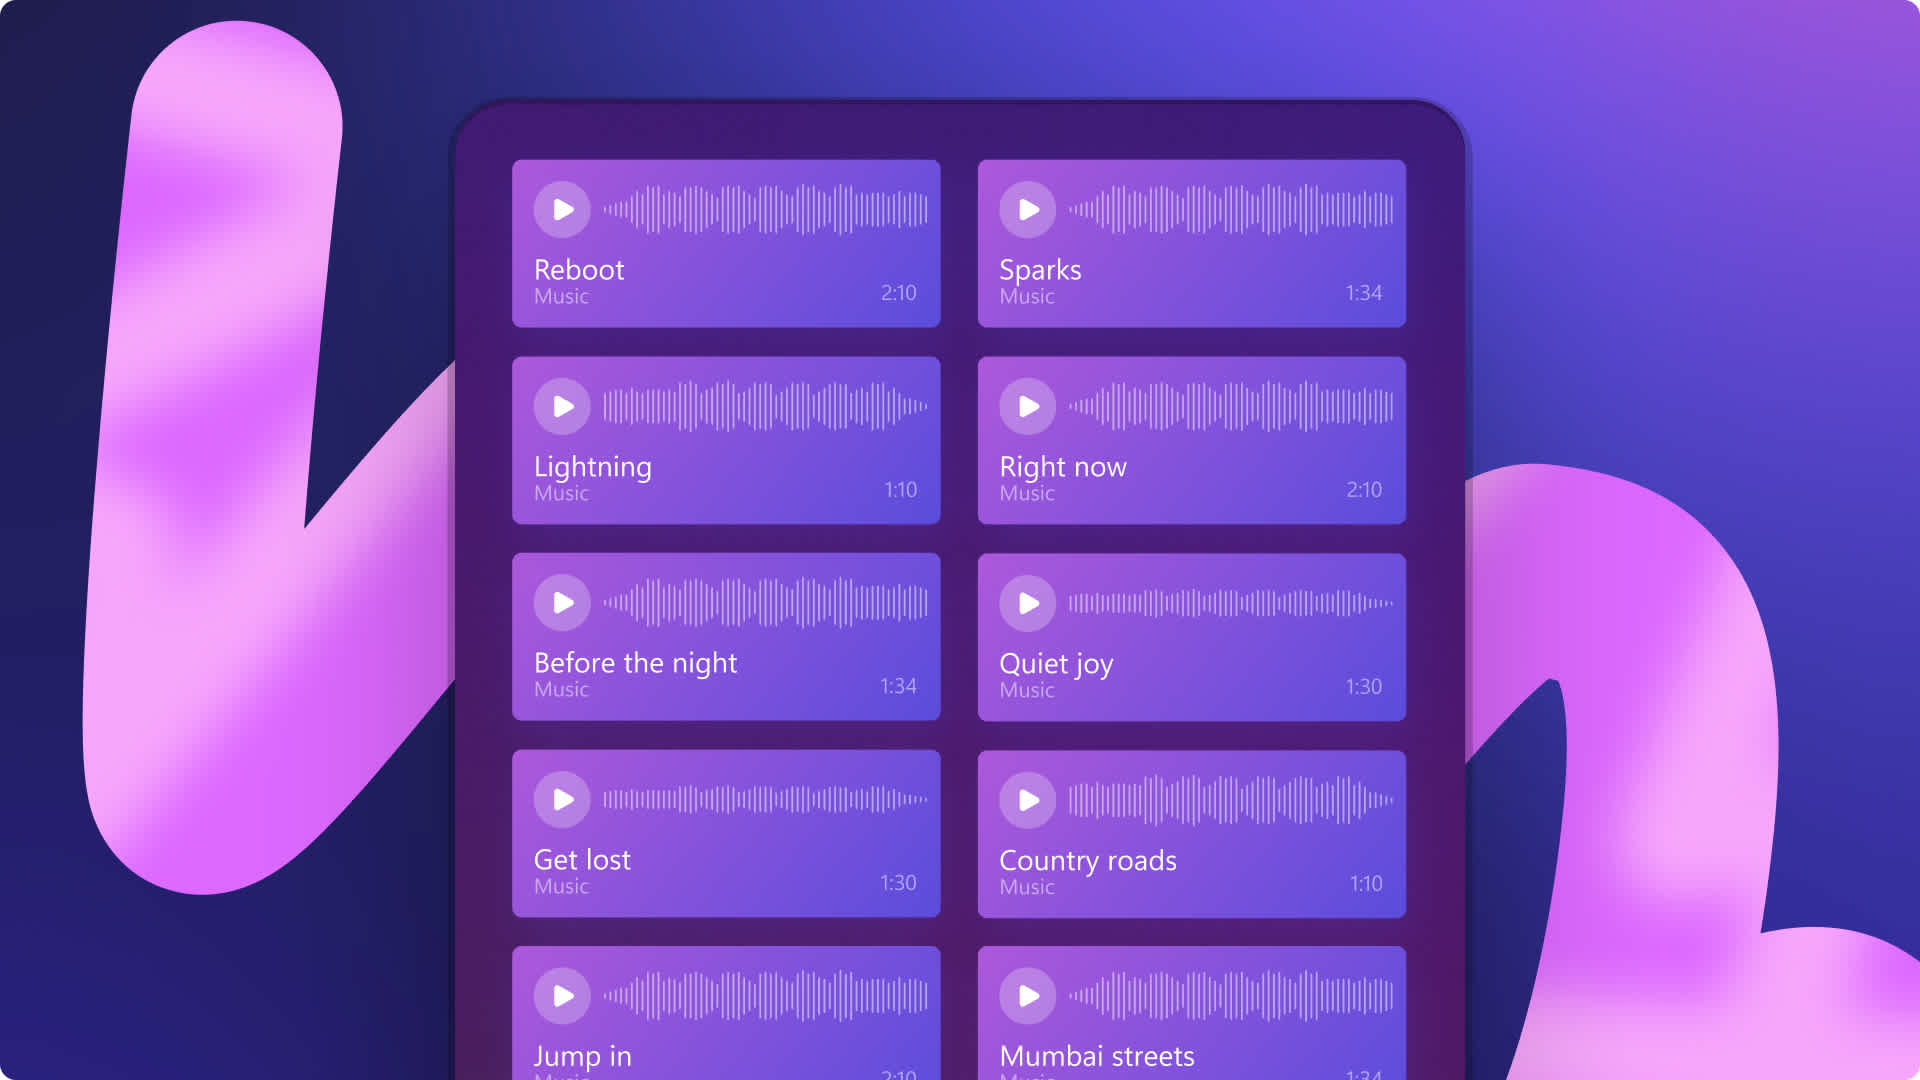
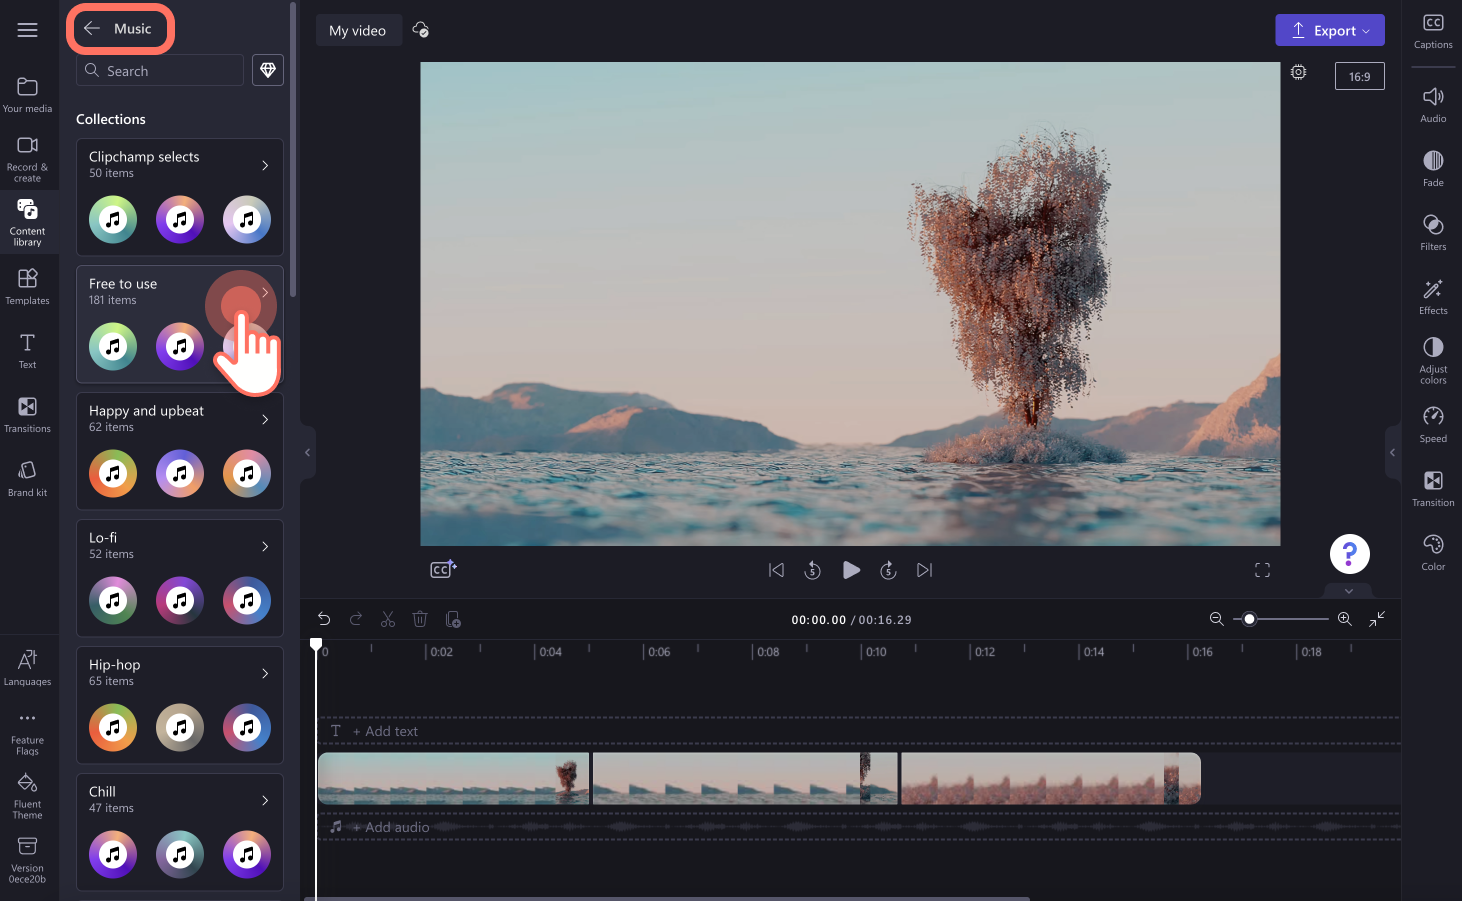
Once you have filtered music only, click on a music category like free to use, lo-fi, happy and upbeat, and more to browse music options.
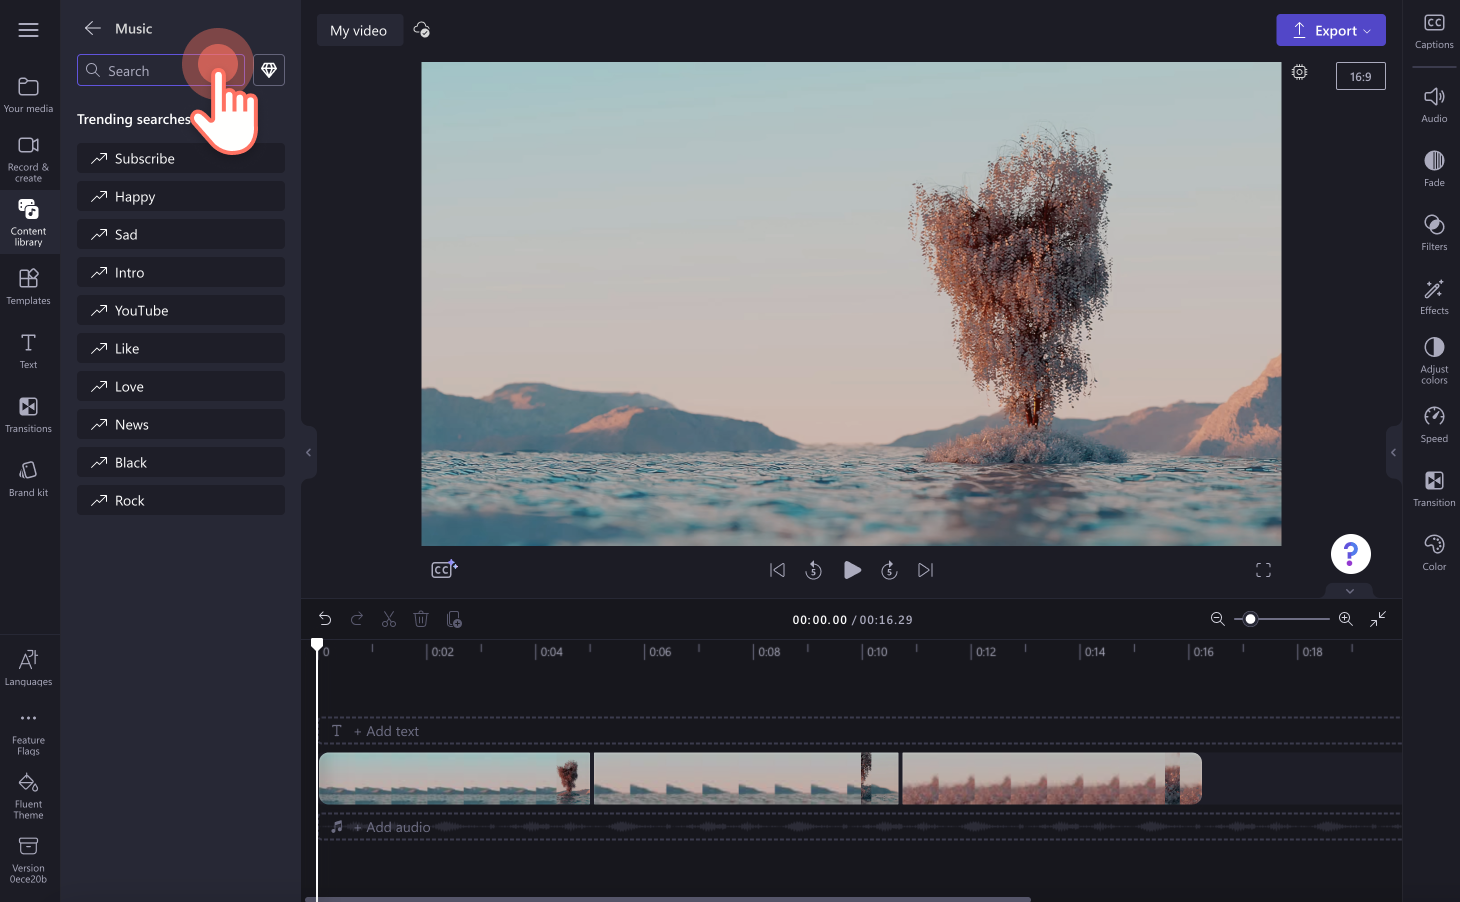
You can also browse the copyright-free music library using the search bar. Type in a relevant keyword like a specific instrument, mood, or style of music like Latin or Greek.
Step 2. Preview the audio file
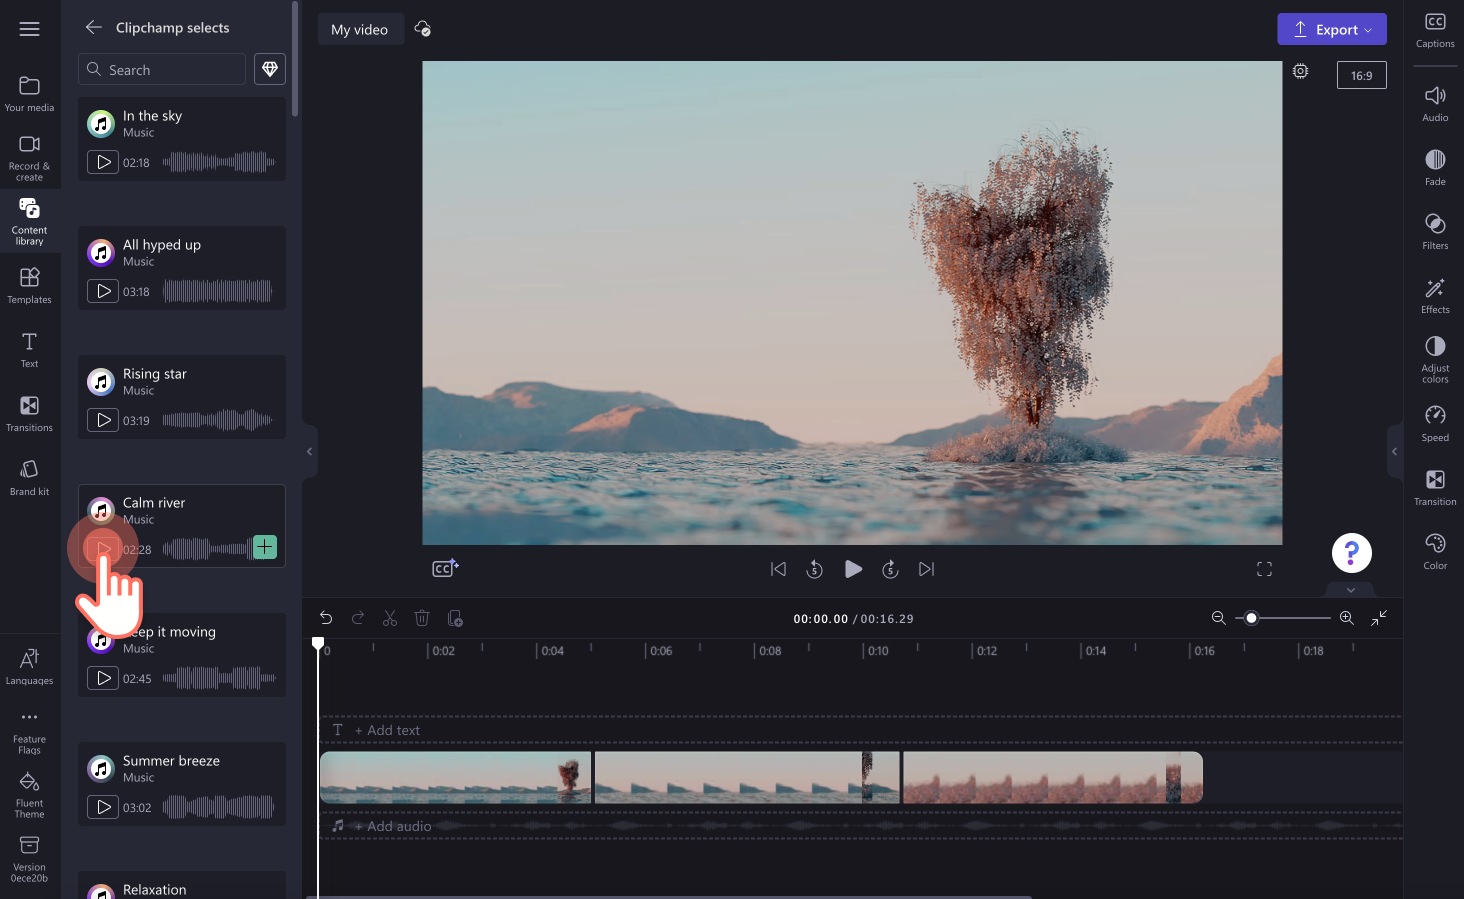
To preview an audio track, click on the play button on the audio file. The music will automatically start playing and you can listen to the full song for free before adding it to your video. Stop listening to the soundtrack by clicking on the same button.
If you want to open the audio file to full screen, click on the audio file. A popup window will appear with options to add the audio to my media, timeline, as well as the song's duration and type of asset (paid or free).
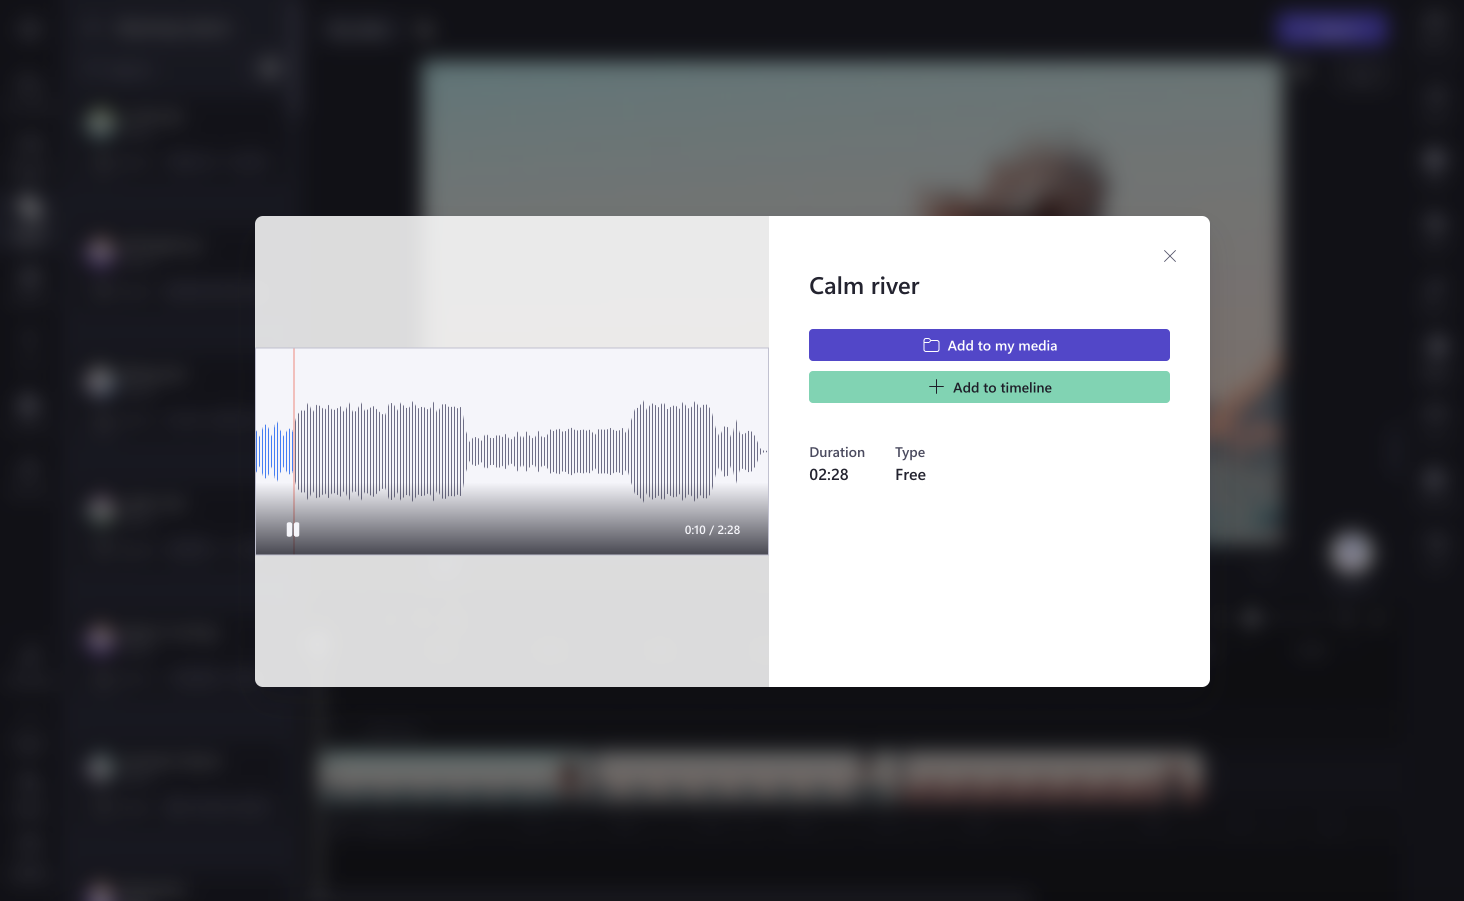
Step 3. Add your music to your video
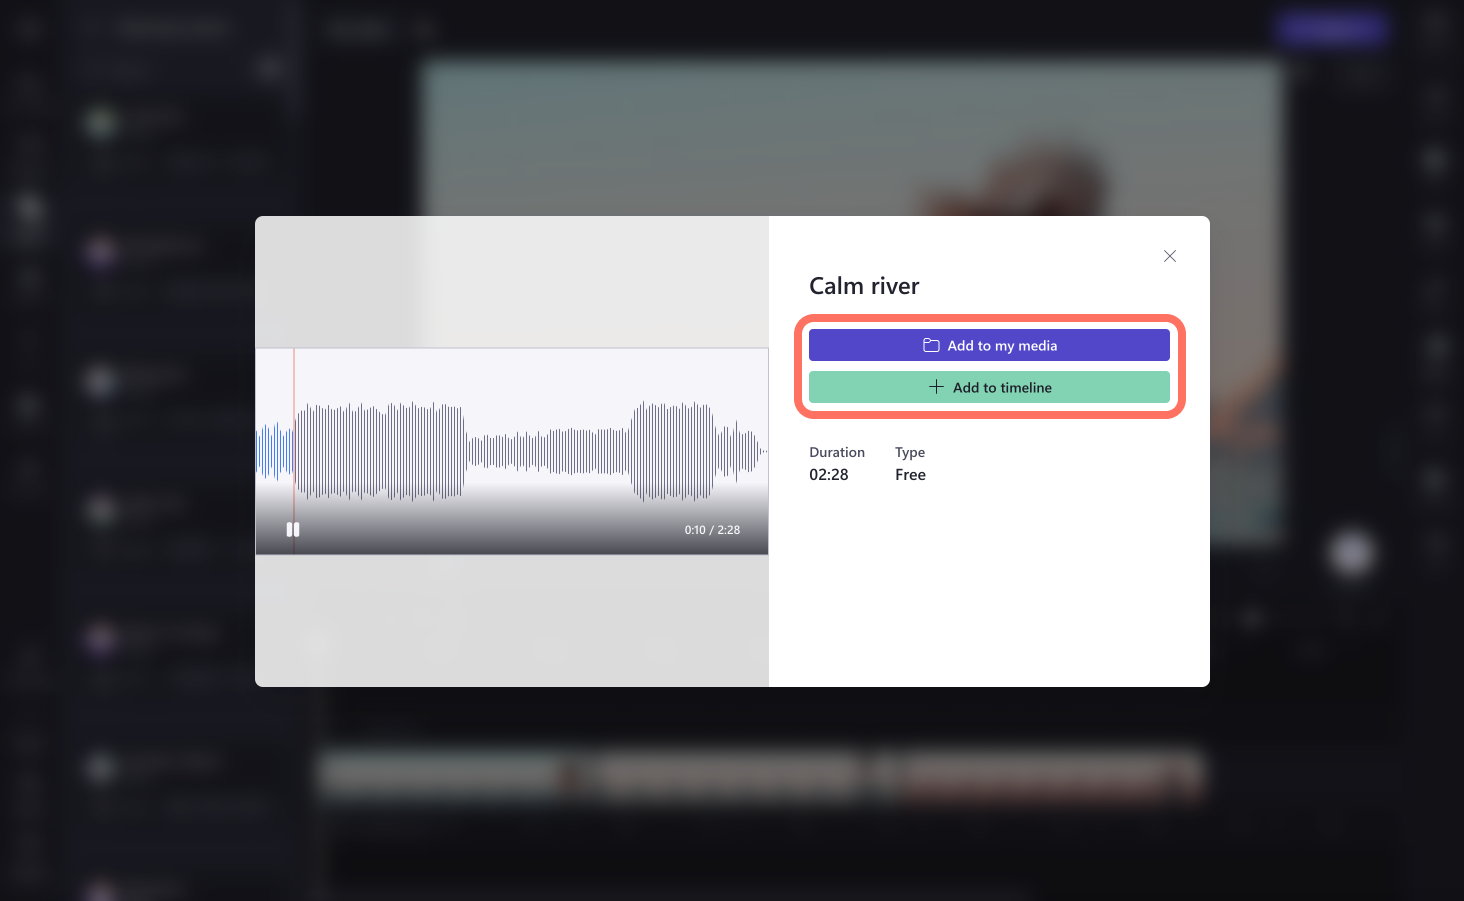
If you’re in the enlarged preview window, click on the add to media button to add your audio to the media tab, or click on the add to timeline button to directly add your audio to the timeline.
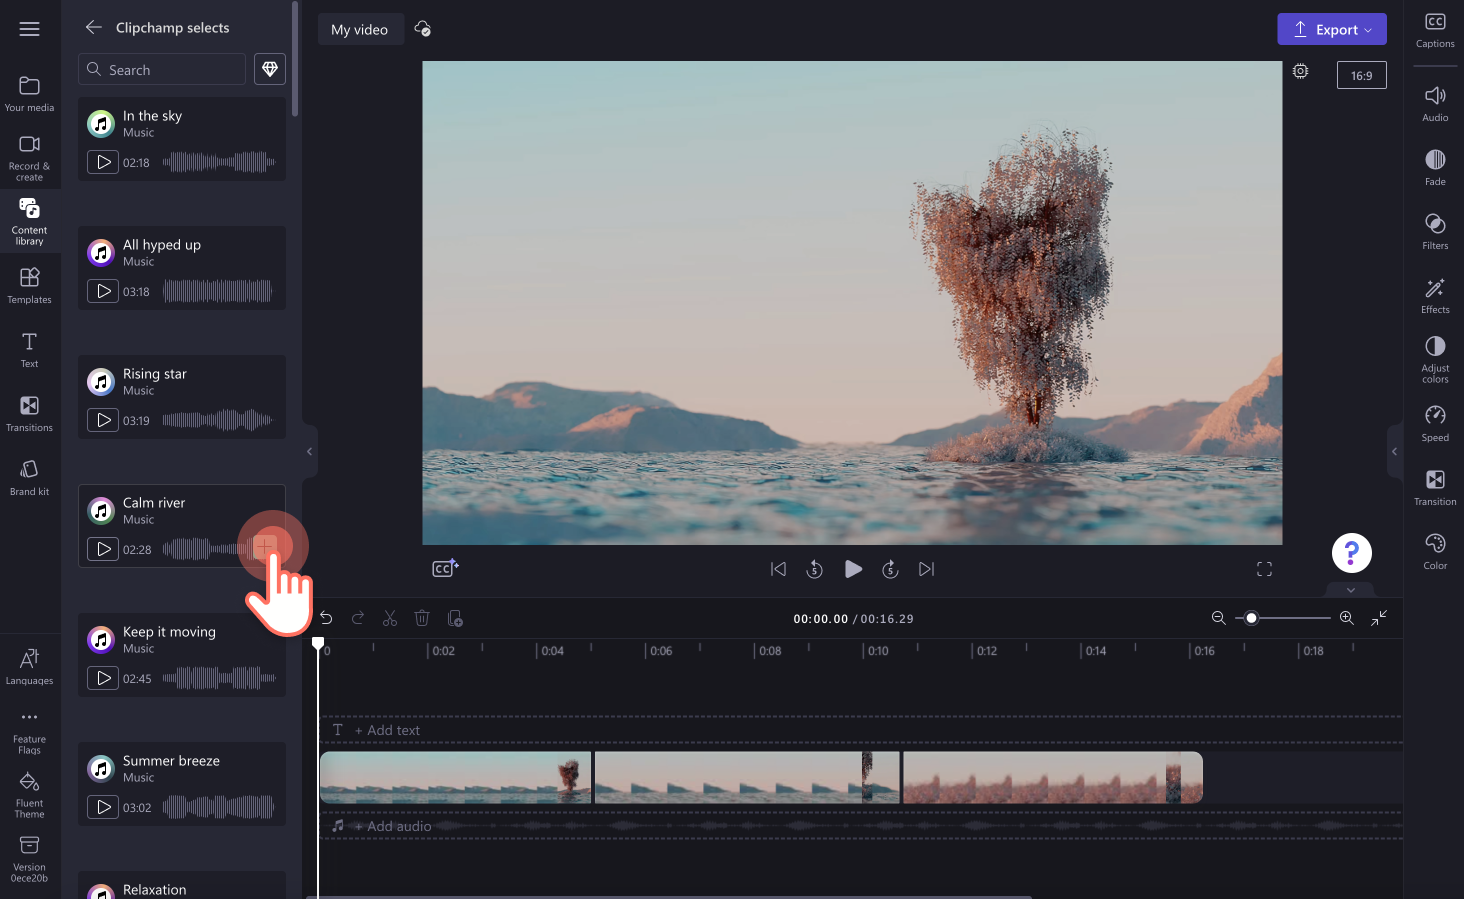
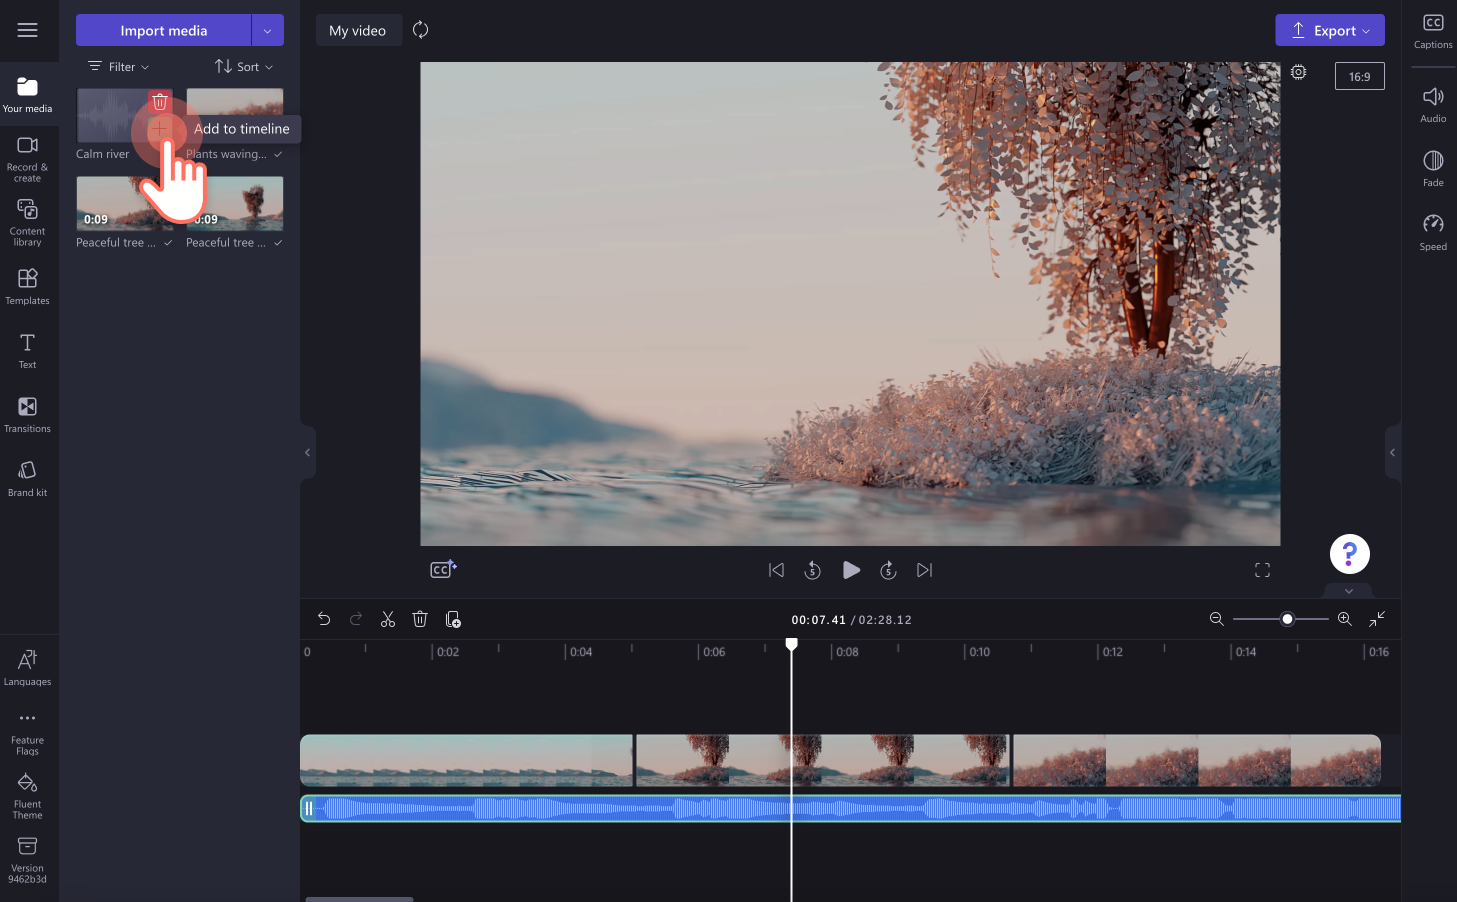
You can also click on the + button on the audio inside the tab to add it to your timeline.
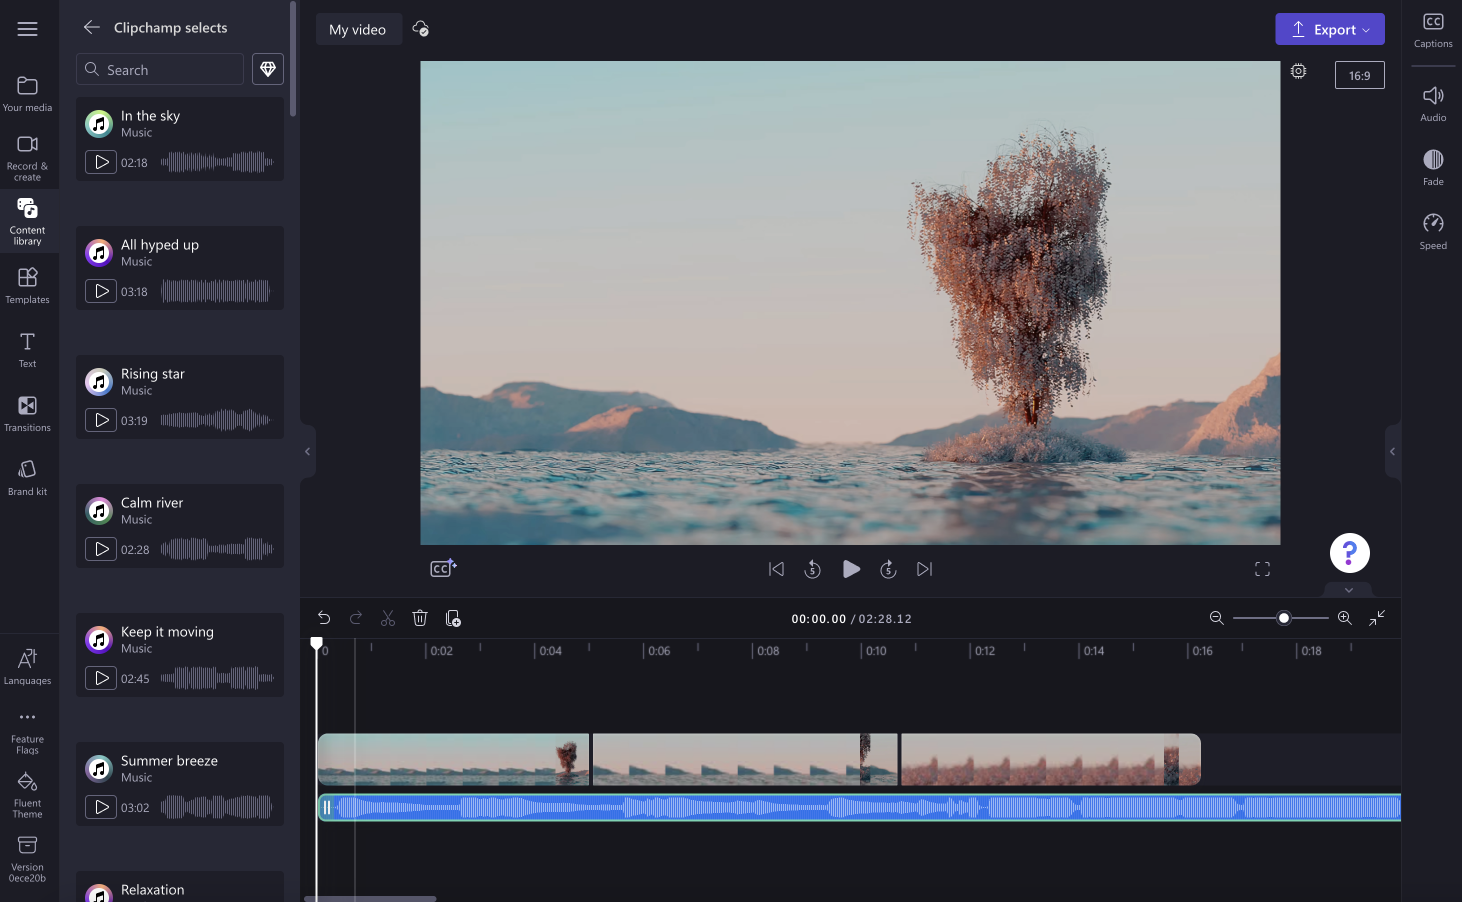
Your audio will now appear on the timeline below your video clips.
Step 4. Edit your background music
These are all optional editing techniques you can add to your audio track.
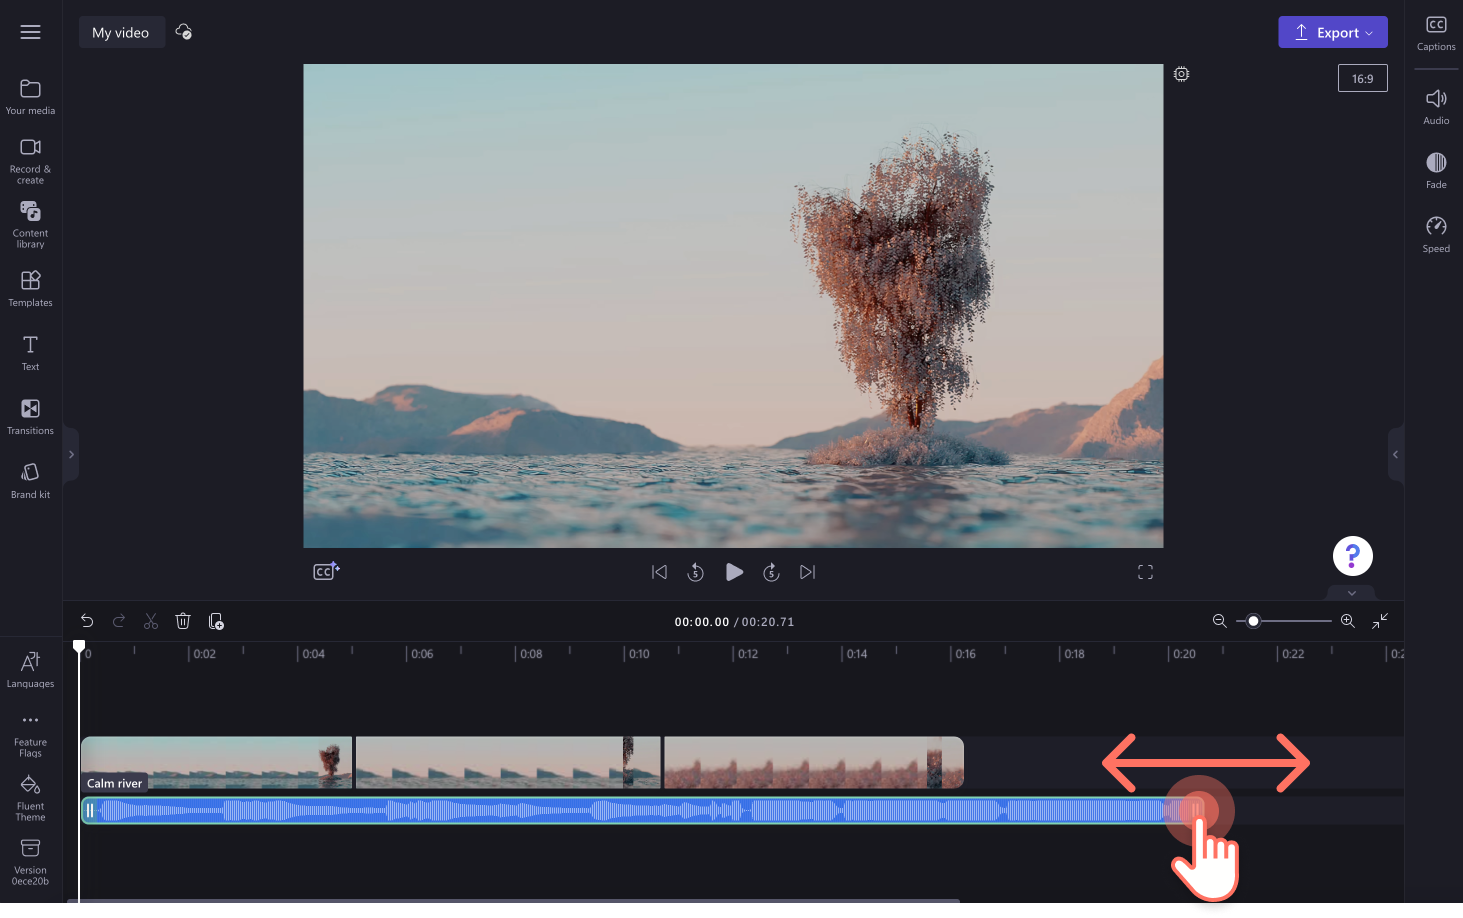
Trim the length of your audio
Your background music may require some trimming if it isn’t the same length as your video. To trim your audio, drag the green sidebar to the left of the timeline. This will reduce the length of your music. If you made your music too short, easily drag the green sidebar to the right to make your audio file longer.
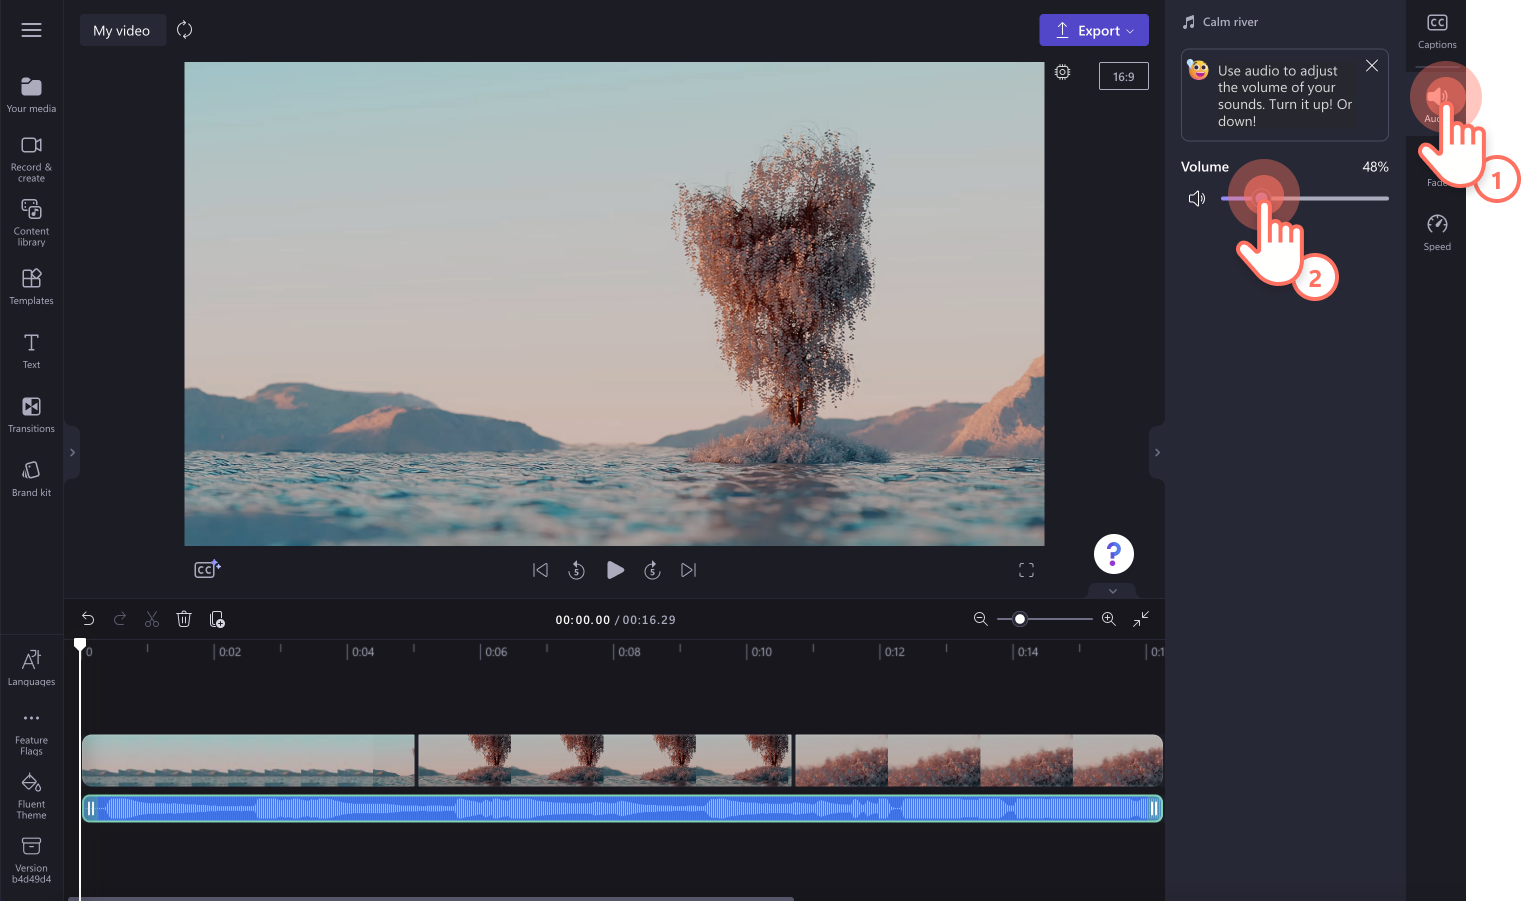
Adjust the volume
To turn down or turn up the volume of your background music, click on the audio tab on the property panel. Drag the slider to the left to make the audio softer or drag to the right to make the music louder. You can also type in a specific numeric percentage.
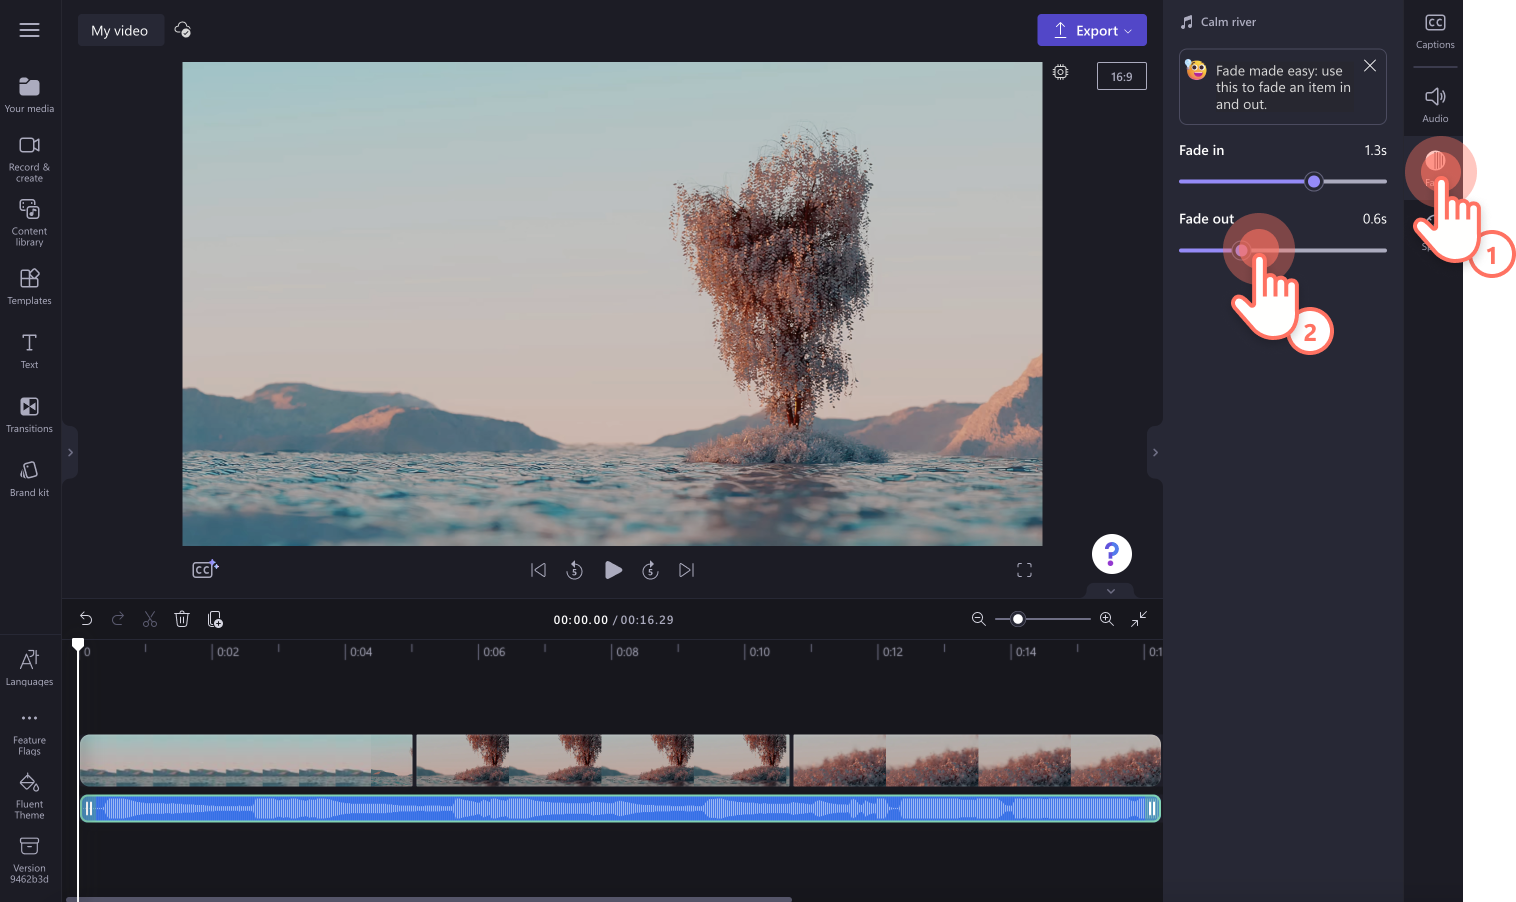
Add fade in and fade out to your audio
To add a fade in or fade out, click on the fade tab on the property panel. Drag the sliders to the right to add a fade in or out.
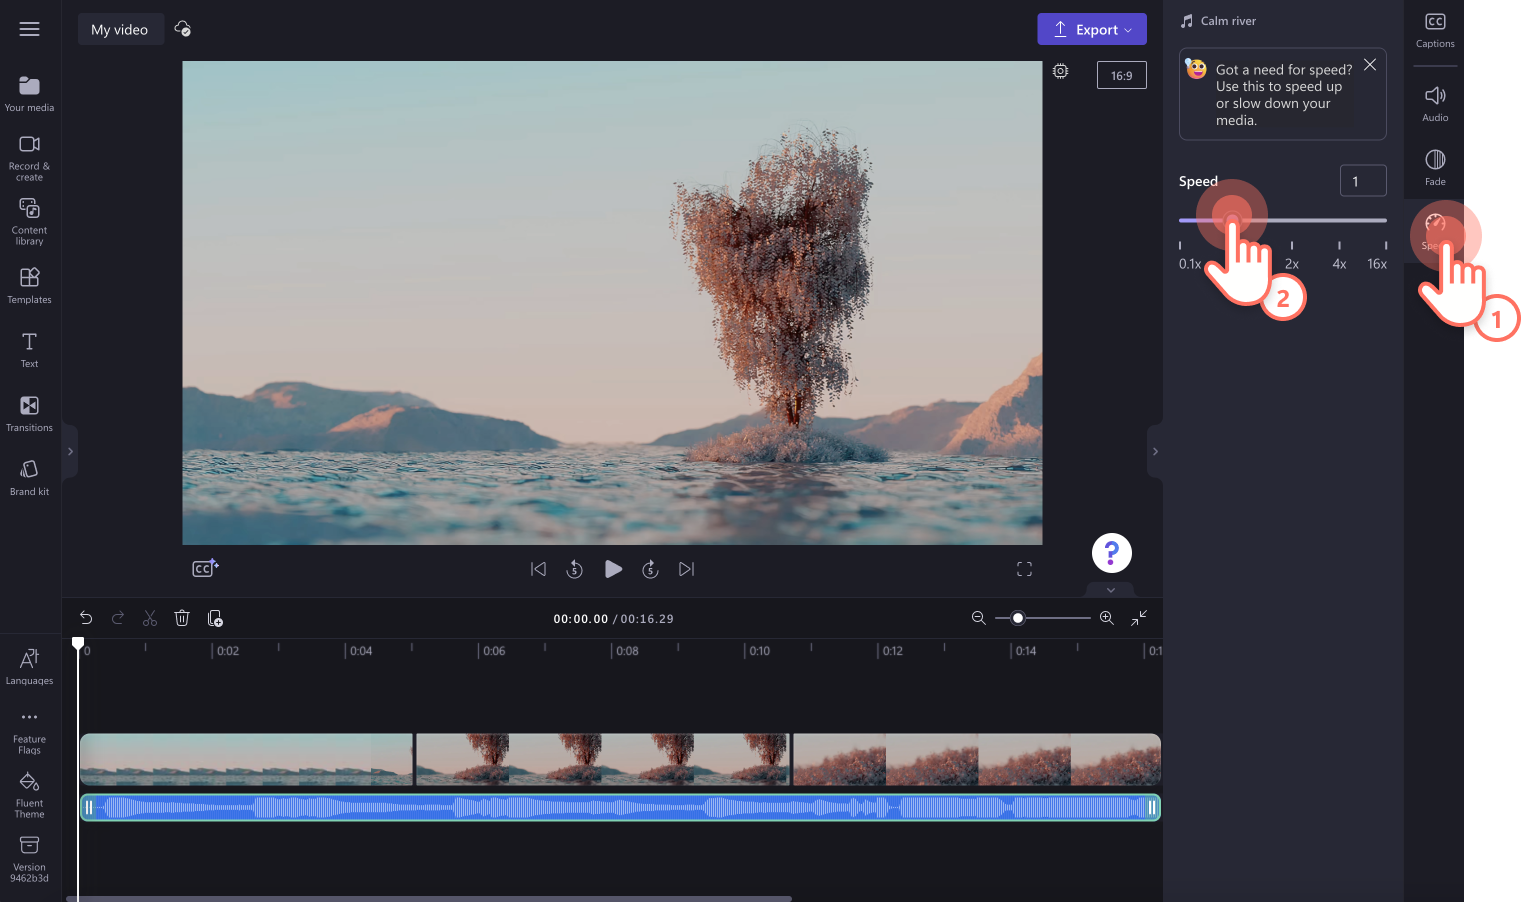
Edit the speed of your background music
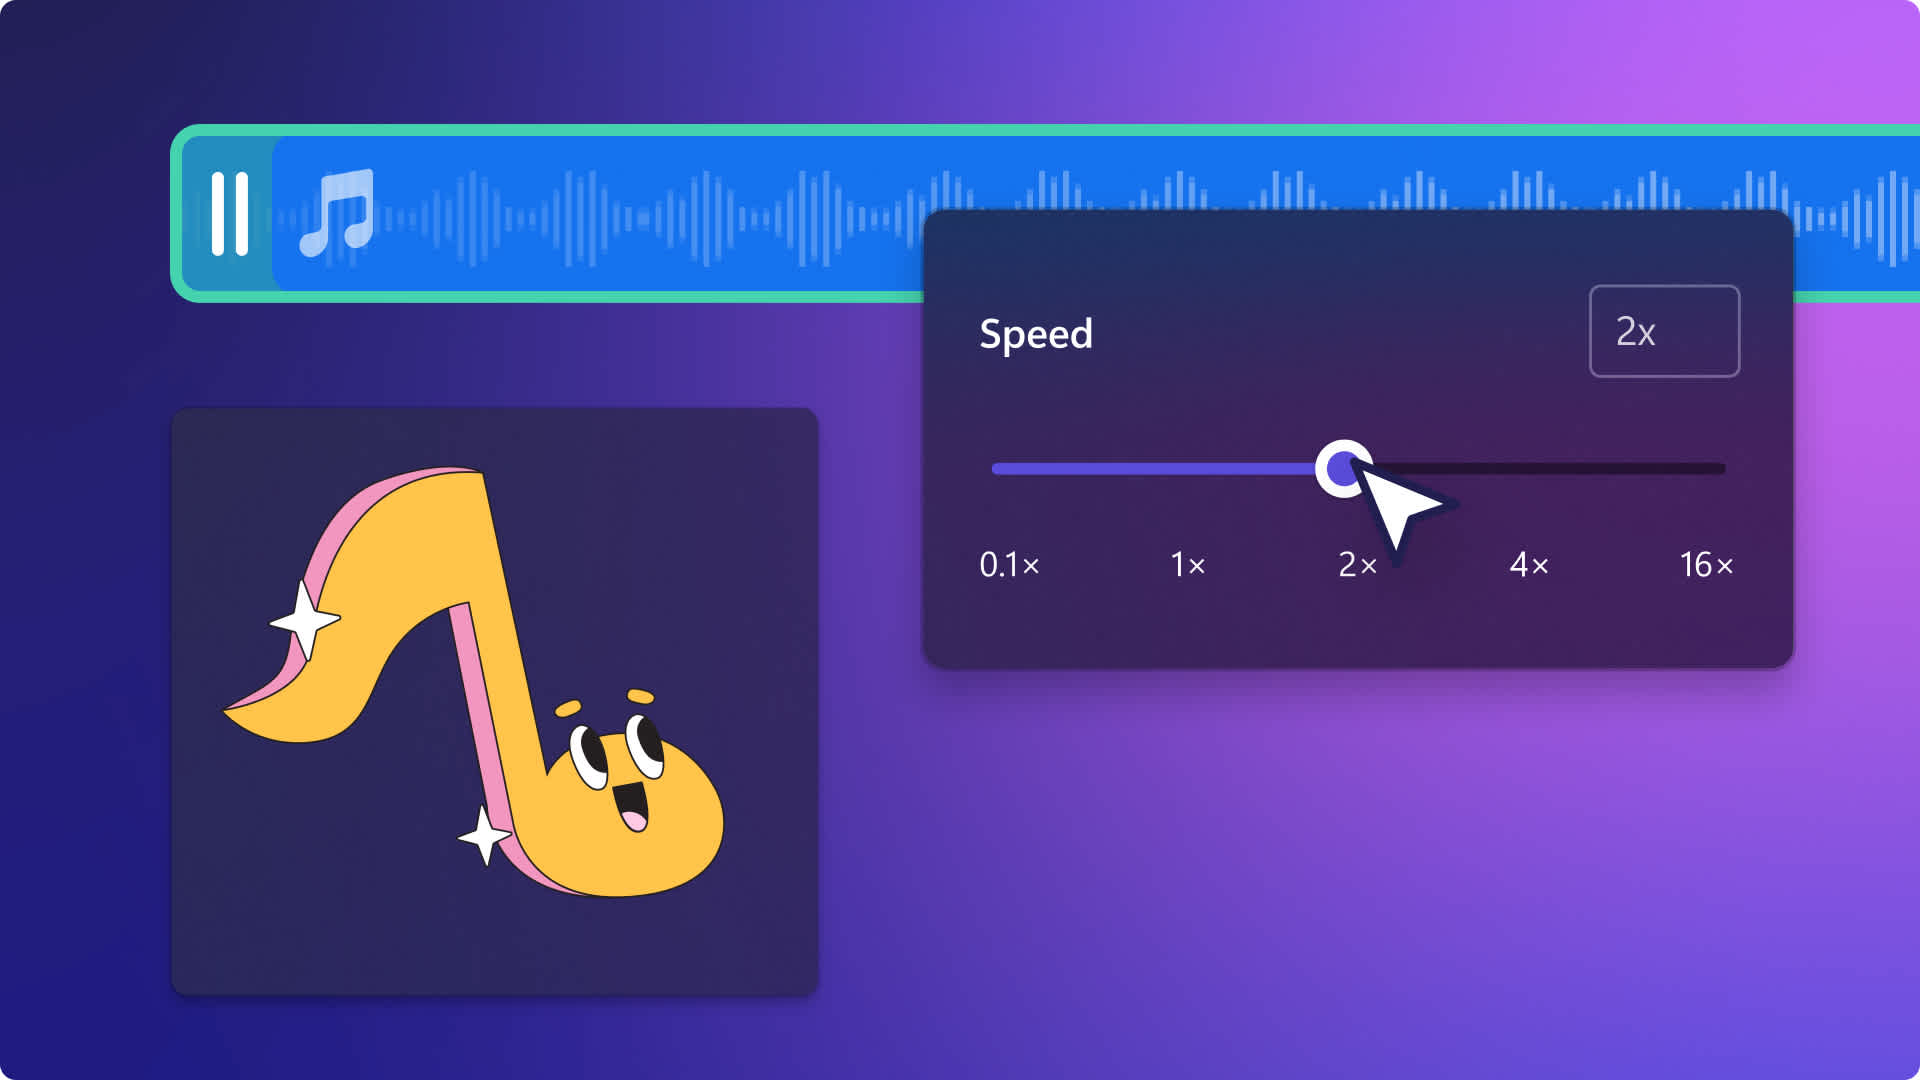
To make your audio faster or slower, click on the speed tab on the property panel. Drag the slider to the left to make the audio slower or drag the slider to the right to make the audio faster. You can also type in a specific numeric percentage.
Duplicate your audio file
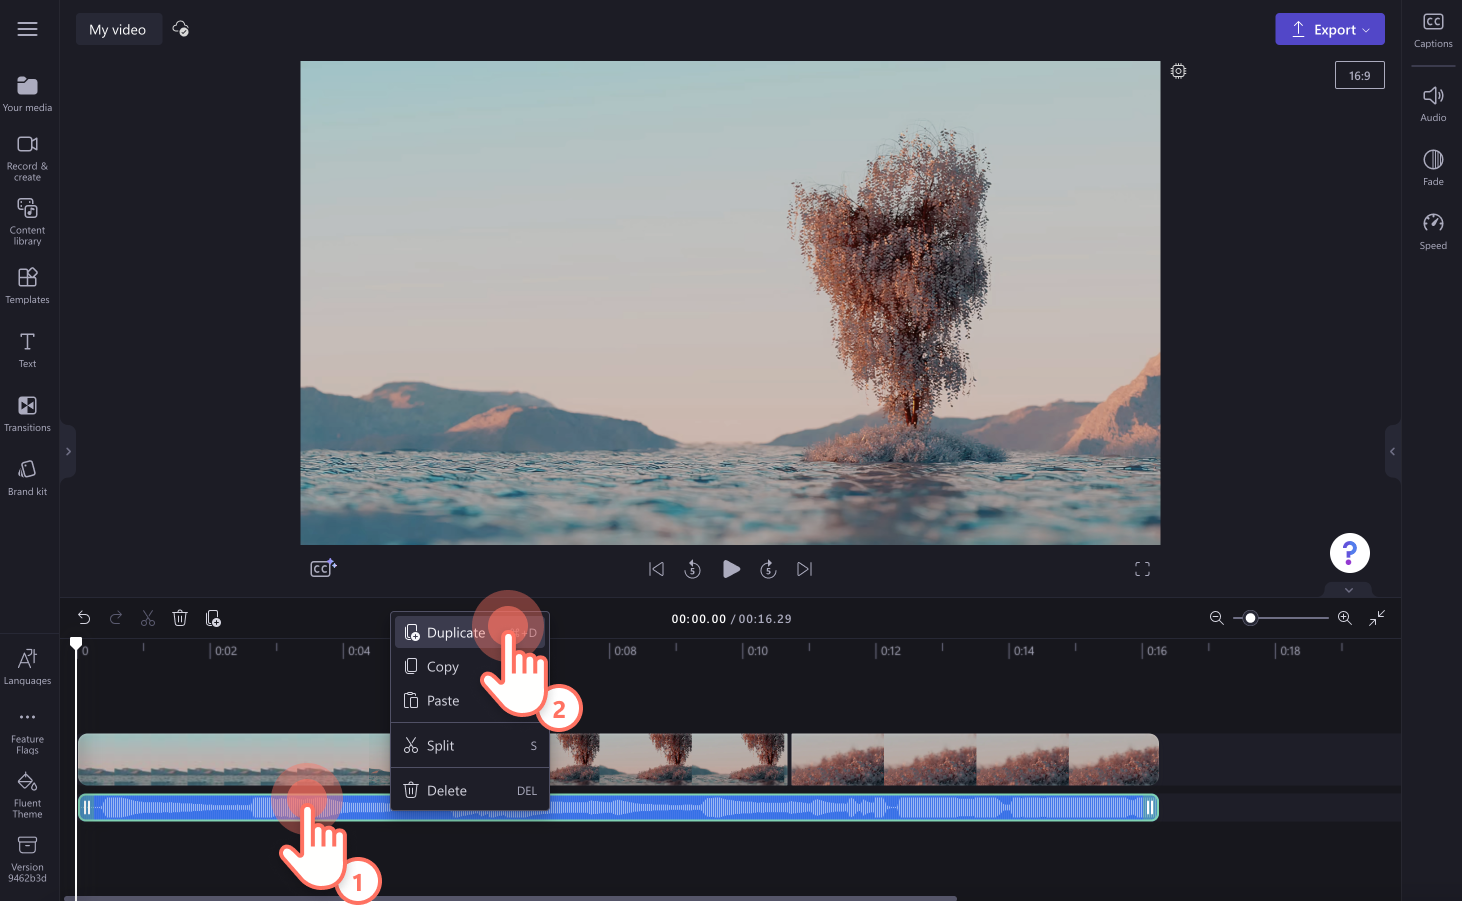
To duplicate your audio file on the timeline, click on the duplicate button on the timeline editing options. You can also right click on the audio file, then click duplicate, or command D or control D.
Step 5. Save your video with music
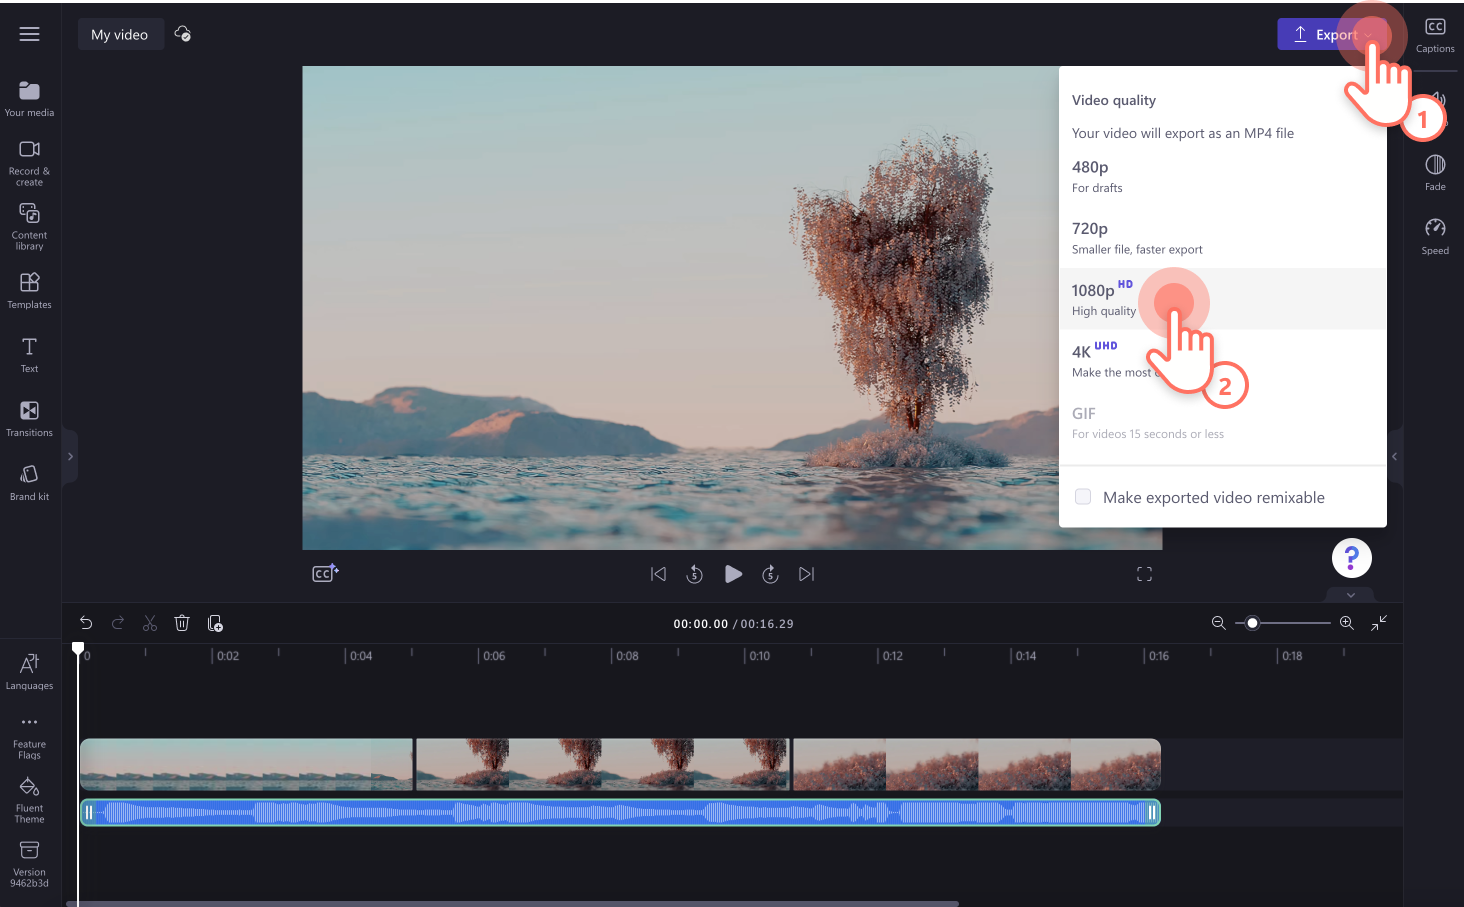
Before saving your new video, make sure to preview by clicking on the play button. When you’re ready to save, click on the export button and select a video resolution. We recommend saving all videos in 1080p video resolution for the best quality. Paid subscribers can save in 4K video resolution.
How to add your own audio to Clipchamp
If you don’t want to use stock background music, upload your personal audio files to the editor for free. Upload MP3 files from your computer, or even upload MP4 files that include sound to use the attached audio.
Using MP3 media files
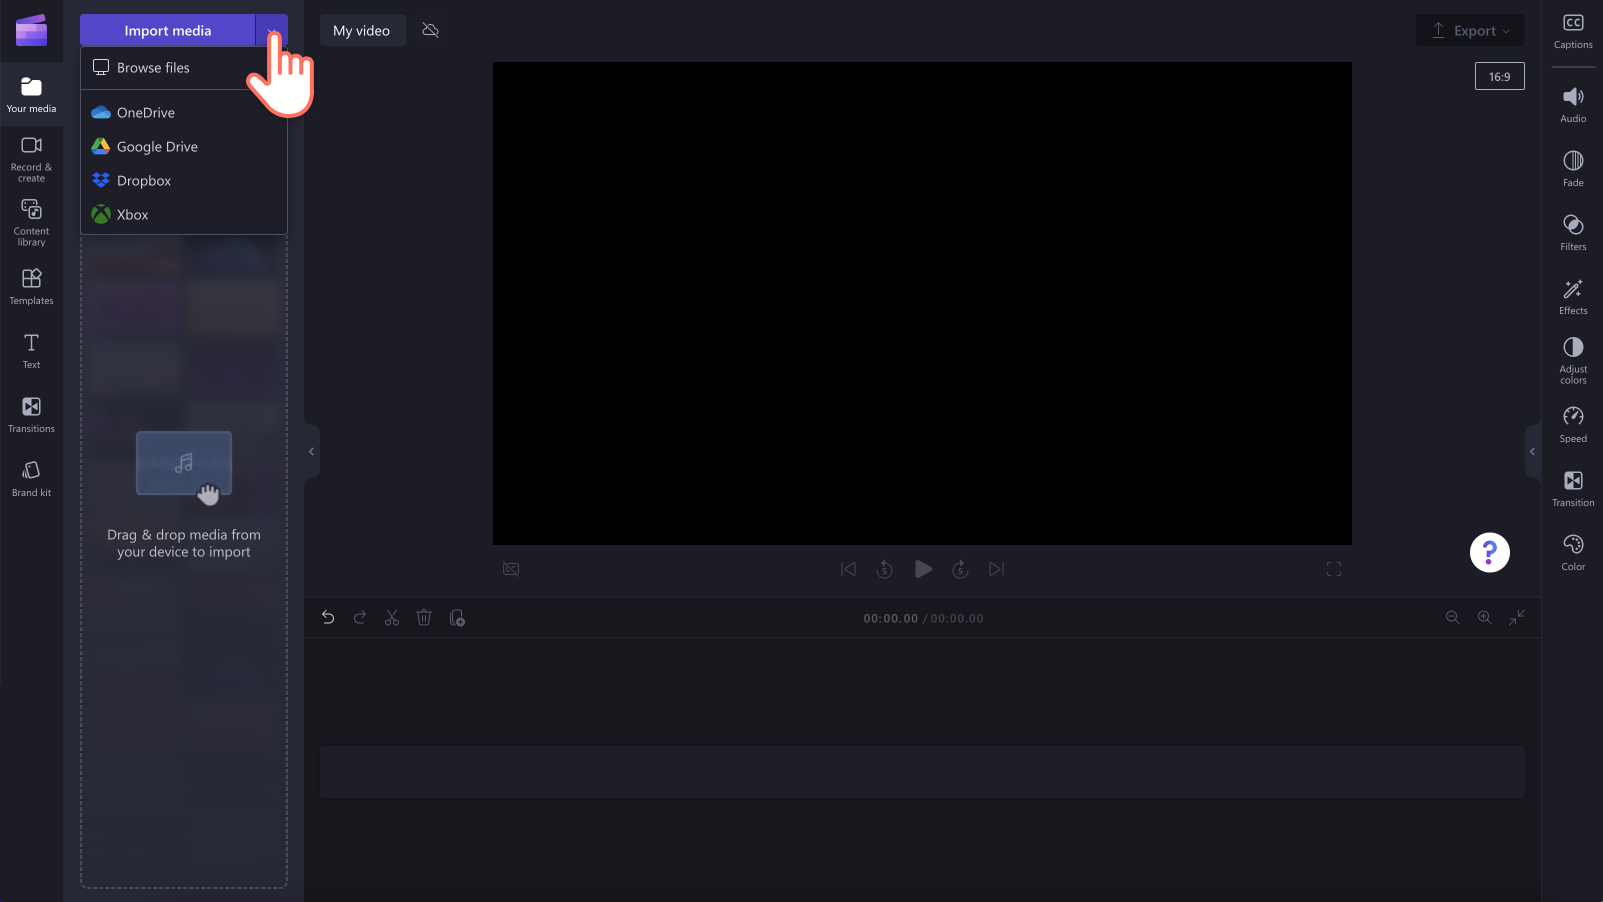
Click on the your media tab on the toolbar, then click on the import media button. Browse your media files and click on the open button to import your music.
Drag and drop your media onto the timeline below your video. Follow the above steps to edit your audio file.
Using video audio
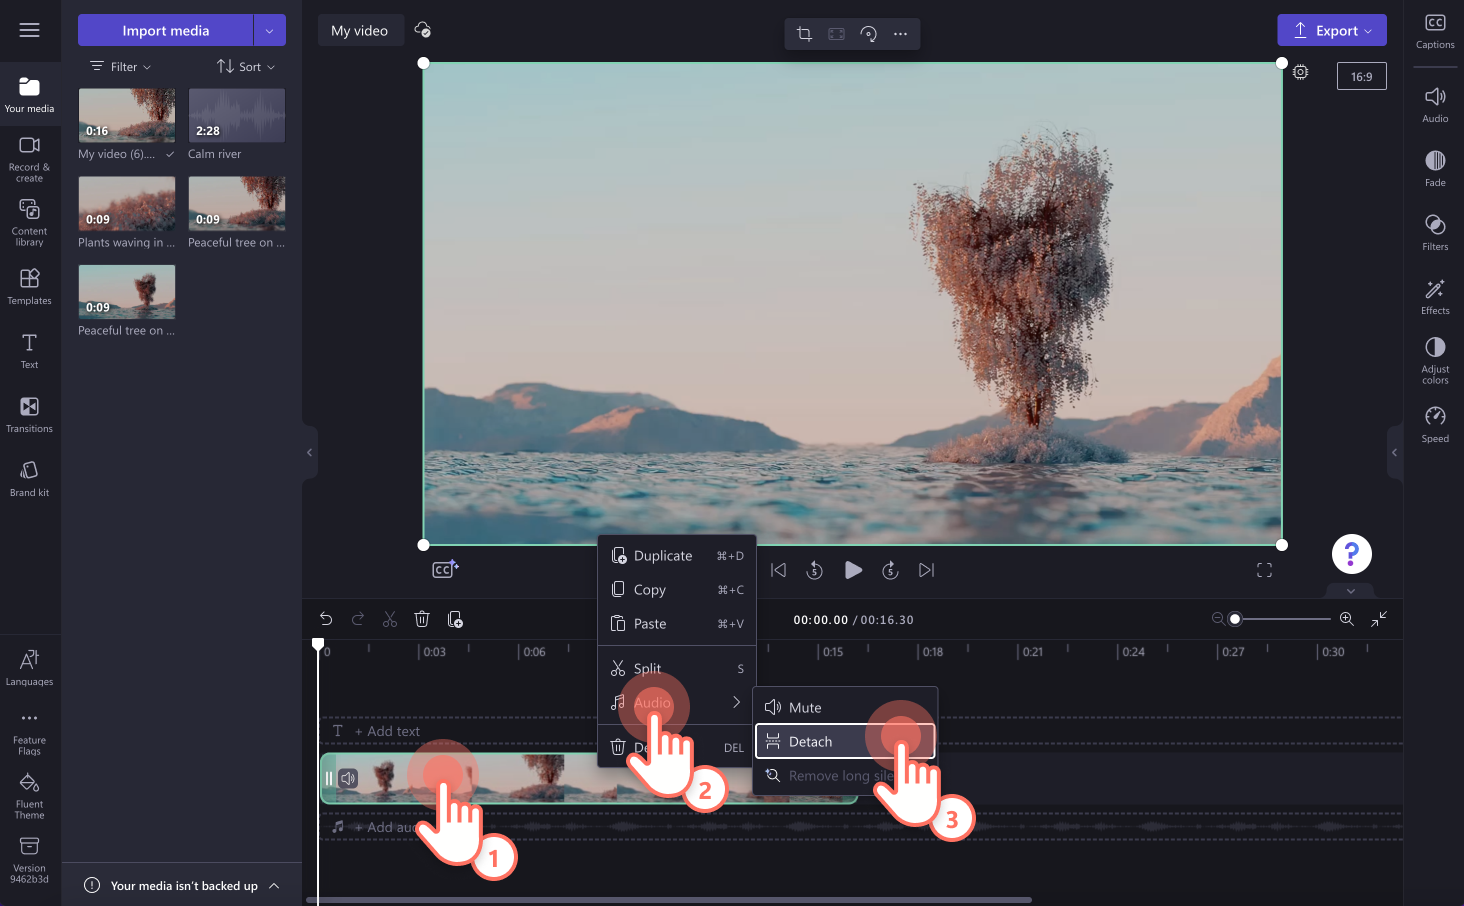
After uploading your video with sound to the editor, drag and drop the video onto the timeline. Right click on the media then click audio then detach audio to separate the sound from your video.
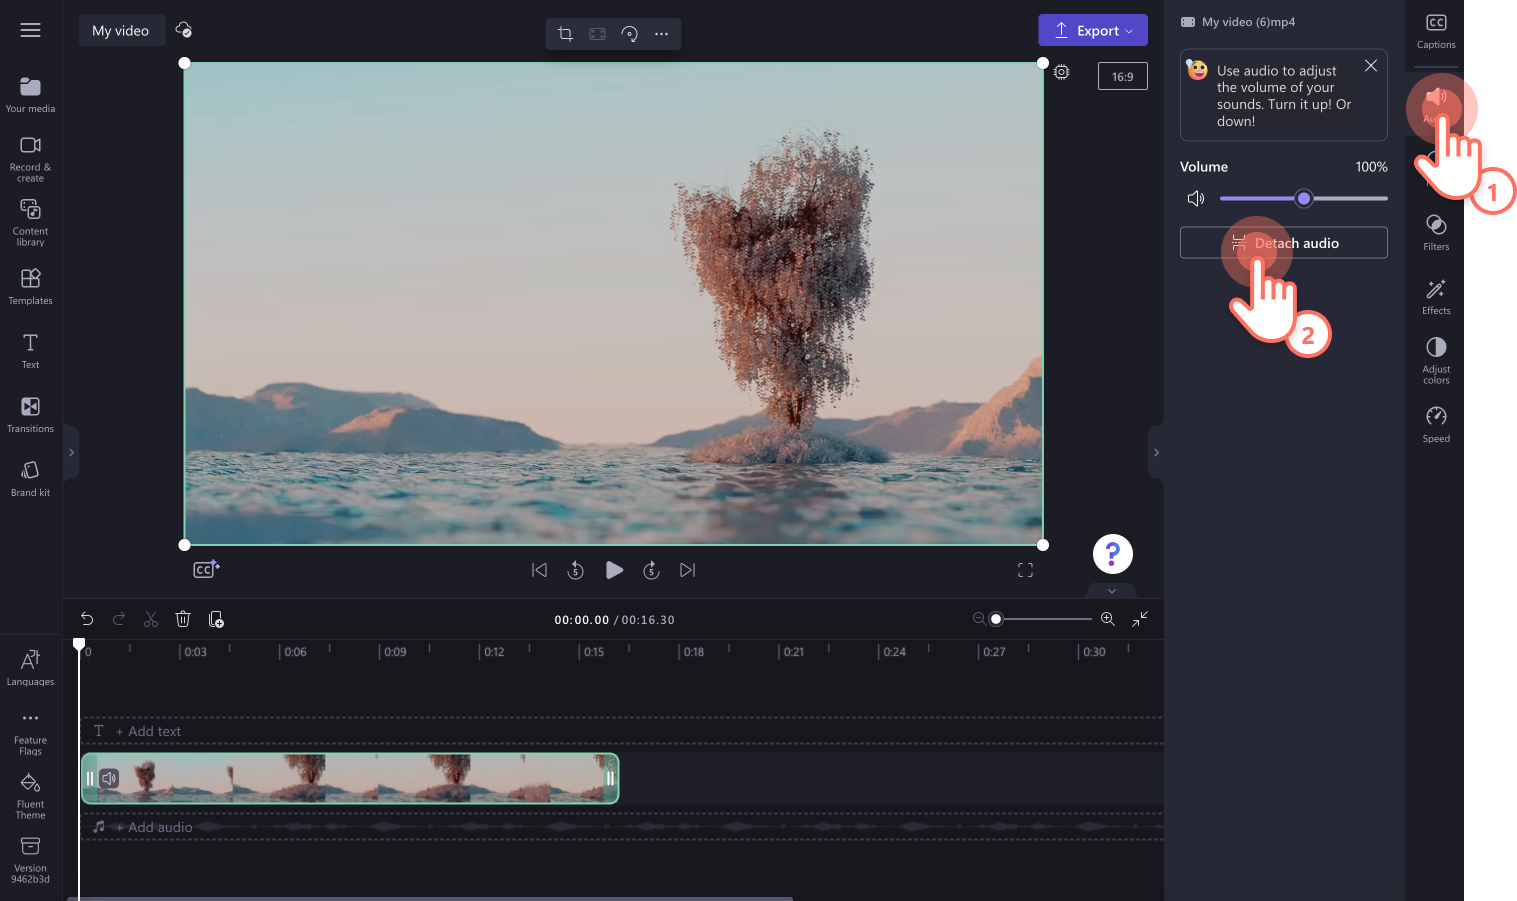
You can also click on the audio tab on the property panel, then click on the detach audio button.
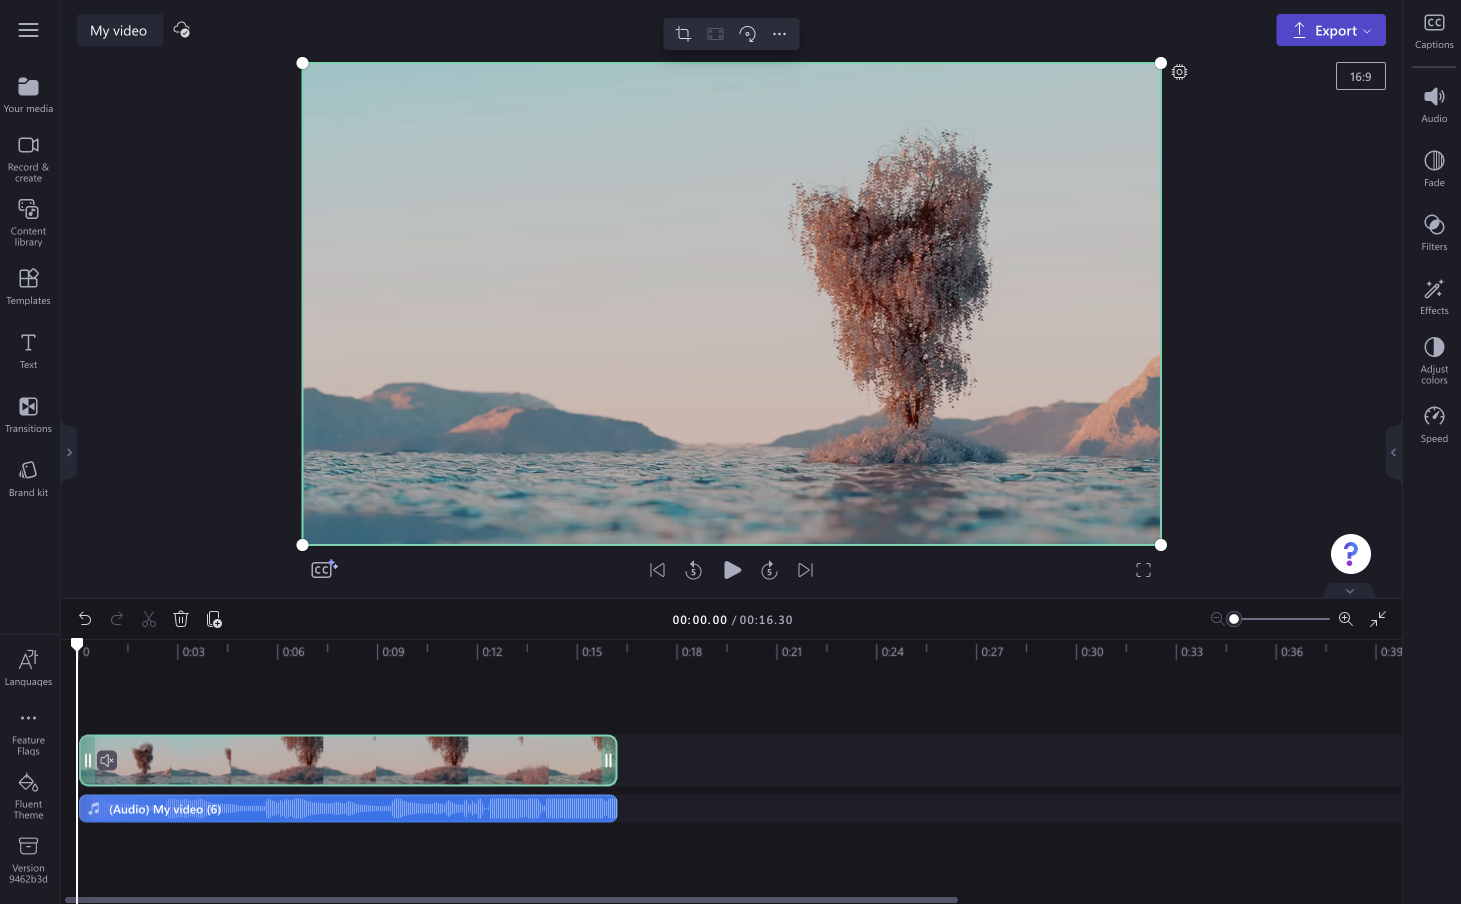
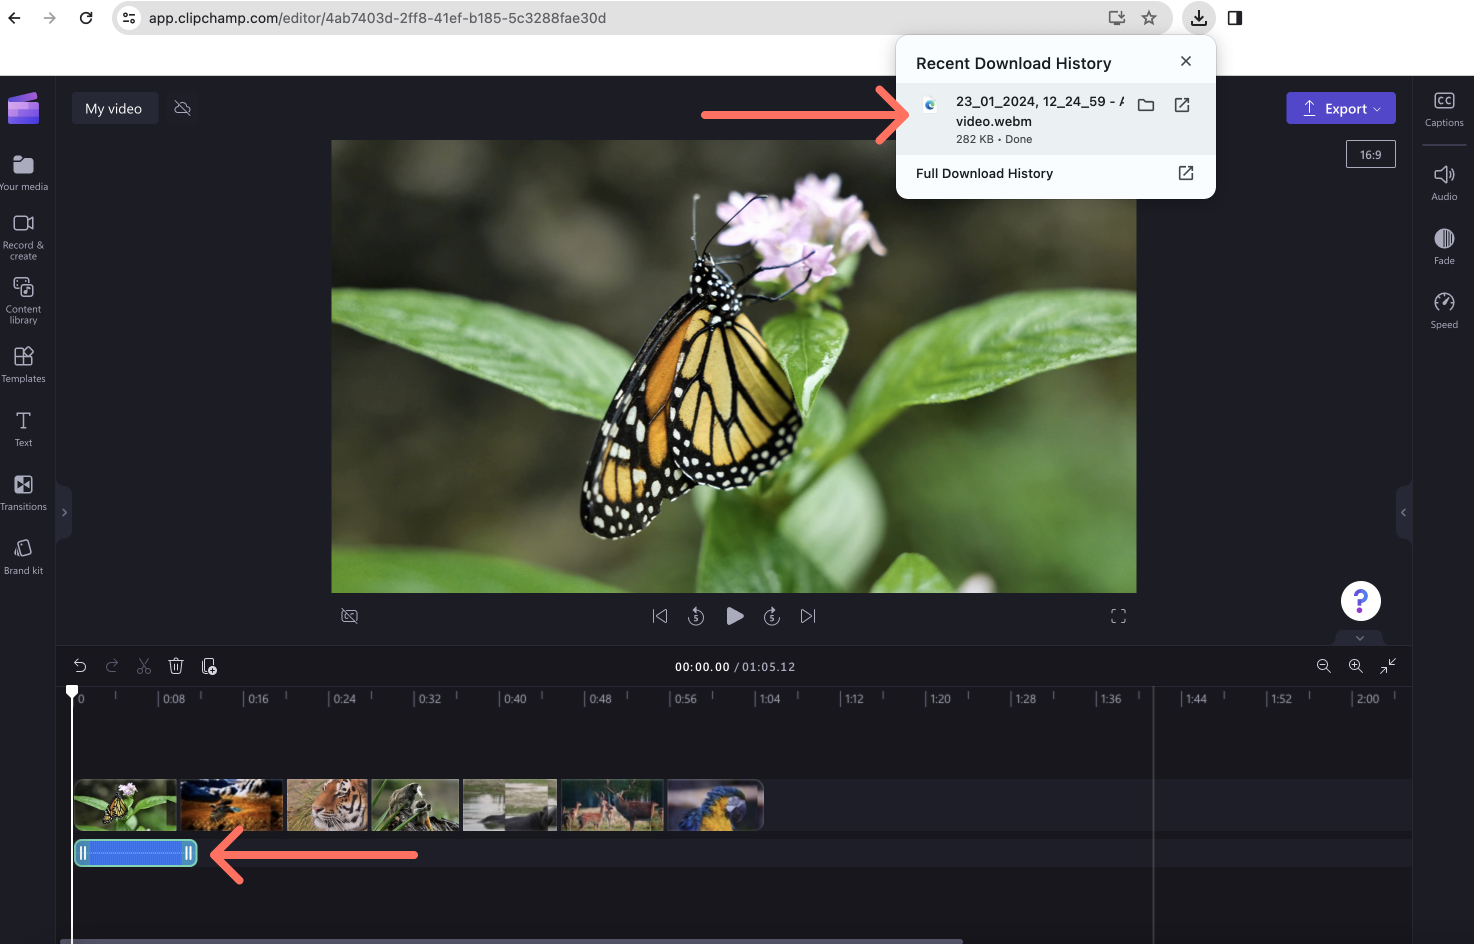
Your audio from your video will now appear below your video on the timeline, and an MP3 file will automatically download to your computer.
How to add voiceovers to your video
Using a text to speech generator
If you’re looking for ways to add multiple audio files like background music and voiceovers, create a narration with the AI text to speech generator.
To create a voiceover, click on the record & create tab on the toolbar, then click on the text to speech option.
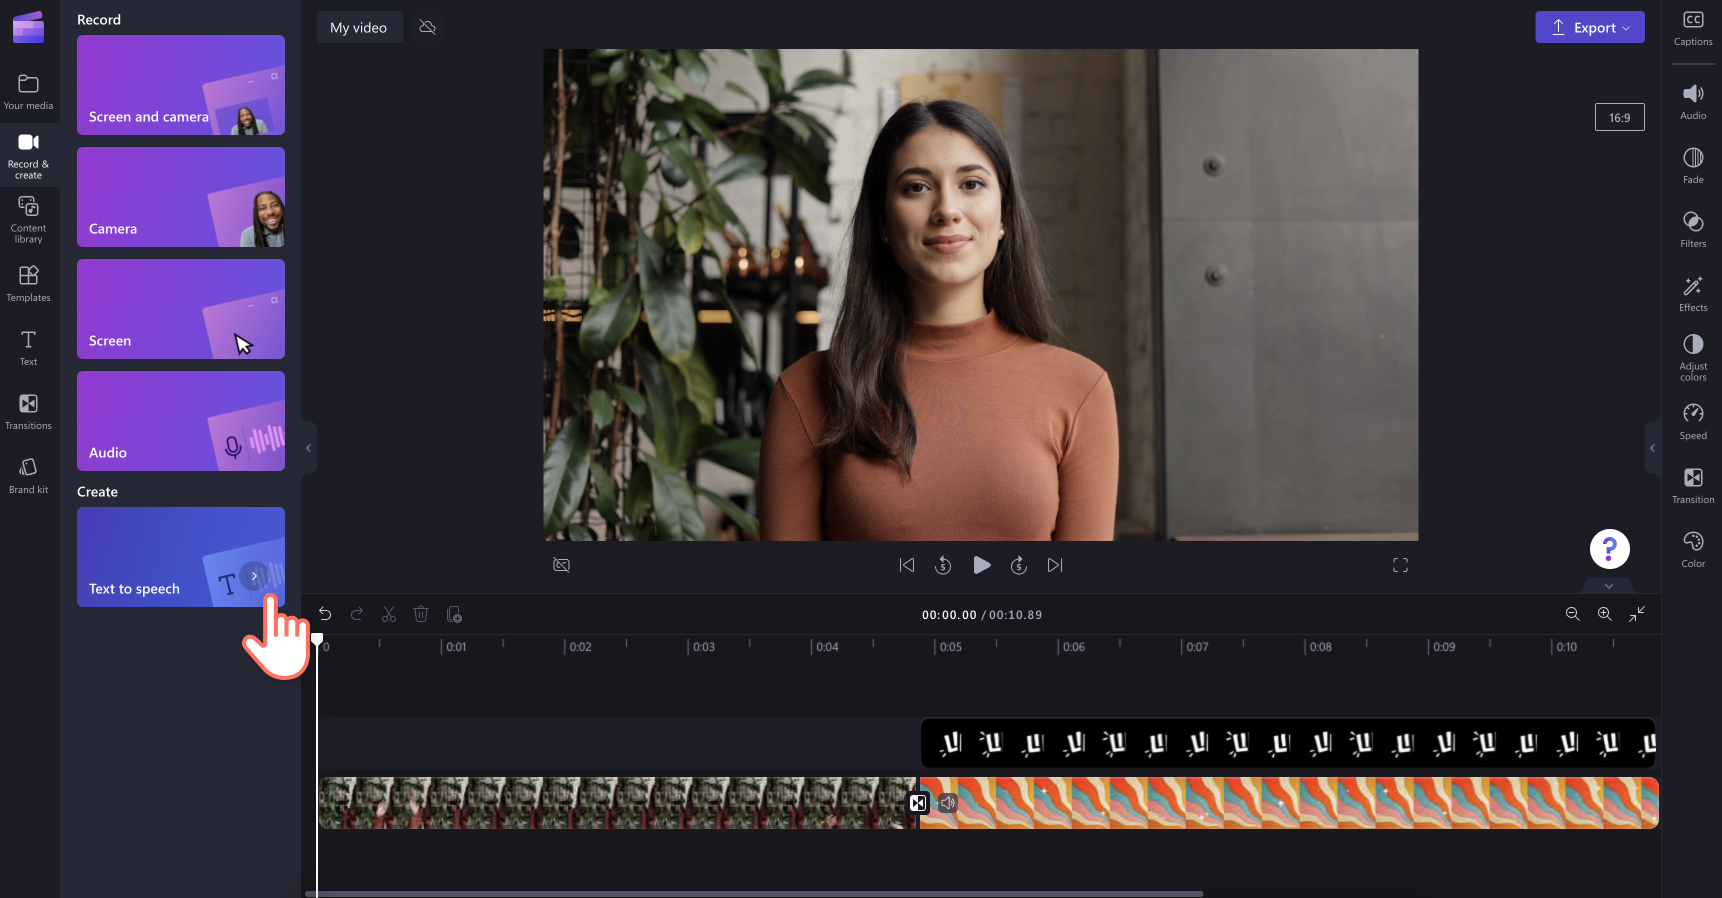
The text to speech tab will appear on the property panel. Select a language, voice, pitch and pace. Type in your voiceover text, then preview your video using the play button. When you’re finished, click on the save to media button to return to the editor. Your voiceover will appear in the your media tab.
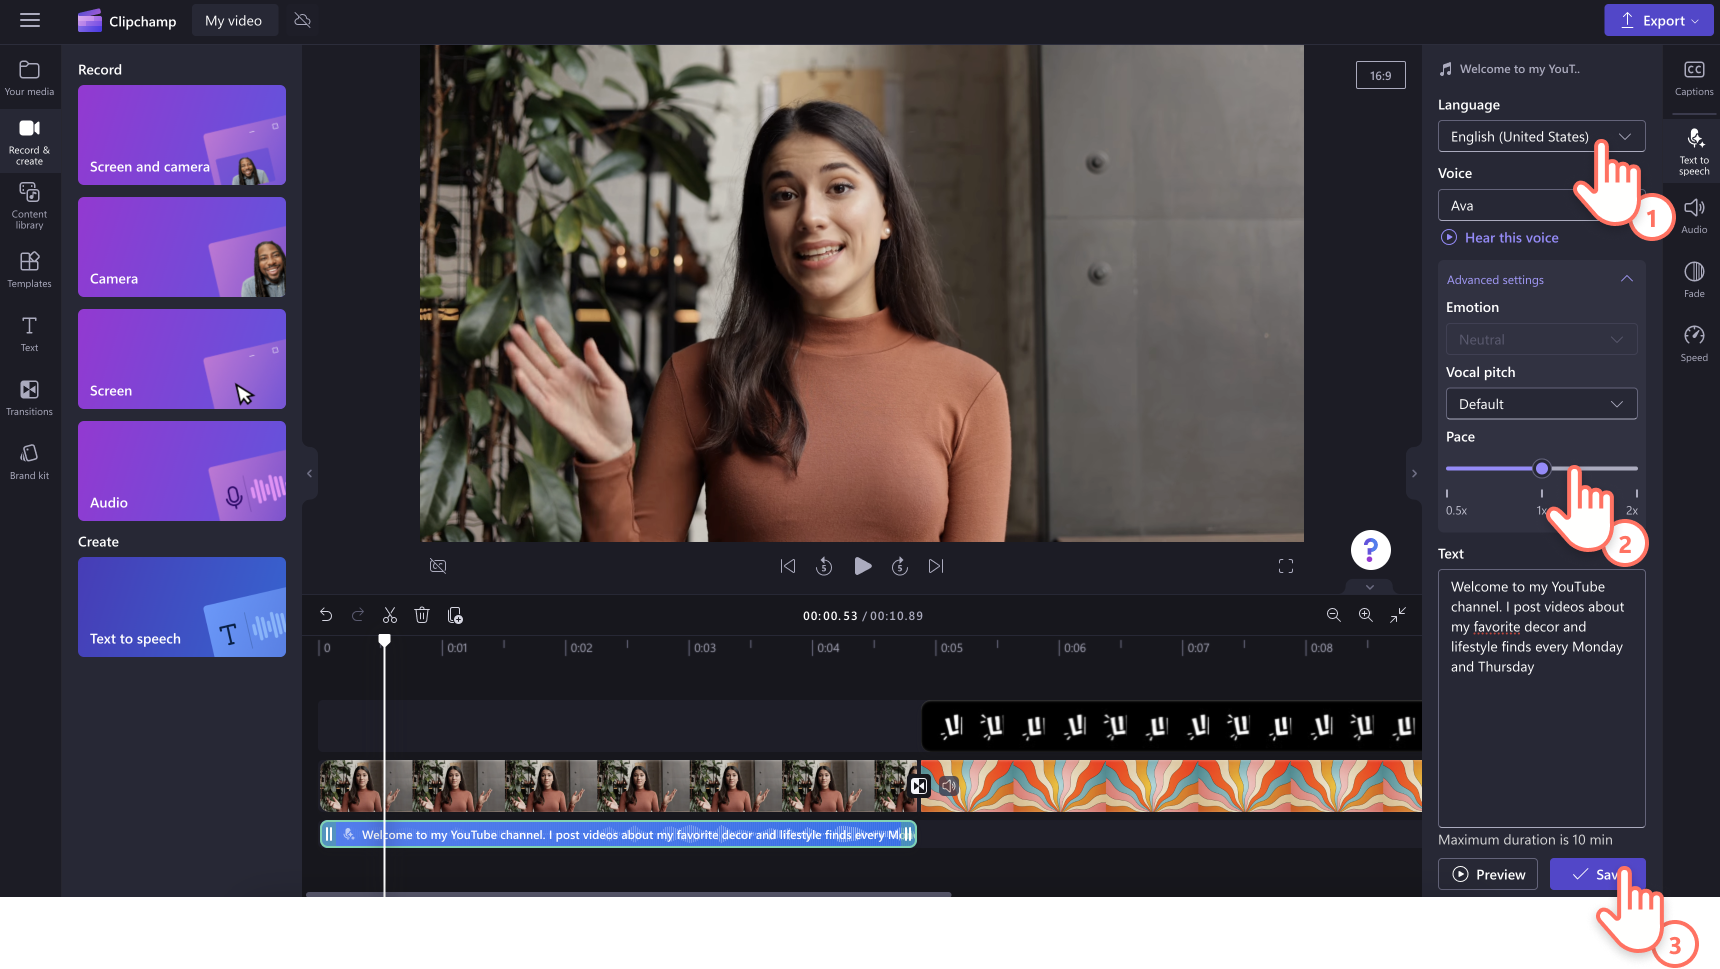
Drag and drop your voiceover onto the timeline above your existing audio. You can even add captions to your voiceover using the autocaptions feature.
Using an online voice recorder
Easily narrate your video your slideshow video or video tutorial using our free and secure online voice recorder.
To record your own voiceover, click on the record & create tab on the toolbar, then click on the audio option.
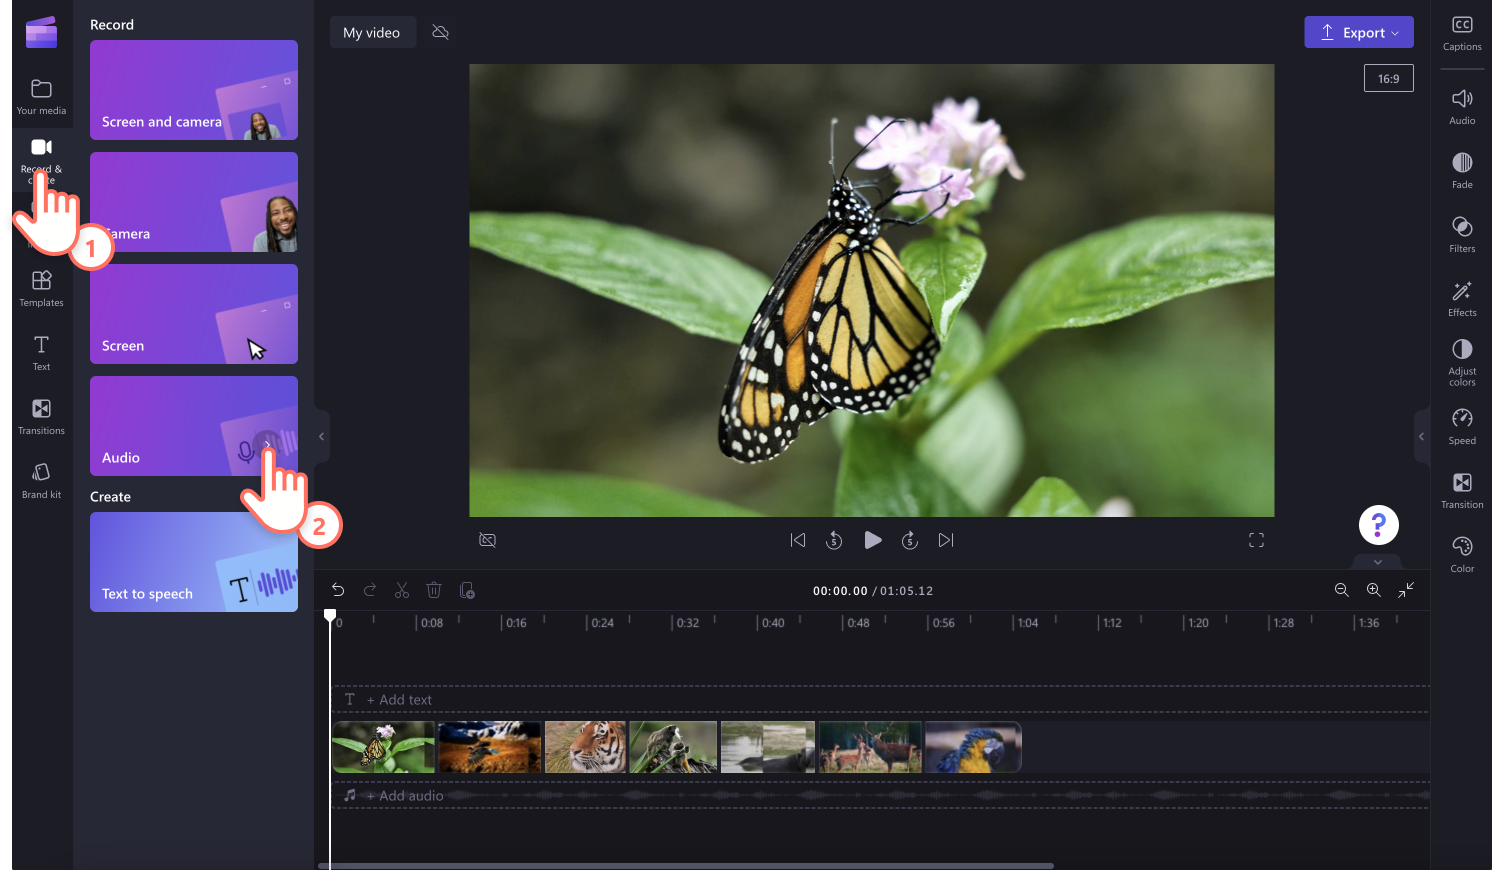
A popup window will appear. Click on the red button to start or stop recording and playback your voice recording using the play button. Your voiceover will automatically download as an MP3 file to your device and be added to the your media tab. Drag, drop and place your audio recording into the video editing timeline as you desire.
Frequently asked questions
How do I remove audio from a video?
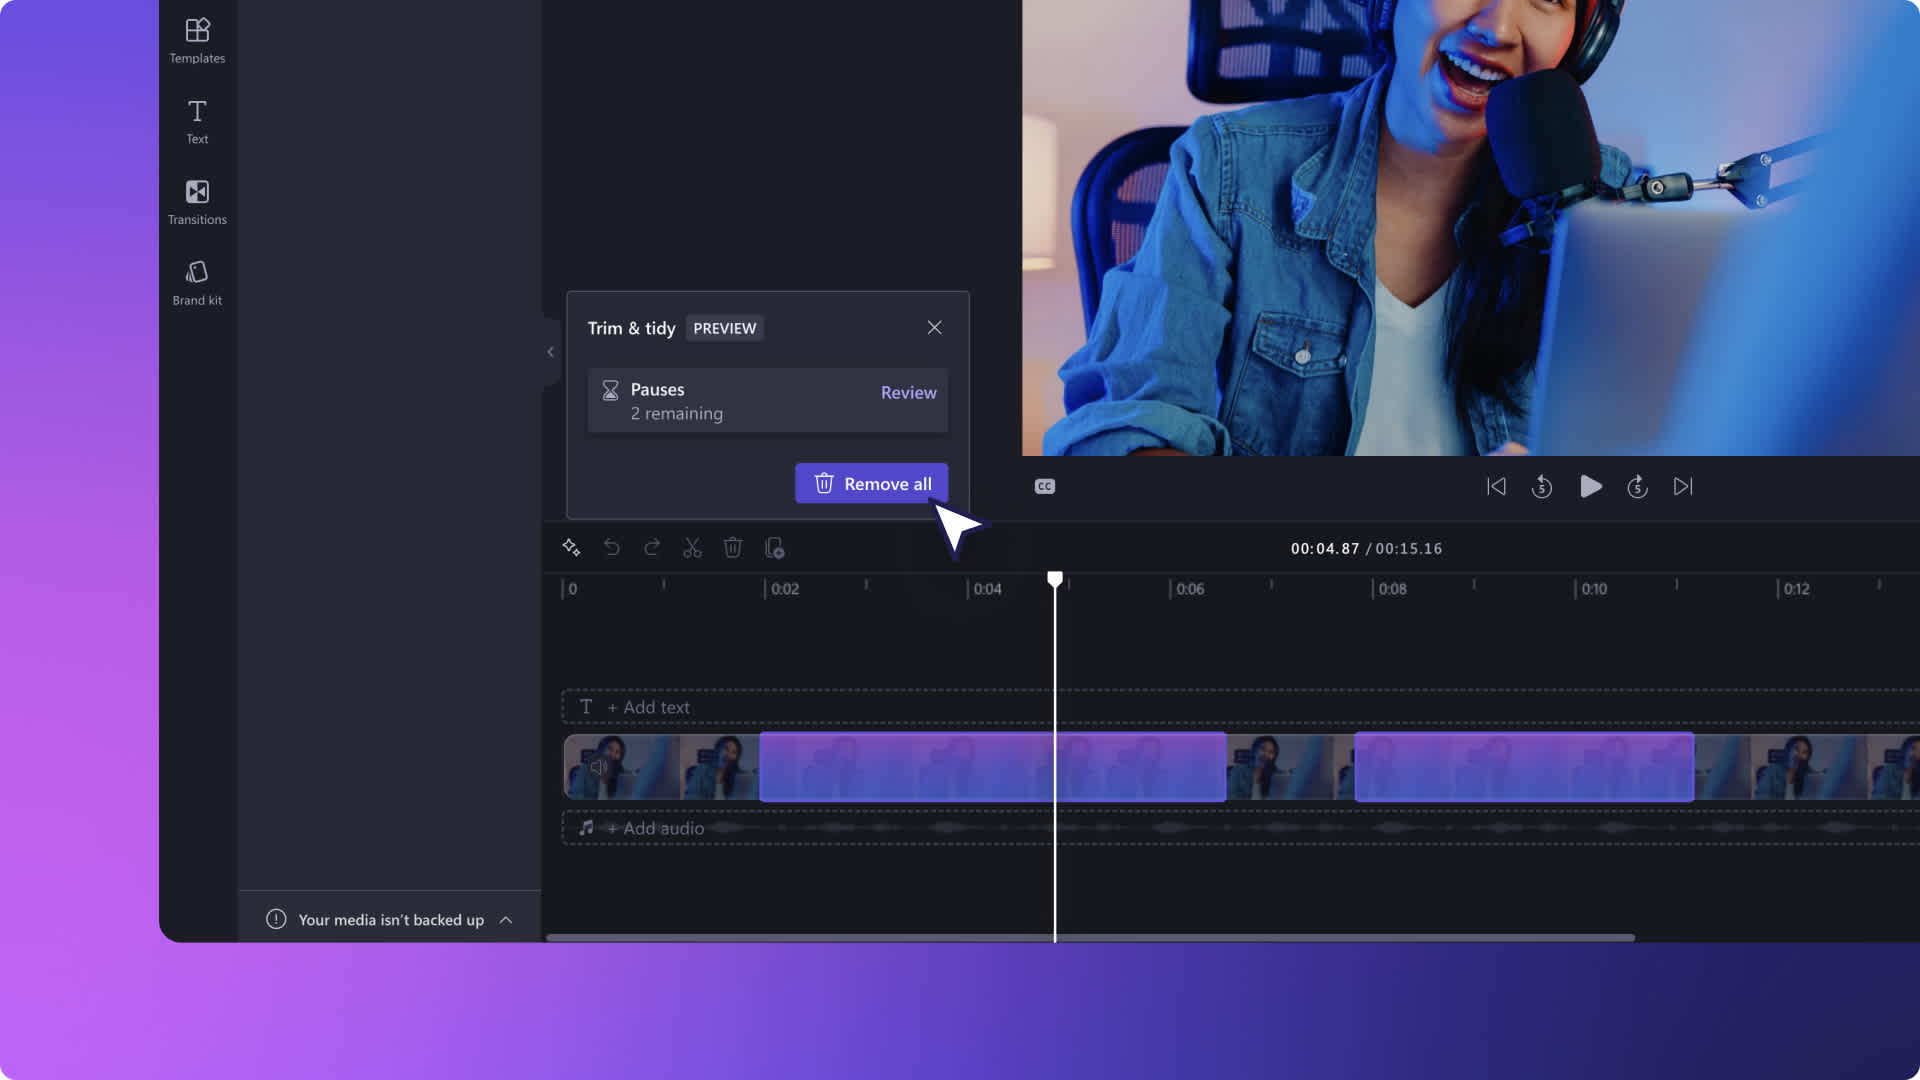
If you have added music or sound effects to your video that you no longer want, simply click on the asset on the timeline, then click on the trash can icon or delete key on your keyboard. Using the property panel, you can also separate audio from a video and mute videos to add different audio.
Is Clipchamp audio royalty-free?
Yes. All are free and premium audio tracks are royalty-free.
Clipchamp also offers some carefully created original music tracks for free, so you can find a tune that fits your video editing needs.
Can I add more than one audio track to my video?
Yes. You can add multiple audio tracks to your videos, like background music and sound effects. We recommend not overlapping background music and only adding one track at a time to keep your video professional.
Can I download YouTube audio to add to my video?
Yes. Feel free to convert YouTube audio into MP3 files to use in your videos. Just be sure to follow YouTube’s downloading guidelines.
Ready to add royalty-free music or an AI voiceover to your video? Search though an endless array of free and premium stock audio like lo-fi, jazz, hip hop, and funk to find the perfect background music. For more ways you can edit your audio on the timeline, check out audio editing hacks. You can also create animated sound waves from your audio using our music visualizer.
Start editing today with Clipchamp for free or download the Clipchamp Windows app.
