Heads up! This content is relevant for Clipchamp for personal accounts. Try this link If you're looking for information about Clipchamp for work accounts.
On this page

Quickly and easily edit the size and focus point of your assets without limitations using the freehand crop tool in Clipchamp.
“Freehand” refers to simply using your cursor to change the asset in the preview instead of relying on presets. Crop certain areas of videos, images, stickers, GIFs, and even change the aspect ratio of an asset by adjusting the corners inside the preview area. You can even keep the focal points of your video in frame with ease.
Explore how you can save time and let your creativity take over using the freehand crop tool in Clipchamp.
How to use freehand crop in Clipchamp
Step 1. Import videos or select stock footage
To import your own videos, photos, and audio, click on the import media button in the your media tab on the toolbar to browse your computer files, or connect your OneDrive.
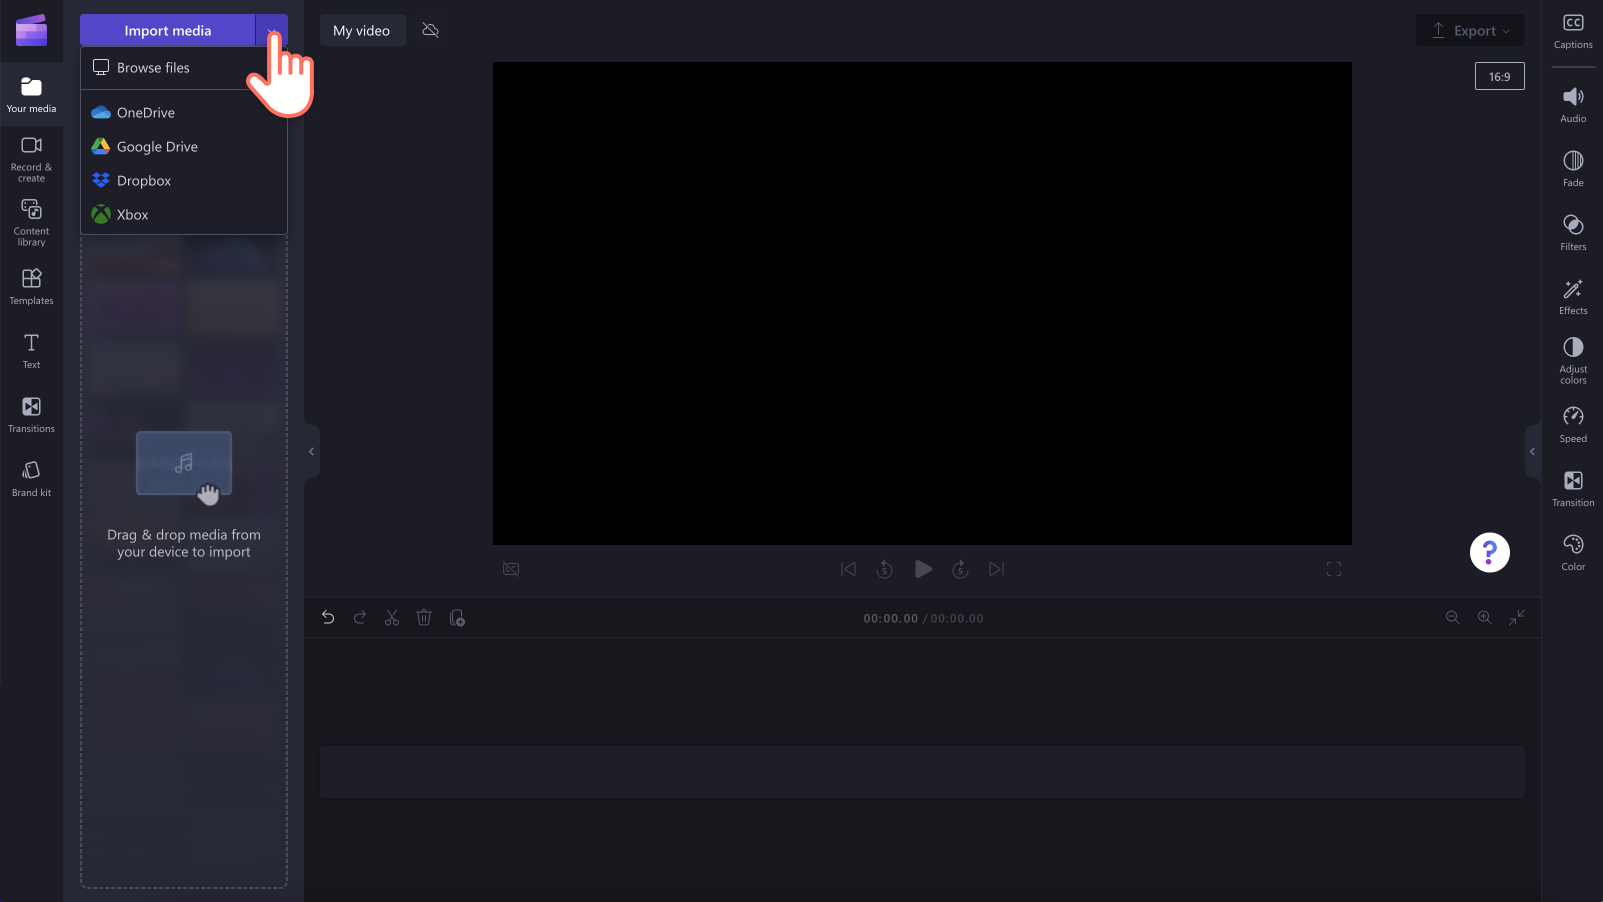
You can also use free stock media like video clips, video backgrounds, and stock music. Click on the content library tab on the toolbar and click on the visuals drop down arrow, then videos, photos, or backgrounds. Search through the different stock categories using the search bar as well. Drag and drop your video onto the timeline to get started.
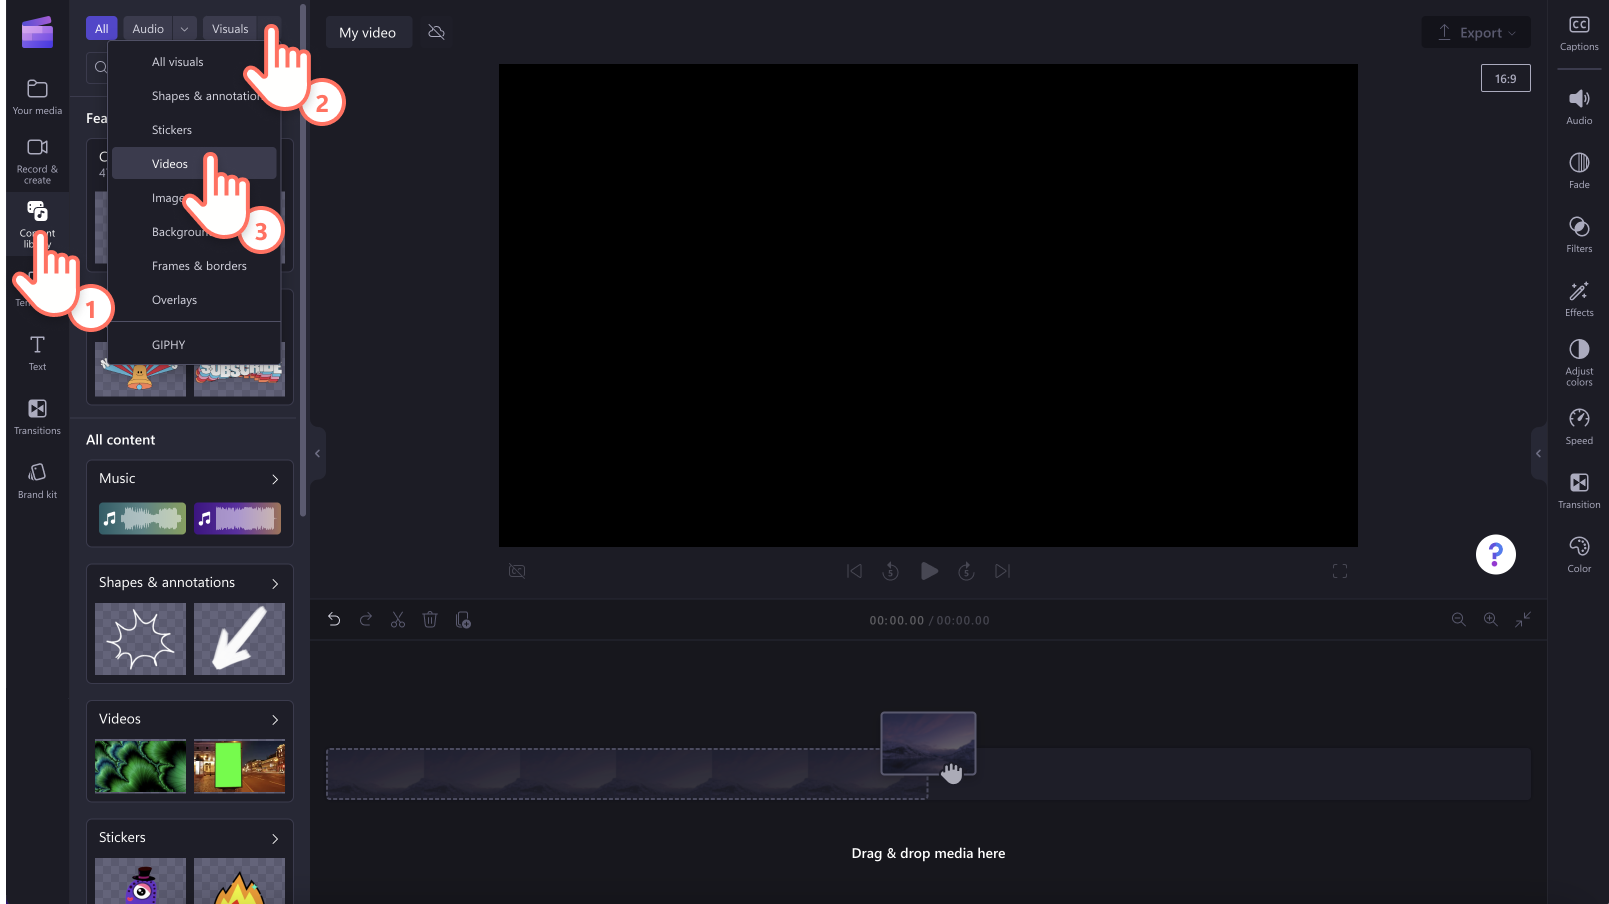
Drag and drop your video onto the timeline to get started.
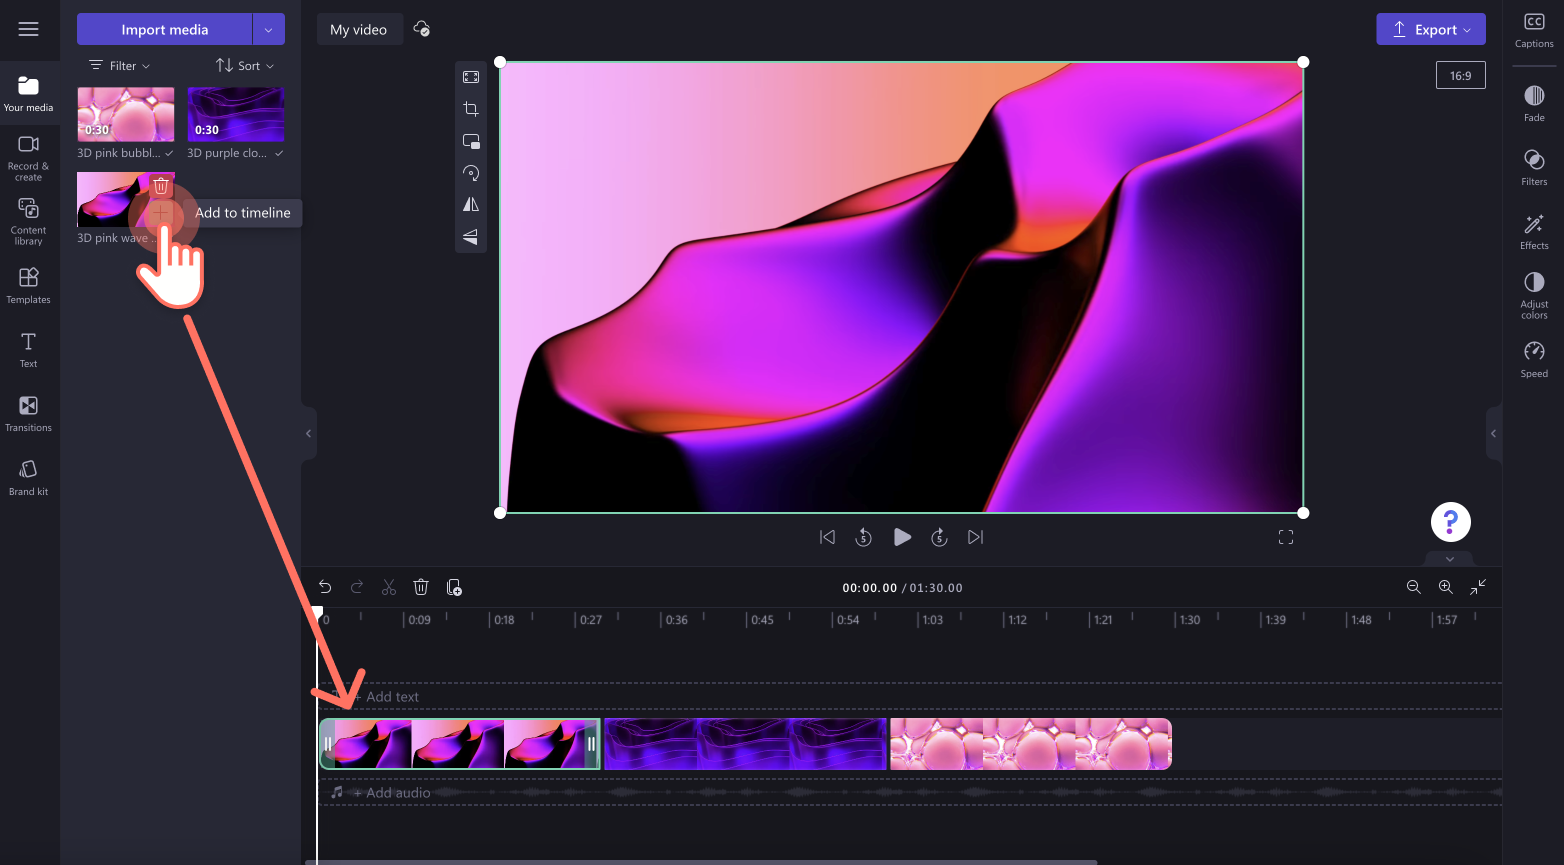
Step 2. Freehand crop your video using the crop button
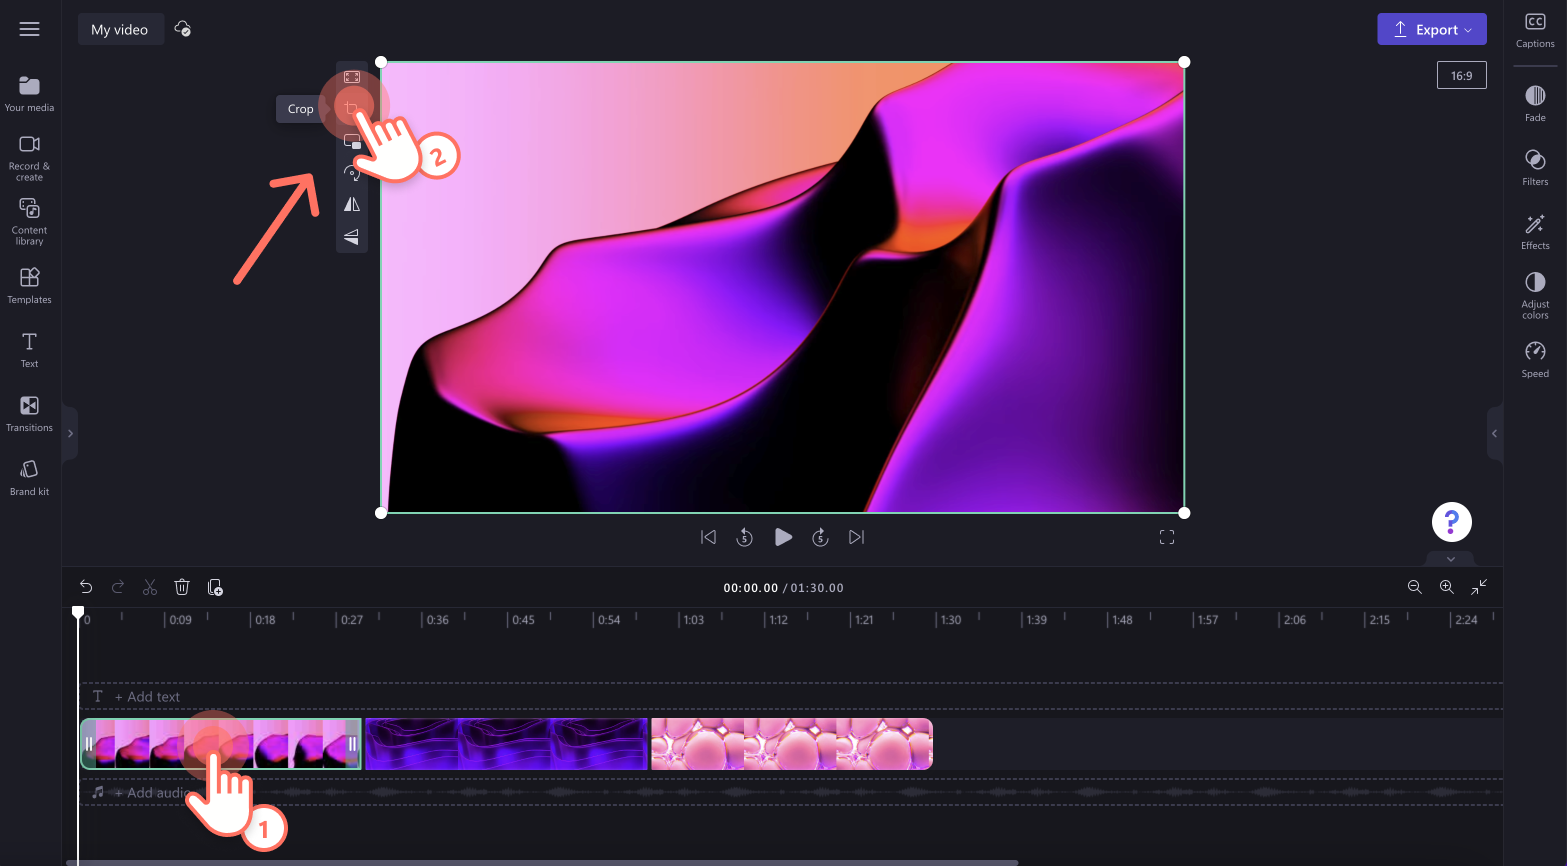
Click on your video on the timeline so it's highlighted green. Editing options will appear in the floating toolbar. Click on the crop button to open freehand cropping options.
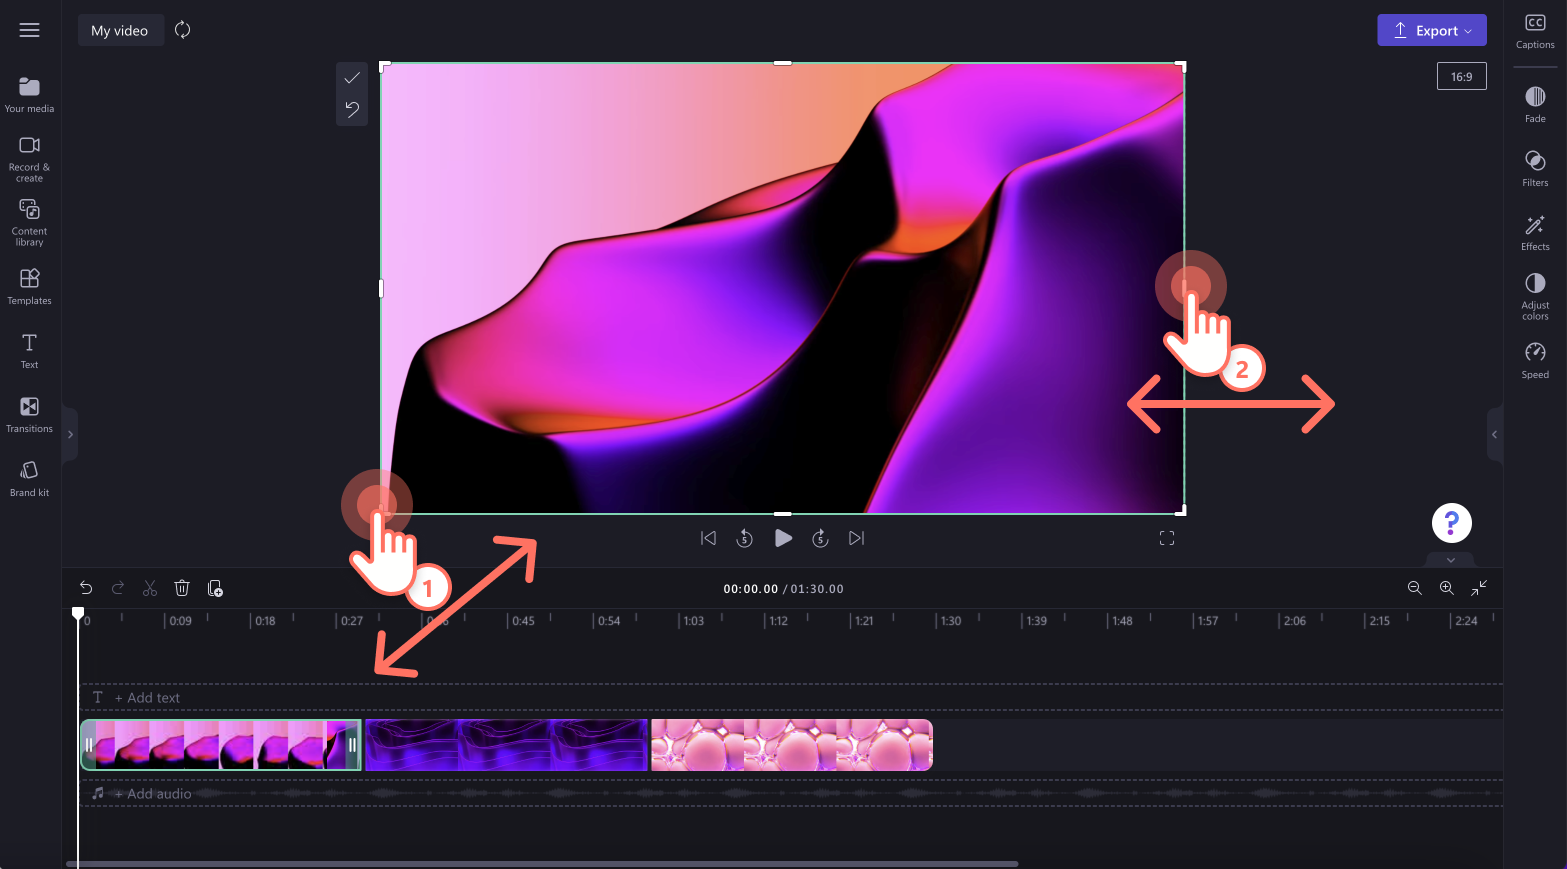
Next, click on a cropping corner or side handles then drag your curser to crop your video to your desired size.
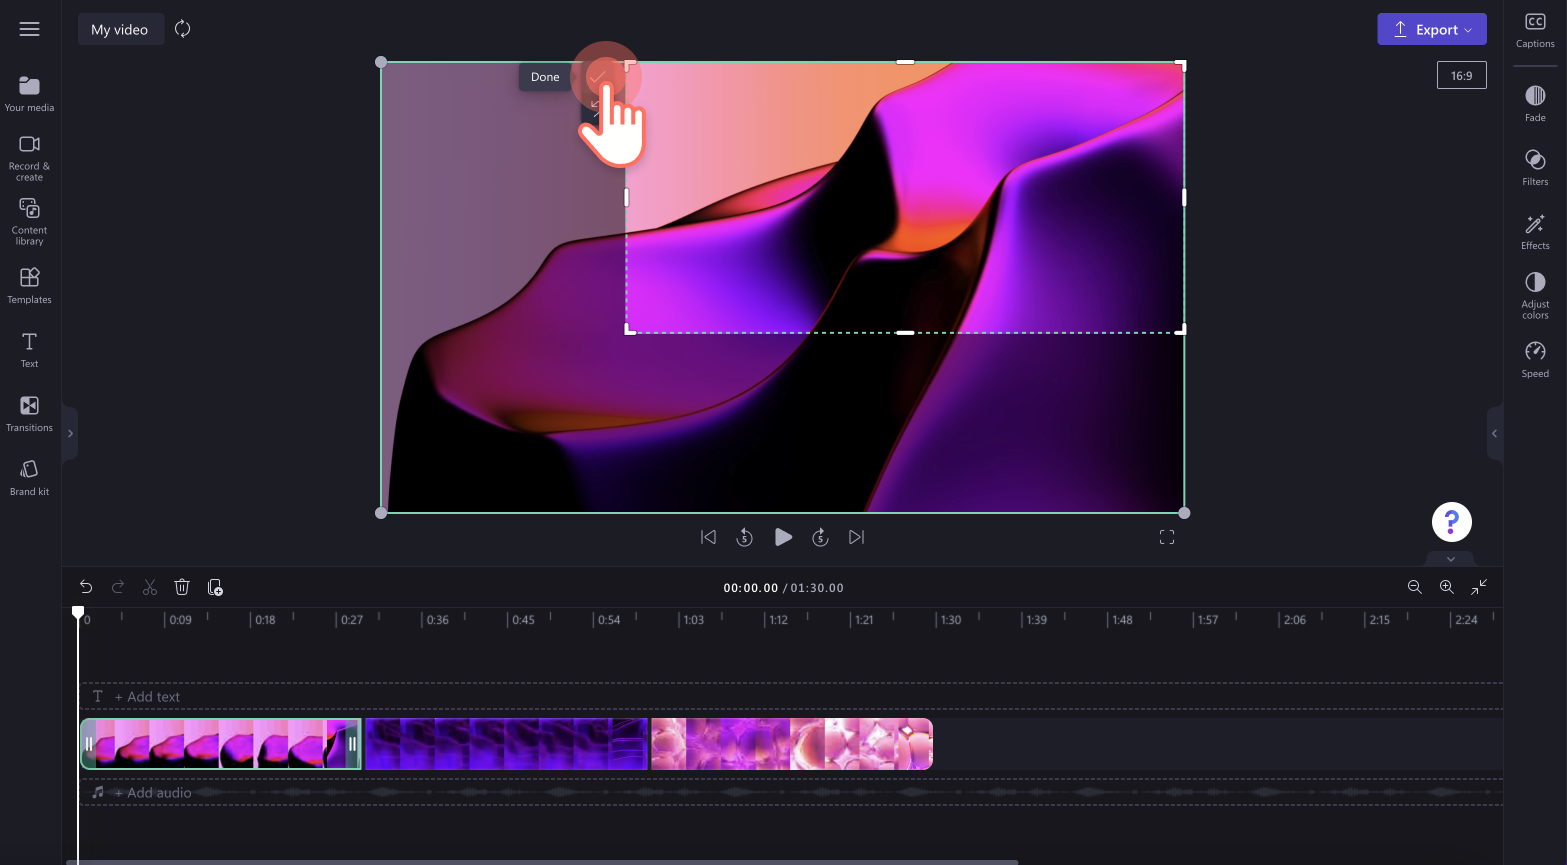
Once you are happy with your new cropped asset, click on the done button to apply the crop. If you want to redo your crop, just click on the undo button to exit the freehand crop tool and not make any changed to your video.
If you're unhappy with your new crop, just revert your video to its original state using the undo button on the timeline. You can also delete your video using the trash can button then drag and drop the same video onto the timeline from the your media tab.
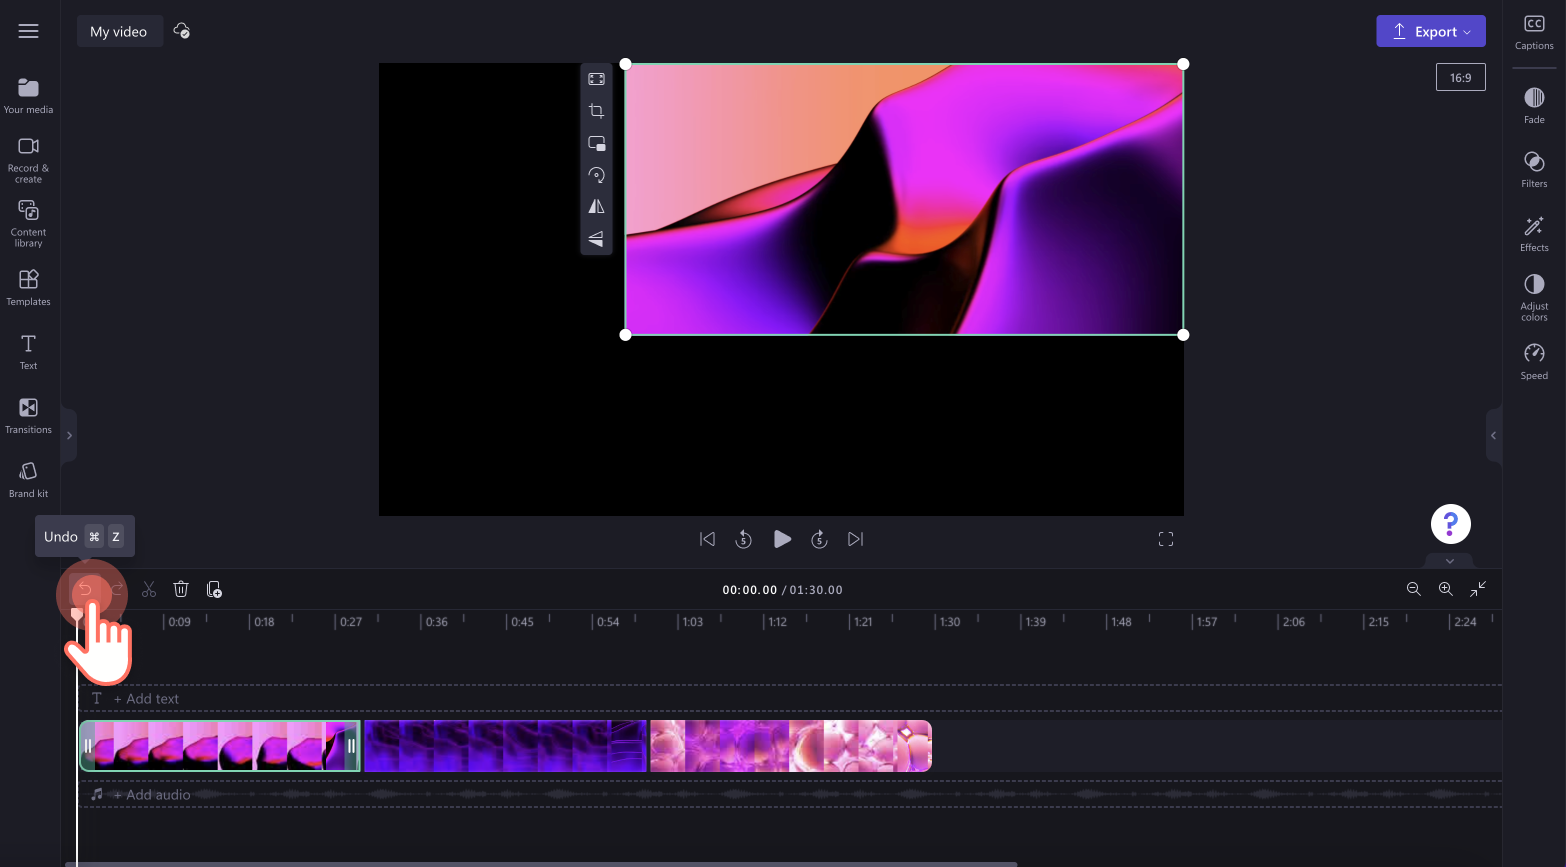
Step 3. Edit your videos position and look
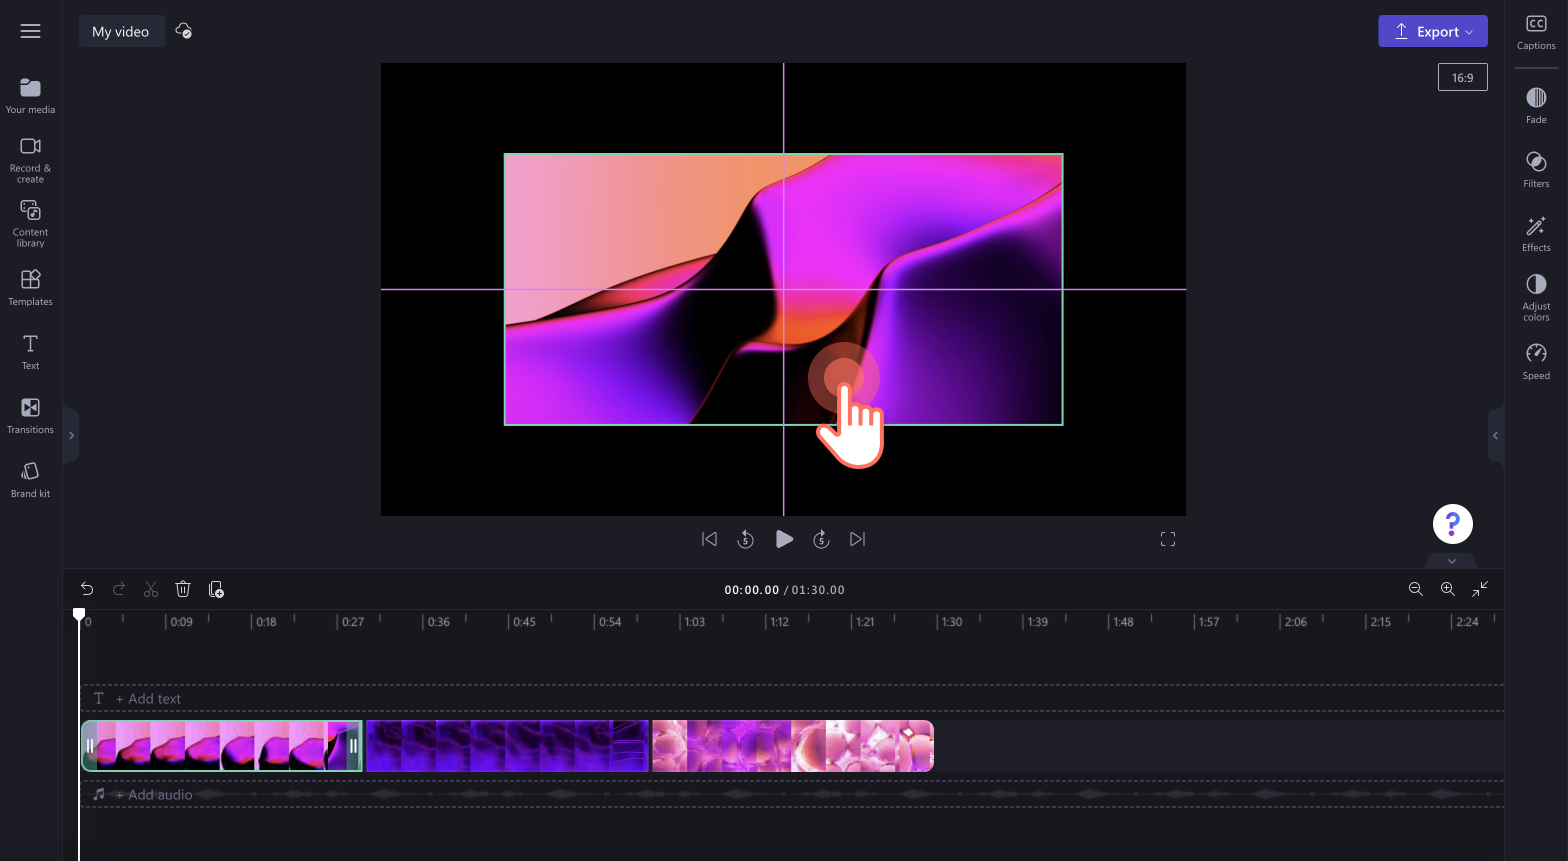
Your cropped asset might have a black background or border, as the video is no longer in it's original aspect ratio. Easily move your video around the preview window to relocate it.
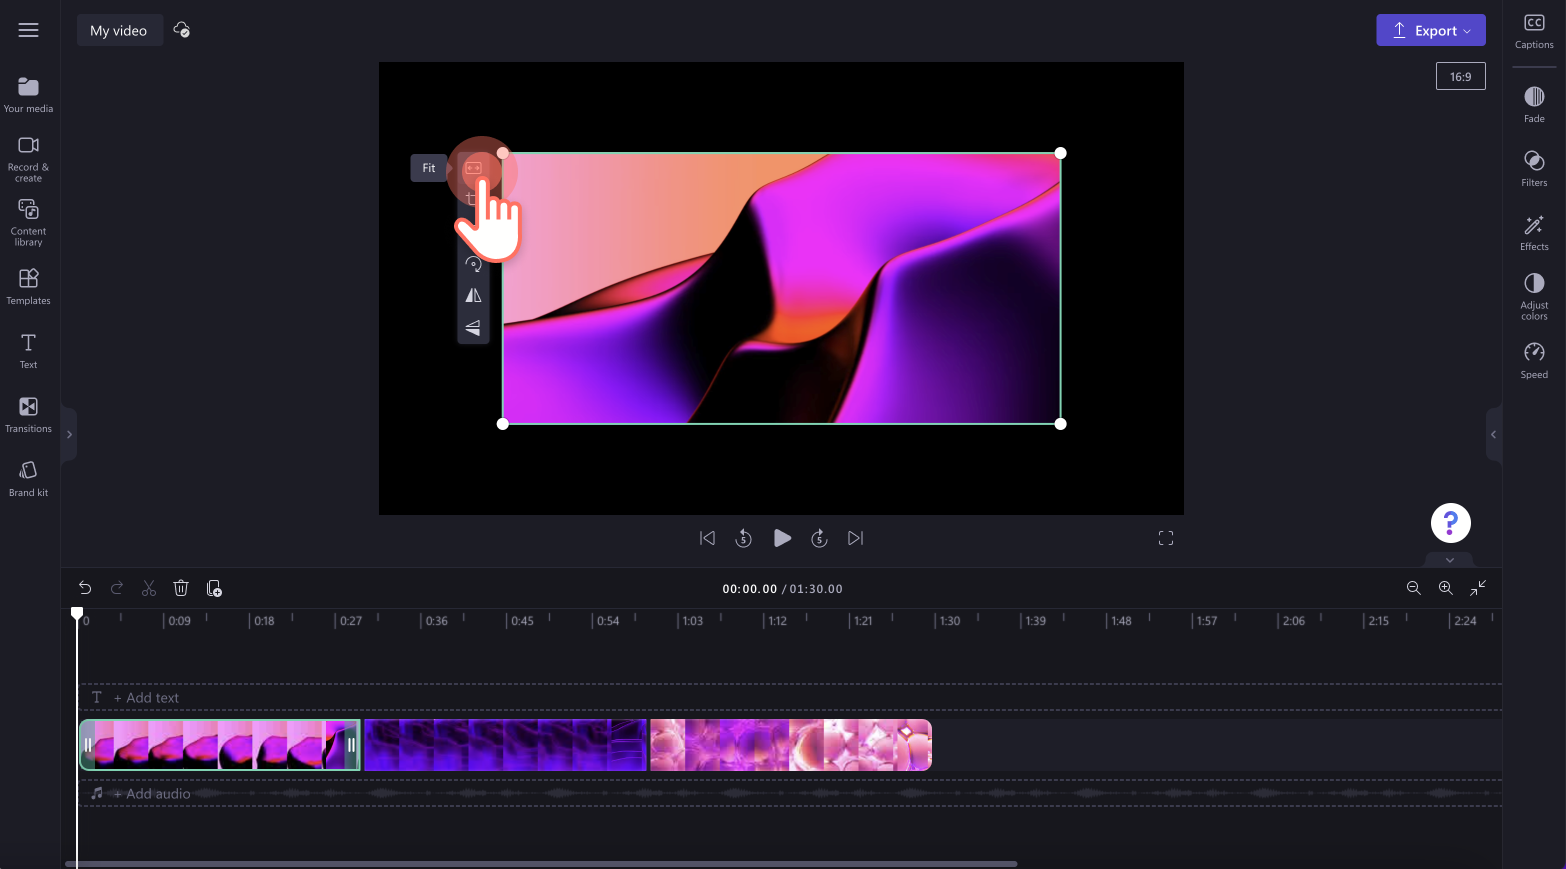
You can also resize your video to make it fit your aspect ratio using the fit button on the floating toolbar.
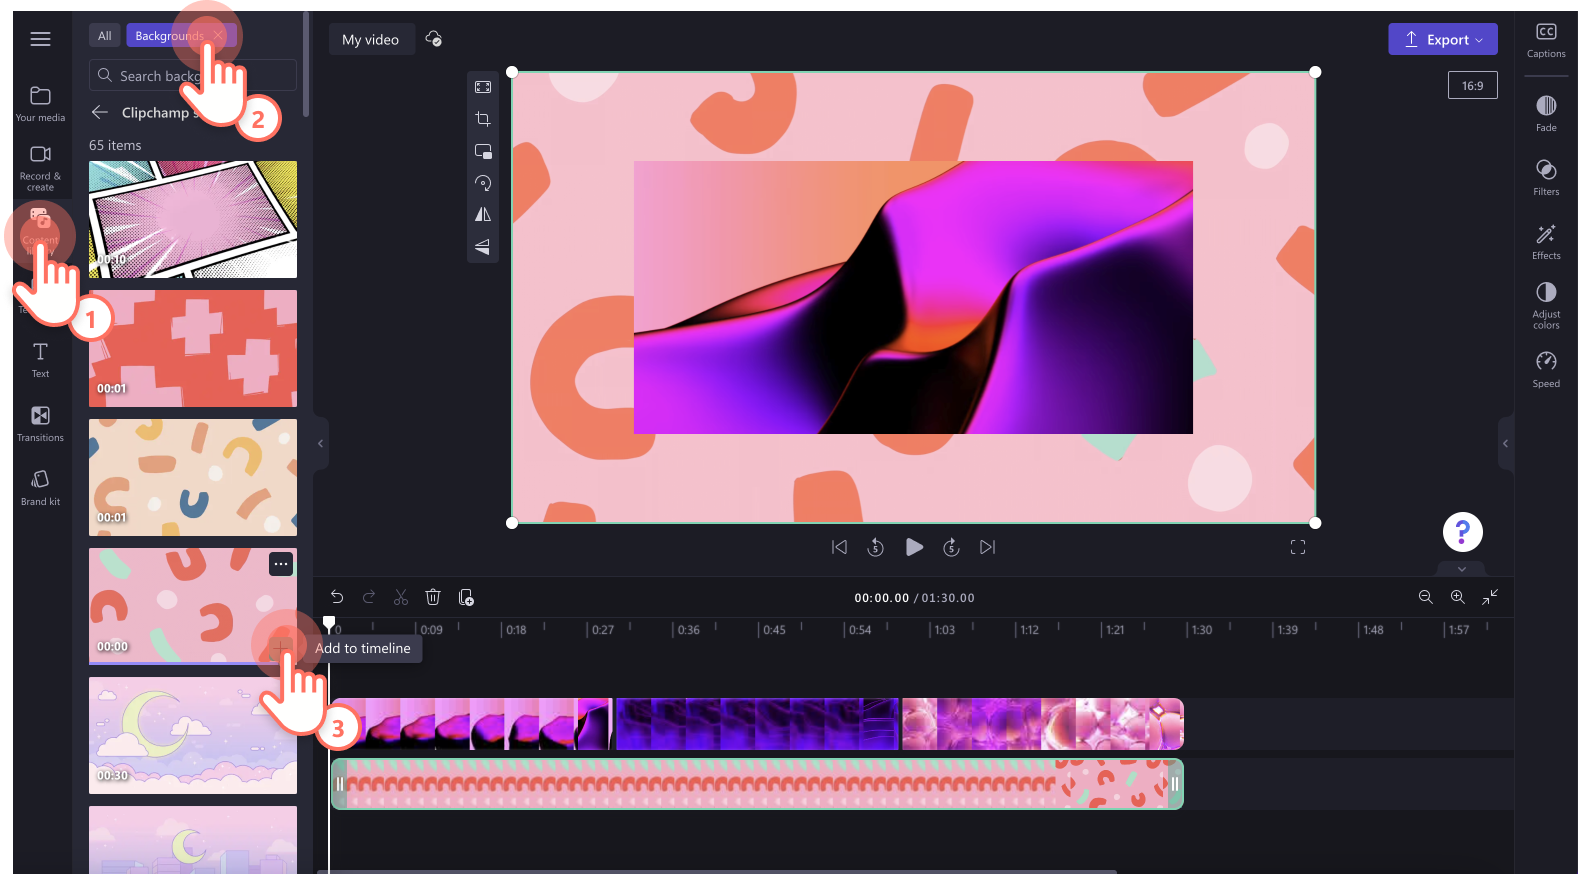
If you want to keep your video in it's new size without using the fill or fit buttons, add a background to your video to hide the black border. Drag and drop a video background from the content library onto the timeline below your video.
Step 4. Preview and save your video
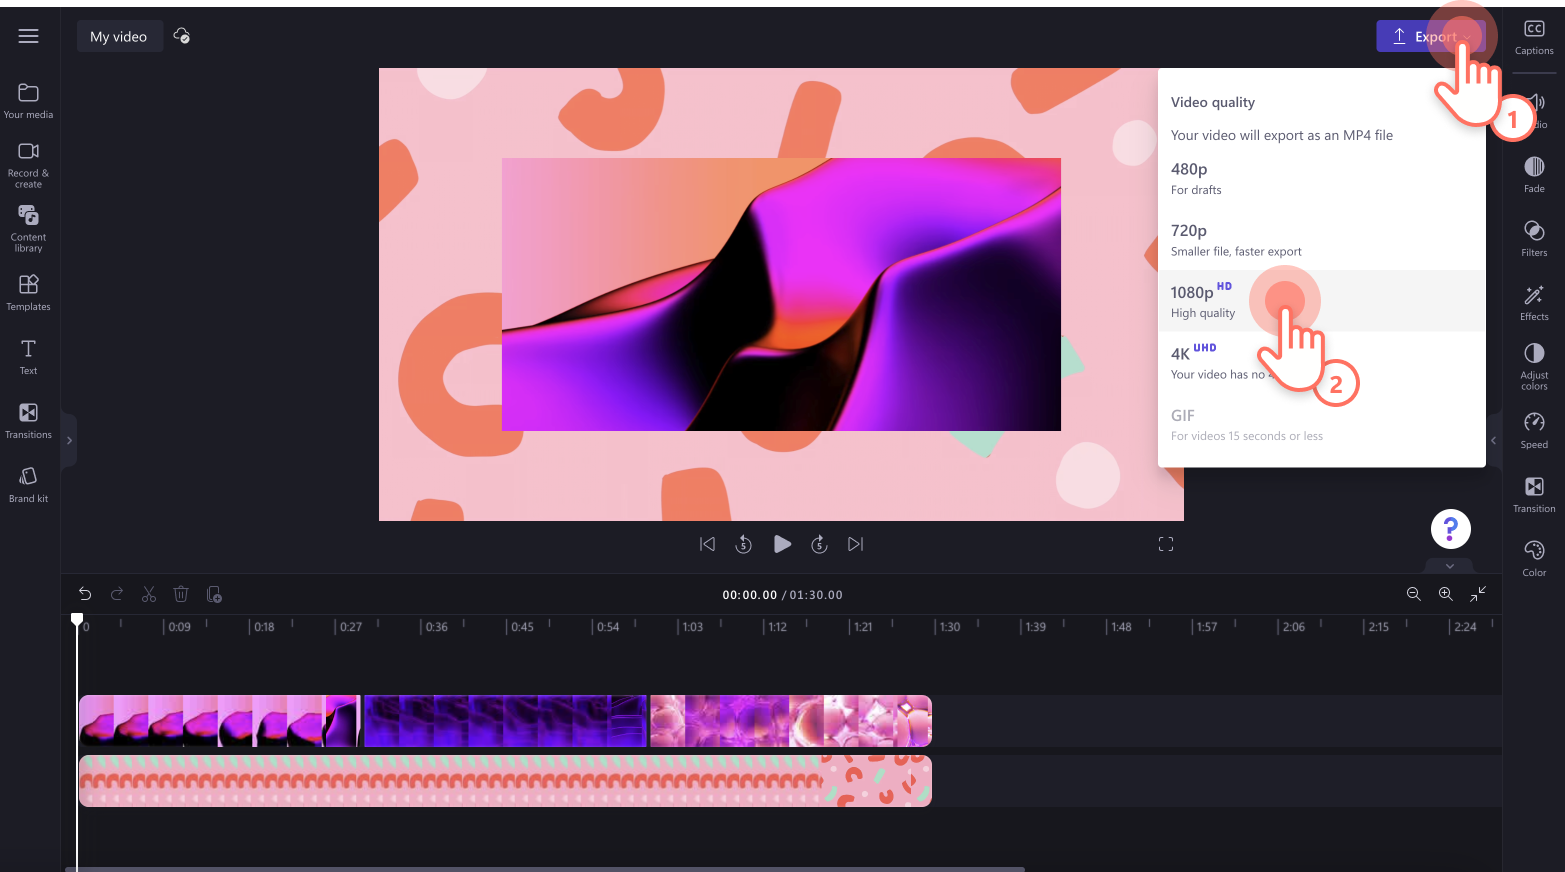
Before saving your new video, make sure to preview by clicking on the play button. When you’re ready to save, click on the export button and select a video resolution. We recommend saving all videos in 1080p video resolution for the best quality. Paid subscribers can save in 4K video resolution.
For more help, watch our YouTube tutorial on how to crop a video for free.
Now that you've mastered cropping videos, clean up your clip with trimming tools or add final touches like audio and transitions.
Start creating videos today with Clipchamp for free or easily download the Clipchamp Windows app.
