Heads up! This content is relevant for Clipchamp for personal accounts. Try this link If you're looking for information about Clipchamp for work accounts.
On this page
- What is a YouTube end screen?
- YouTube outro video length and size
- When to play your video outro
- What to avoid when creating an outro video
- How to create a YouTube end screen with free templates
- How to add end cards to your YouTube end screen
- How to disable YouTube end screens in YouTube Studio
- Popular end screen templates in Clipchamp
Want your YouTube viewers to stay engaged and keep watching more of your videos? With an eye catching branded and informative outro video, you can help viewers discover more videos and stay on your YouTube channel for longer.
Easily make YouTube end screens to add on any video by using royalty-free stock videos and music paired with animated text, subscribe stickers and end card placeholders.
Read on to explore everything creators and brands need to know about YouTube outro videos and end cards in YouTube Studio, and how to make free outro videos with professionally designed YouTube video templates in Clipchamp.
What is a YouTube end screen?
A YouTube end screen is a short video that can be added to the end of each YouTube video. End screens can also be referred to as YouTube end cards which include elements creators can add to drive engagement like related video content, channel logos, website link, social media handles, any other YouTube channels, and online stores. You can even add animated text reminders for viewers to like and comment on your video and subscribe to your channel.
YouTube outro video length and size
We recommend the following specifications when creating a YouTube outro video.
Video pixels: 1920-pixel x 1080-pixel resolution
Video size: widescreen 16:9 aspect ratio
Video length: 5–20 seconds in length.
Video resolution: 1080p video resolution
Video format: MP4 format is the best for YouTube.
Want to save time and make a professional looking end screen? Try a Clipchamp video template and customize it quickly to meet YouTube video requirements and keep your viewers hooked.
When to play your video outro
YouTube outro videos should always be placed at the very end of your video content. The recommended content in your end screens can be displayed on top of your outro video at least 5 seconds before it finishes playing. Many of the YouTube video templates in Clipchamp include end card placeholders with royalty-free background music so you don’t need to design an outro video from scratch.
What to avoid when creating an outro video
Let’s look at some common outro video mistakes to avoid.
Don’t use any copyrighted video footage. YouTube can remove your video or demonetize your channel if you upload copyrighted content.
Don’t use copyrighted background music for similar reasons. Instead, select a royalty-free ambient tune from the audio library in Clipchamp.
Don’t include too many moving elements as the outro clip should be easy to comprehend in a short time.
How to create a YouTube end screen with free templates
Step 1. Start with a video template
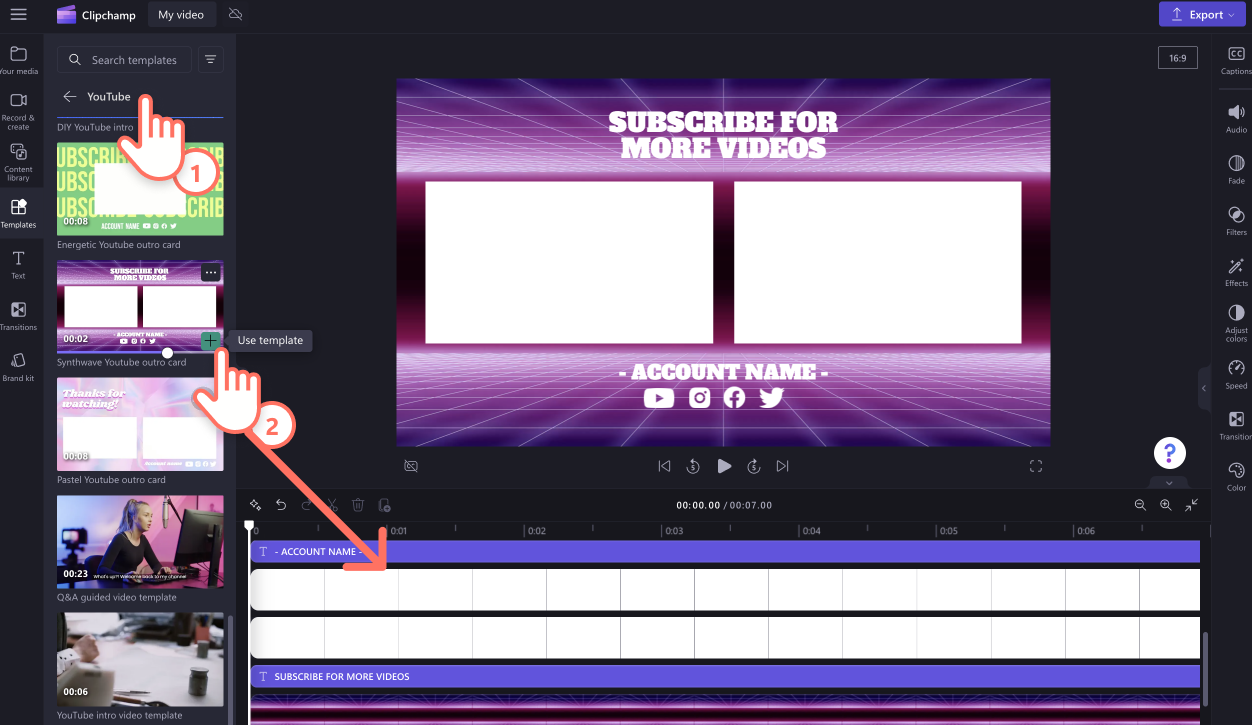
To find YouTube end screen video templates, click on the templates tab on the toolbar inside the editor. Use the search bar to search for intros and outros by using keywords.
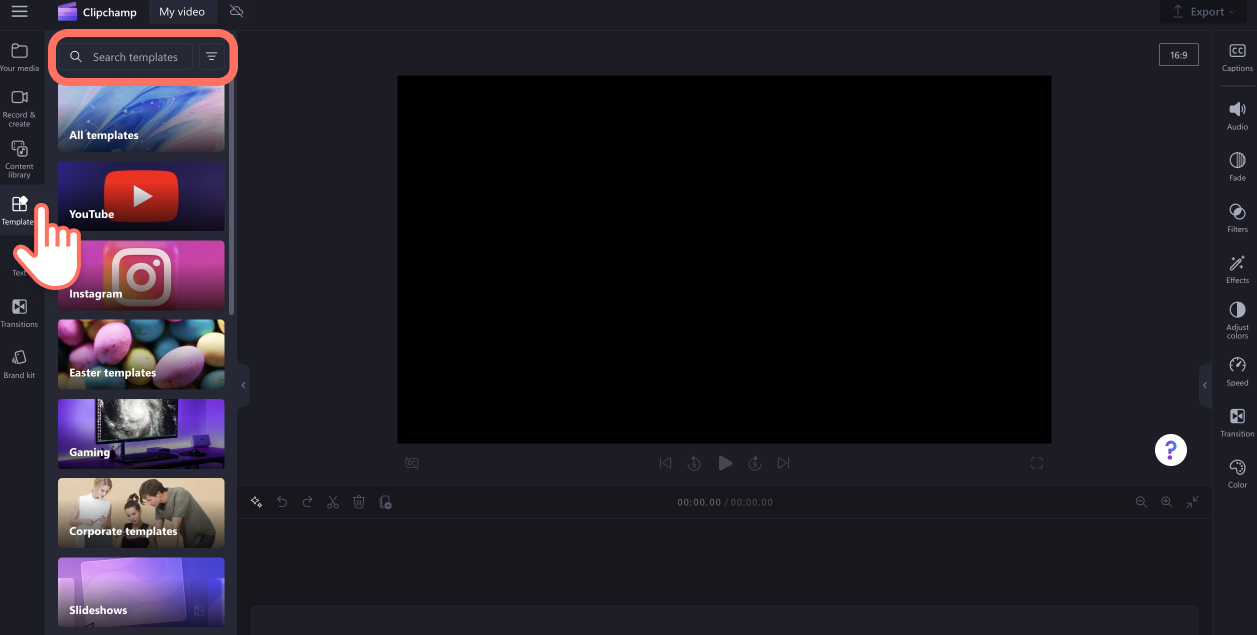
Alternatively, you can search through the YouTube collection to find the perfect video template that suits your channel's aesthetic and needs. Once you have chosen a YouTube end screen template, click on the + button to add the template to your timeline.
Step 2. Customize your YouTube end screen text
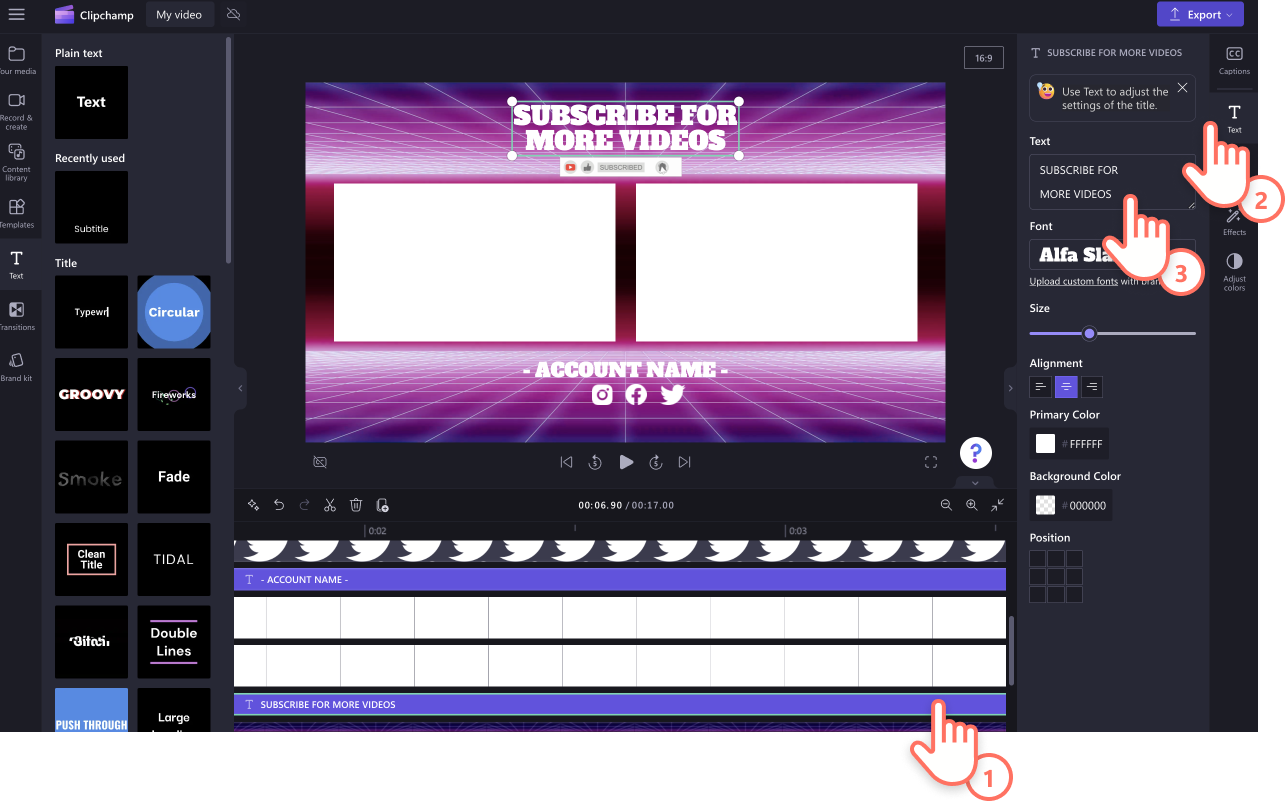
Personalize the video template with your own animated text, colors, and font. Click on the text box on the timeline, then click on the text tab on the property panel. Here, edit your text, font, size, alignment, colors and position. Don’t forget to add your account name, social handles, and any text you would like your viewers to read.
Step 3. Add YouTube stickers and overlays
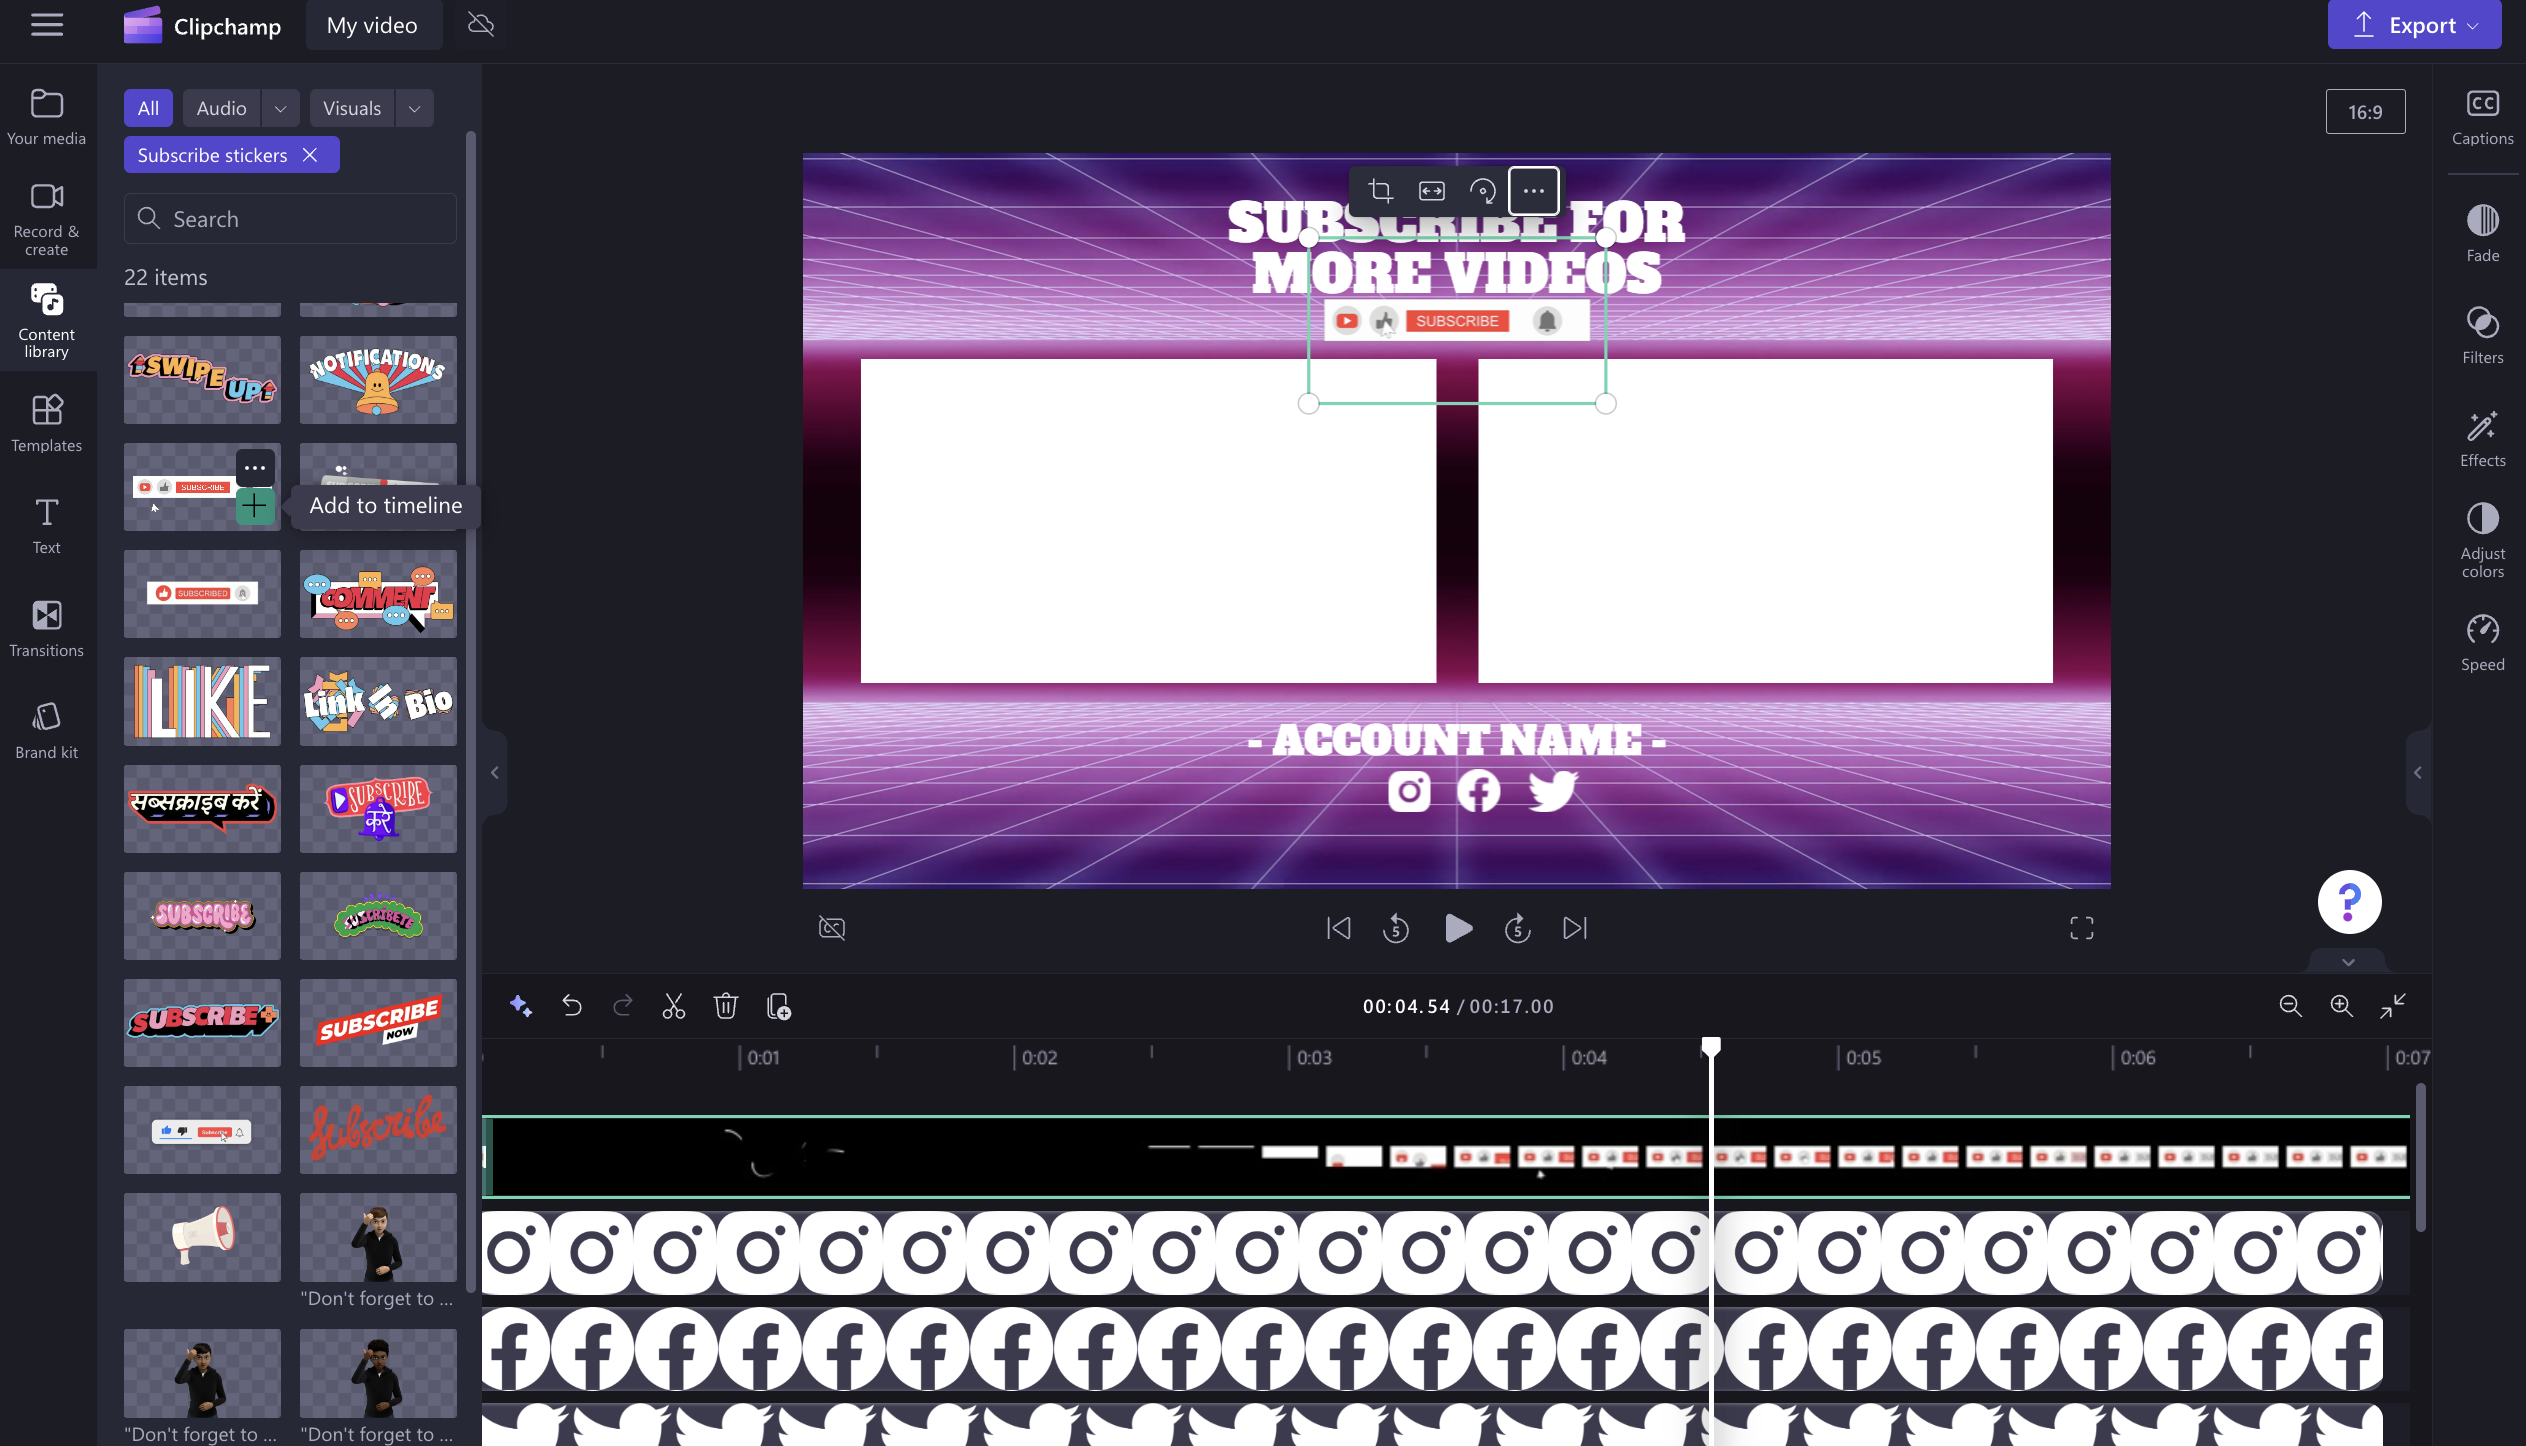
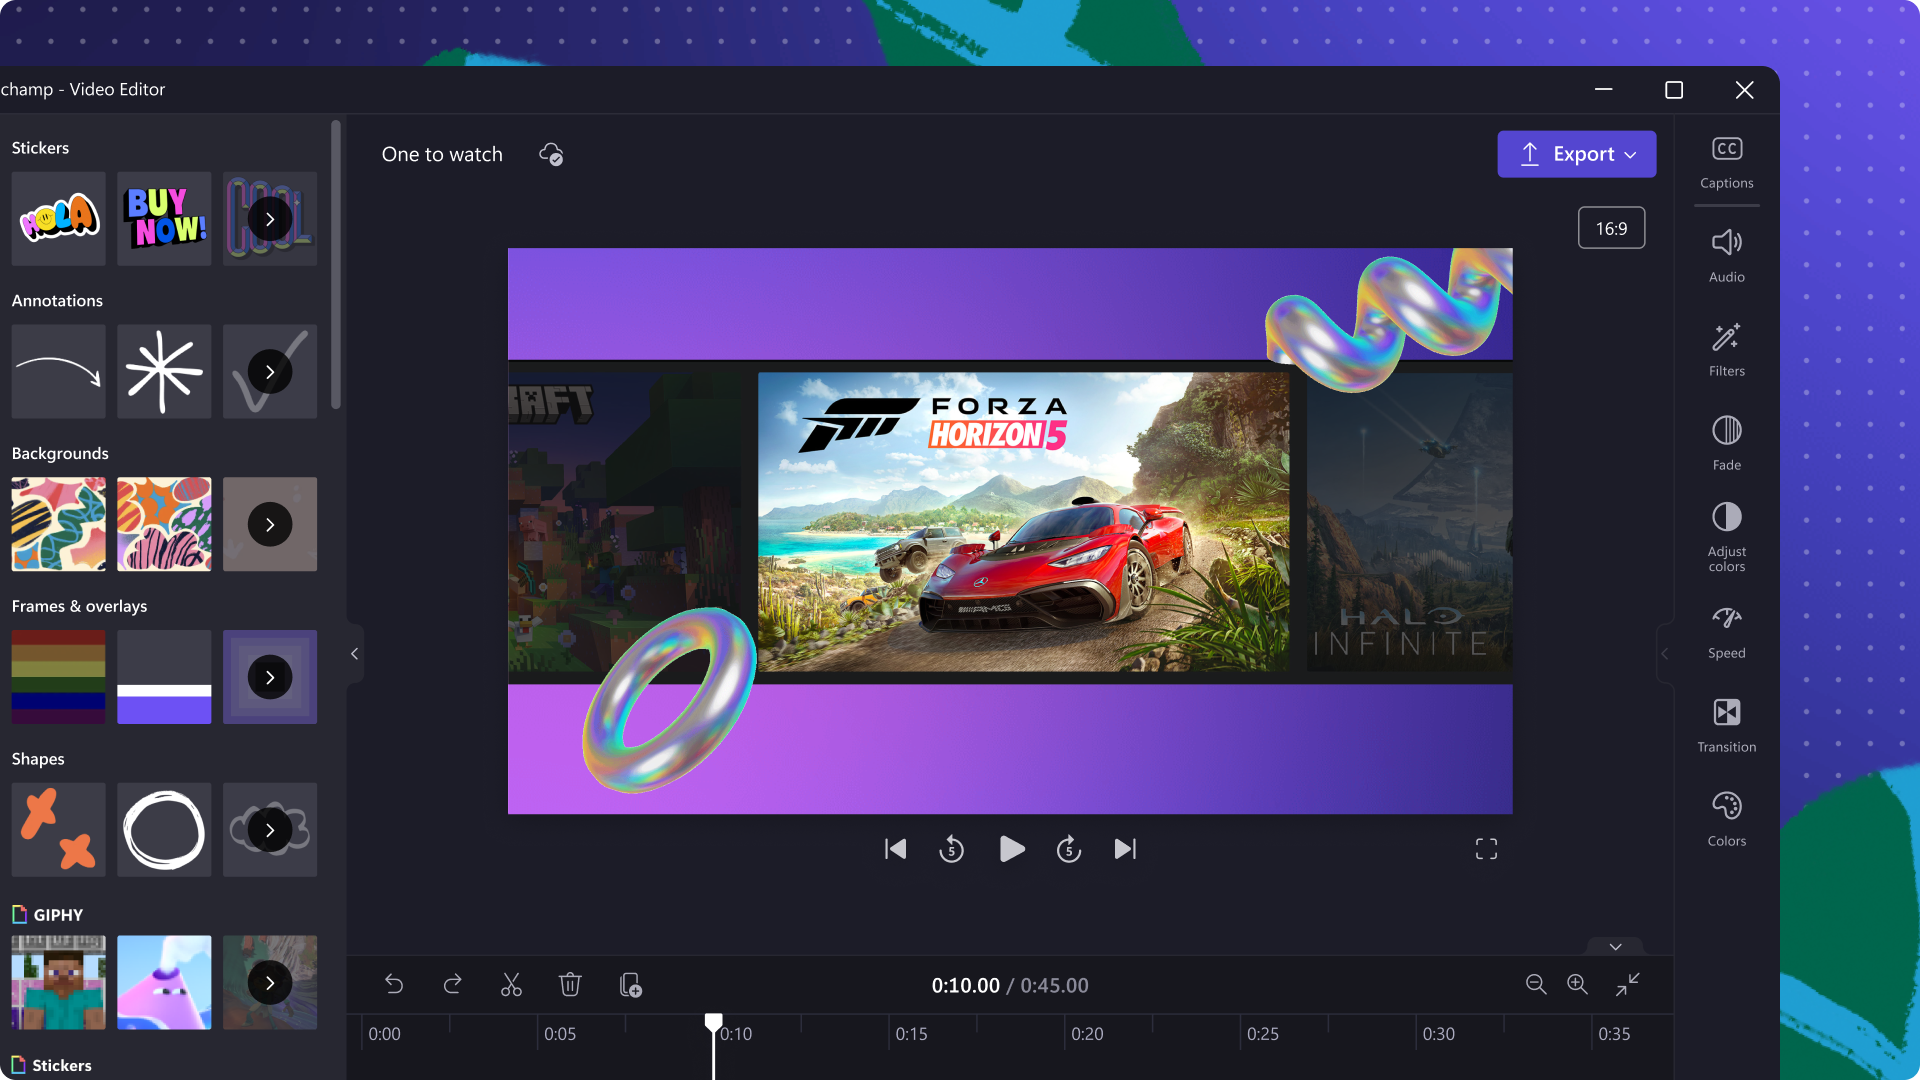
Add YouTube related stickers such as subscribe buttons, alerts, likes, and more with overlays. Click on the content library tab on the toolbar and click on the visuals drop down arrow, then choose stickers.
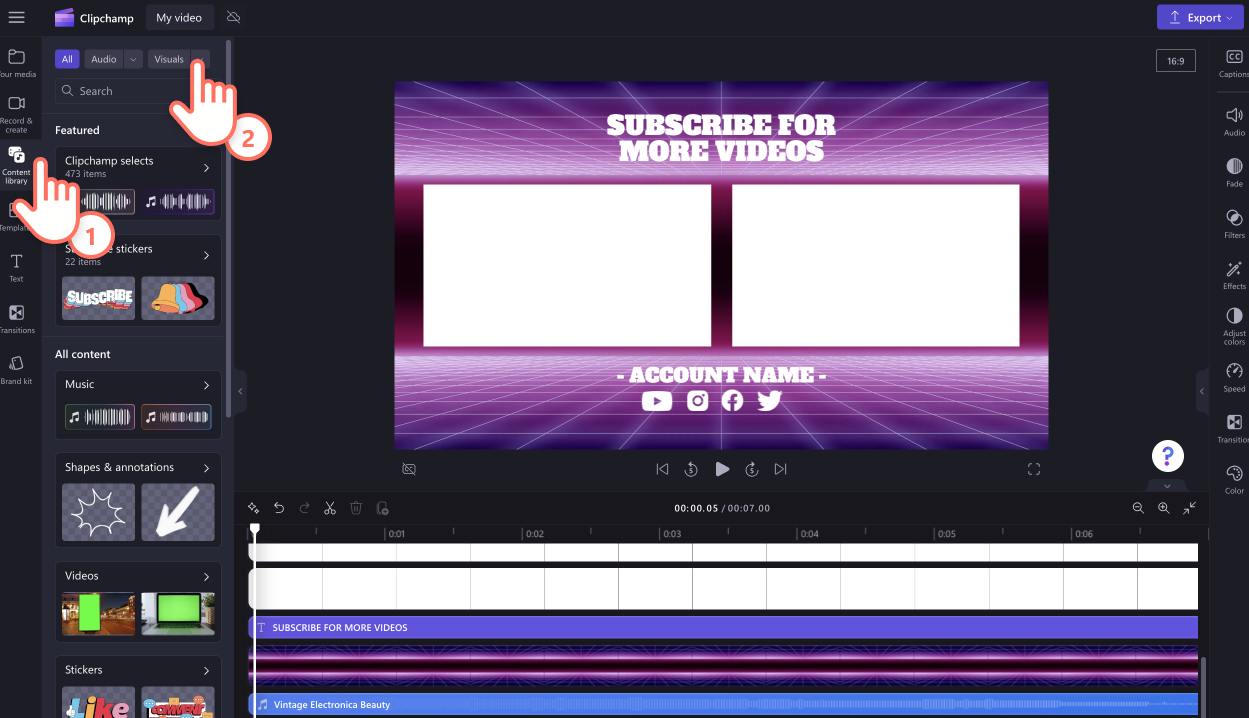
Explore our social media stickers collections like subscribe stickers. When you find a sticker you like, drag and drop it onto the timeline. You can freely move and editthe sticker inside the video preview, use the corners to adjust the size, and trim the sticker to your desired length.
Step 4. Add an AI voiceover
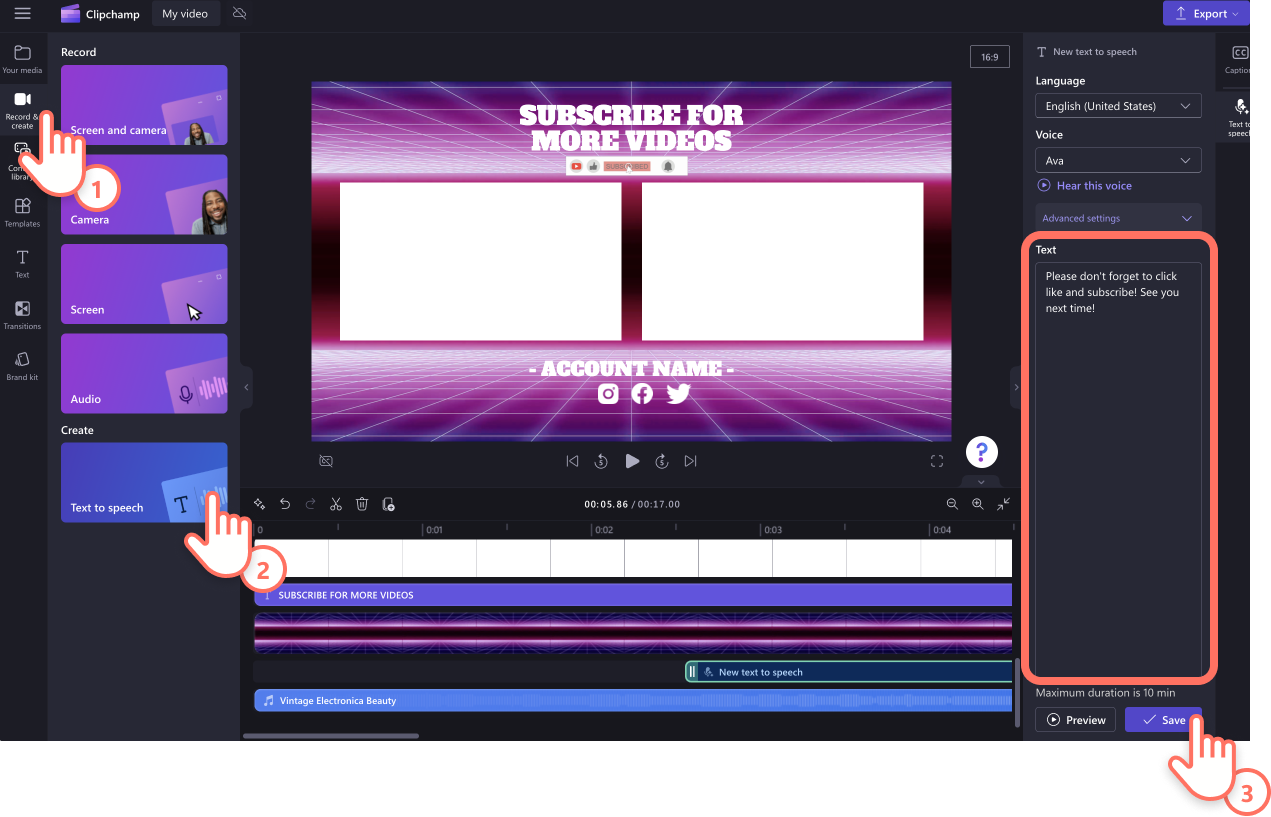
Set you apart from your competitors with a free AI voiceover. Choose from a range of lifelike voices in a range of languages. Select the record & create tab in the toolbar, then click on text to speech.
The text to speech tab will appear on the property panel. Here you can select a voice, language, customize the pitch and pace as well as type your voiceover script. When you're ready, click save and your voiceover will save as an MP3 audio file below your video clip.
Step 5. Add video filters and effects
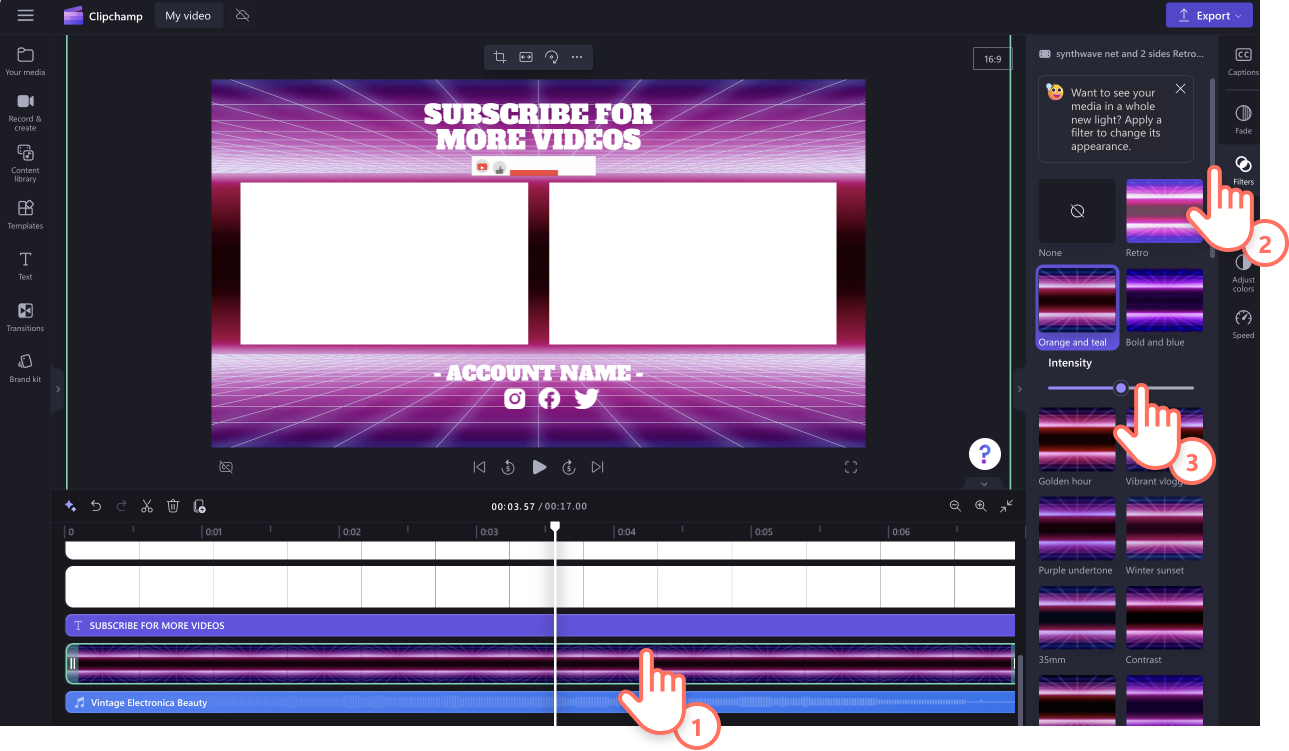
Make your YouTube outro video fit your aesthetic by editing your background footage with effects and filters. Choose from vintage filters, VHS effects or bold color filters.
Click on the video on your timeline, then click on the filters tab on the property panel. Preview the filters by hovering over each one with your curser, then click on your favorite filter to apply.
Step 6. Save your high-quality YouTube outro
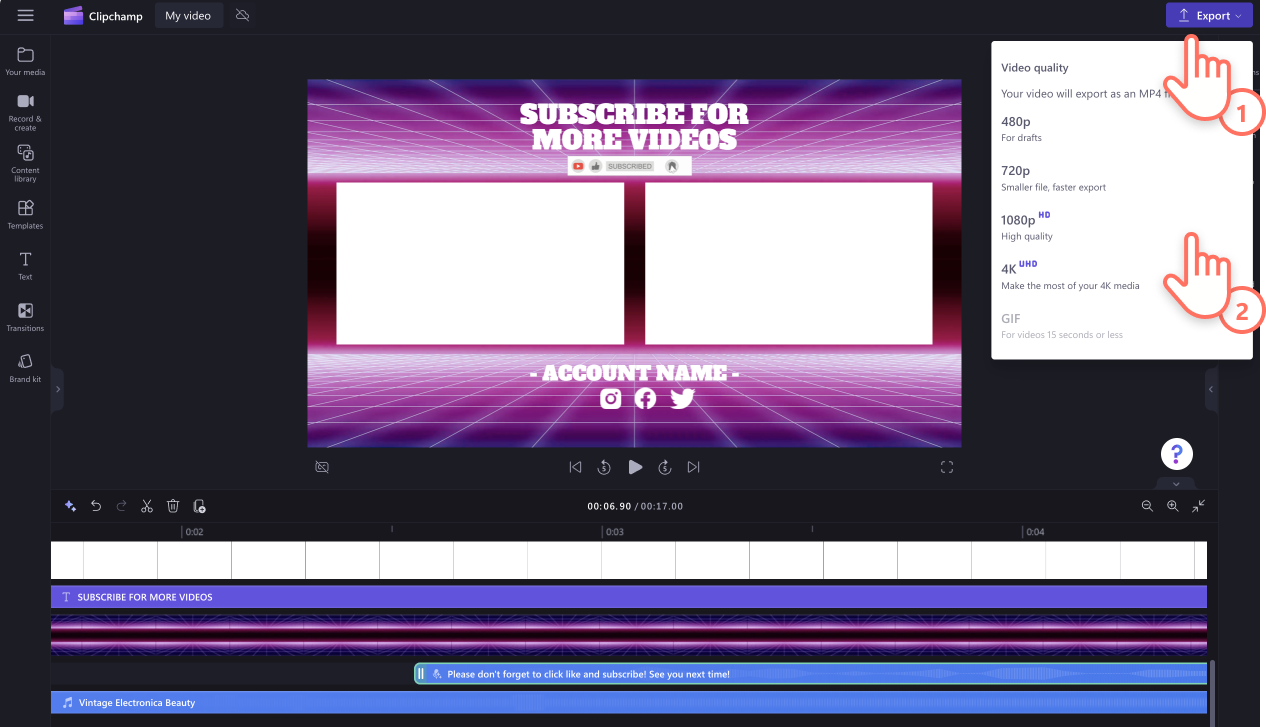
Make sure to preview your video before saving by clicking on the play button. When you’re ready to save your YouTube outro video, click on the export button and select a video resolution. We recommend saving videos in 1080p video resolution for the best video quality for YouTube. If your video includes 4K video footage, paid subscribers can save in 4k video resolution.
How to add end cards to your YouTube end screen
You can also create a YouTube end screen directly in YouTube Studio using the end cards feature. Note that your YouTube video needs to be 25 seconds or longer to use this feature. Videos don’t have to have an end screen or end card, but we recommend adding one to increase your engagement and click-through rates for related content.
Sign in to YouTube Studio.
On the left menu, click the content button.
Click on the title or thumbnail of the video you would like to add an end card to and select the editor button.
Click on the end screens button and select the elements you want to add such as a template, recently uploaded video, related channels or links.
Click on the save button when finished.
How to disable YouTube end screens in YouTube Studio
Not happy with your YouTube end screen, or want to change your branding and colors? Easily remove your YouTube end screen from a video using the following steps below.
Sign in to YouTube Studio.
On the left toolbar, click the content button.
Click on the pencil icon on the video you want to remove the end screen from.
Click on the editor button on the left toolbar.
Click on the edit button next to end screen.
Click on the delete button.
Popular end screen templates in Clipchamp
Gaming video end screen
Use this dynamic and visually stunning end screen to encourage your gaming viewers to explore more videos on your channel. Simply swap the text and colors to suit your channel and branding.
Travel video outro
Try this vlog outro video to share YouTube channel highlights and end your travel video on a high note. Swap in your own footage, logo and social media account handles to customize it.
Podcast video end screen
Make a lasting impression on your podcast viewers and guide them to explore more of your YouTube podcast videos by creating a branded outro. Don't forget to add your where else they can listen to your content, and any other social media account handles.
Polish your YouTube videos and give your viewers the opportunity to easily keep watching by adding professional end screens with Clipchamp.
If you’re looking for more ways to level up your YouTube videos, learn how to save YouTube audio.

